 ----
----
by Brooke
What are scenarios and what are they like? Scenarios are what I fly for -- the best, most-wonderful part of on-line flying. For two short music videos done by Mark S. "Dok" Miller and made from gun-camera footage out of a scenario, click the respective pictures below.
----
The following is the story (with many screen shots) of my involvement in one scenario to serve as an illustration. All pictures of aircraft and combat and all radio messages are taken out of the game, as they appeared when flying in the scenario. This scenario ran in the on-line multiplayer air-combat simulation Aces High in November, 2004.
Dok announces that he is designing a scenario -- Rangoon, '42 -- to run in the later portion of 2004.
"A semi-hypothetical scenario of the Japanese attack on Rangoon early in 1942. In this case, a mixed Allied force is defending the city from air attack. The IJA is trying to gain control of the skies and bomb the defenses to enable a coordinated ground-naval assault. This was one of the first encounters between the AVG and IJA where the Japanese started to develop tactics to counter the stronger, faster US fighters. It was also one of the last desperate stands for the British-led forces before falling back to India."
It will be one mission per week, each mission lasting 2-4 hours, spanning more than a month. I know I'll be signing up for it. There will end up being over 100 other people participating.
The rules of engagement, objectives, and so on have been firmed up.
The command staff for each side is being recruited. It takes a lot of work and time invested to be Commanding Officer of a side. The CO needs to recruit and to assign his command staff, to think in great detail about the mission objectives, to come up with battle plans, and to lead one side in battle. The call goes out again for volunteers for CO, and I step up. CO volunteers need to supply their backgrounds, as the team that puts on the scenario wants qualified candidates. At this point, I am fairly new to Aces High, having flown in only one other Aces High scenario (Battle of Britain 2004), but I've flown in many scenarios in Air Warrior, the first on-line WWII multiplayer air-combat sim. I had flown in 19 scenarios and been CO in four of them.
I am picked as CO of the IJA. Work now begins on recruiting command staff and players and thinking about battle strategies.
I have lined up the about half of the command staff and, with help from command staff, recruited several excellent quads from the main arena in Aces High, including the 327th Steel Talons, 56th Firebirds RAF, Cactus Air Force, and 315th Polish Squadron as well as, among others, a few representatives from JG13 "Lokis Kinder" and Lentolaivue 34.
![]()
![]()
![]()
![]()
Mission 1 takes place on November 13, 2004. I'm going to give you a flavor of a mission, but not this one. Mission 1 went decently. We went west over the water and hit Rangoon from the southwest. We did poorly in mission 2, trying improvements on the same route that worked in mission 1, but getting hit early and hard by the allies and their P-40's. We did well in mission 3, going right flank and hitting Rangoon from the east. All tallied, the battle was now a draw -- and it all came down to mission 4. That's the one I'm going to talk about.
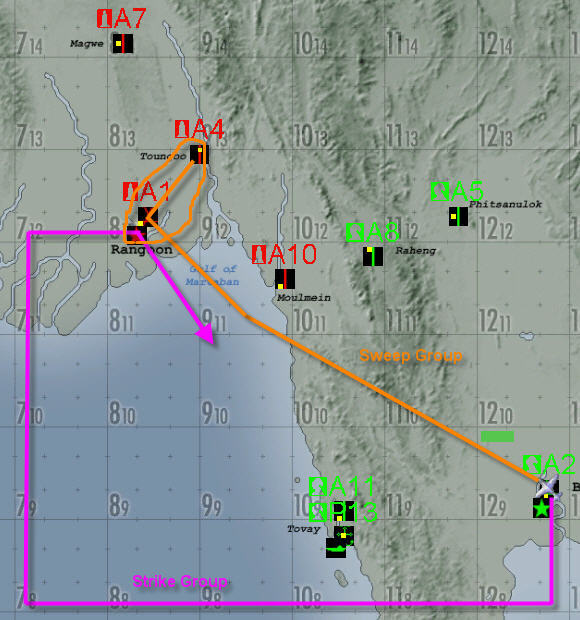
Right flank had been the best so far, but I don't think we can do that again. The allies would be sure to cover it. Also, I don't think we can do the routes of missions 1 and 2 again exactly. I pick this. The map below is divided up into sectors, each sector being 25 miles on a side.
The Strike Group consists of bombers, detached escort, and close escort. The bombers and Bomber Squadron Leaders are:
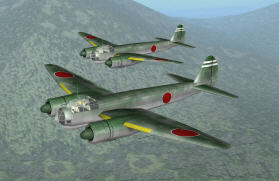
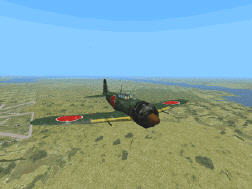
G4M Betty (modelled as Ju88A-4 in scenario) [1].
Detached escort is to fly a distance away from the bombers, just within visual range, as a screening force to intercept enemies before they can get to the bombers. Detached escort is the job of:
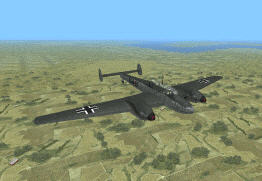
A6M5b Zero and Ki-46-III Dinah (modelled as Bf110C in scenario).
If enemies get through the detached escort, close escort will be flying directly above the bombers, with the job of killing or driving off attackers on the bombers and of keeping the bombers' tails clear. Close escort consists of:
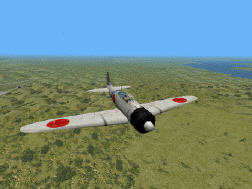
A6M2 Zero.
The Sweep Group has the job of heading up the middle and disrupting the enemy on the way to a combat air patrol over the Rangoon target area. Sweep Group consists of:
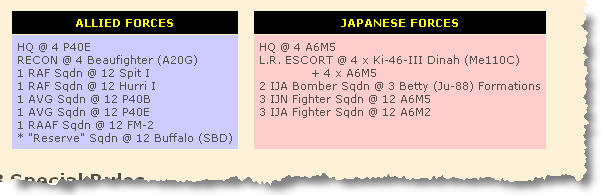
Thus, we have a Strike Group of 18 bombers and 35 fighters and a Sweep Group of 14 fighters. Against us, we can expect 50 or more allied aircraft, consisting of Hurricane Mk I's, Spitfire Mk I's, FM2 Wildcats, Beaufighters, P-40B Warhawks, and most dreaded of all P-40E Warhawks.
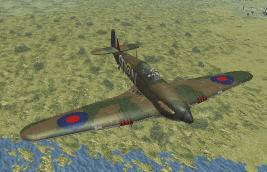
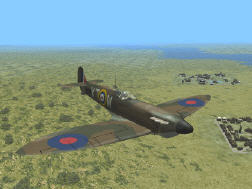
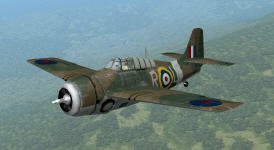
Hurricane Mk I, Spitfire Mk I, and FM2 Wildcat [2].
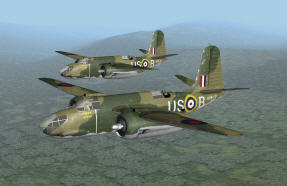
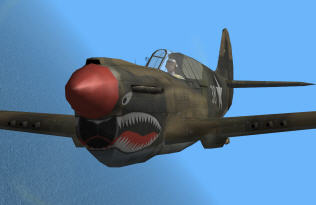
Beaufighter (modelled as A-20 in scanario) [3] and P-40E Warhawk [4].
This is the first frame we are taking fighters away from directly protecting the bombers. My goal here is for the Strike Group to stay away from scouts sent to Tovay and then to Bangkok and to have the Sweep Group cause confusion and kill any P-40's encountered. Perhaps the Sweep Group will cause the allies to think we are going up the middle, a route we haven't used yet.
It's Saturday, mission day. I wake up at 10 am (Takeoff time -- "T minus zero" -- is scheduled for noon). I drink some orange juice and have a yogurt -- nice and light because later I know my adrenaline will be pumping. I check e-mail and the bulletin board for any last-minute problems that might have cropped up. Nothing. I print out the mission orders and make some notes.
11 am. I log in and go to the special events arena. By 11:15, command staff is showing up, going to their briefing fields. By 11:30, more pilots are showing up, with Squadron Leaders collecting them. There are some "walkons" (people who show up on mission day hoping to get an open spot but who have not registered for the event). They are welcomed and doled out to the squadrons I most want filled. By 11:50 we and the allies are still assigning walkons, so takeoff is delayed 10 minutes to 12:10. We scramble to get all walkons to their briefing fields and informed of whom they report to, what type of plane they take -- just basic things. They'll get more fully briefed in the air, as there isn't enough time to fill them in completely now.
My adrenaline is always pumping at this stage. Figuring out which squadrons have how many pilots, jockeying pilots around to make sure we have the balance needed to pull off the mission we have in mind, anticipating the start of the scenario . . . as the clock ticks down to T-0, it's hectic. Finally, people are as arranged as they're going to be given the time available, and it's time to get to takeoff fields. In this case, we all head to Bangkok and get to the hangars to grab and configure our planes. At T-3, I call for everyone to get their planes out onto the runway but wait for my call to take off.
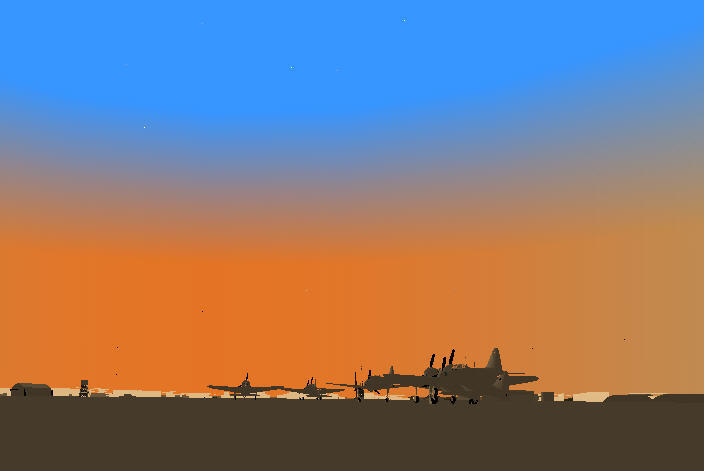
A3 Squadron awaiting dawn takeoff from Bangkok airfield.
The following is the action as called in my mission debrief. I am flying in A3 Squadron, close escort in an A6M2 Zero.
We took off from Bangkok, with the Strike Group (made of B1, B2, A2, A3, N1, N2, HQ, and LR squadrons, all Zeros as A6M5b's for range) heading SW and the Sweep Group (made up of A1 and N3 squadrons, outfitted in A6M2's) heading toward Rangoon.
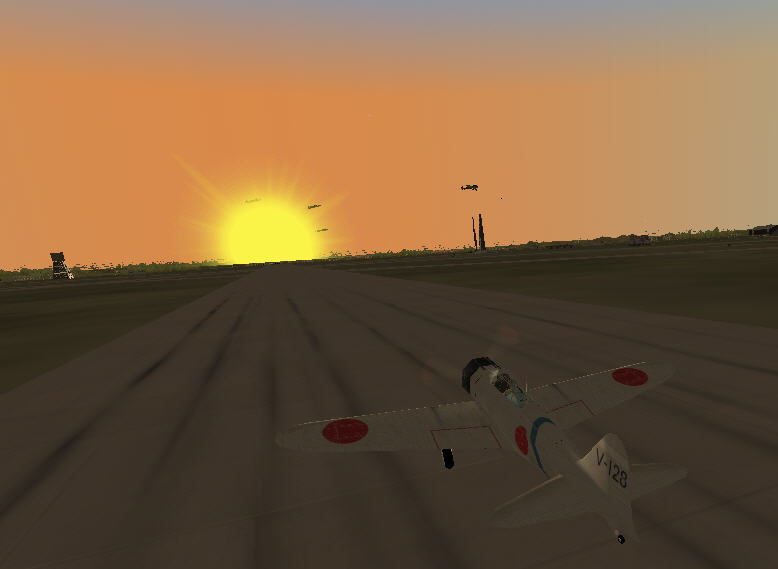
Brooke taking off into the rising sun to join up on the bombers.
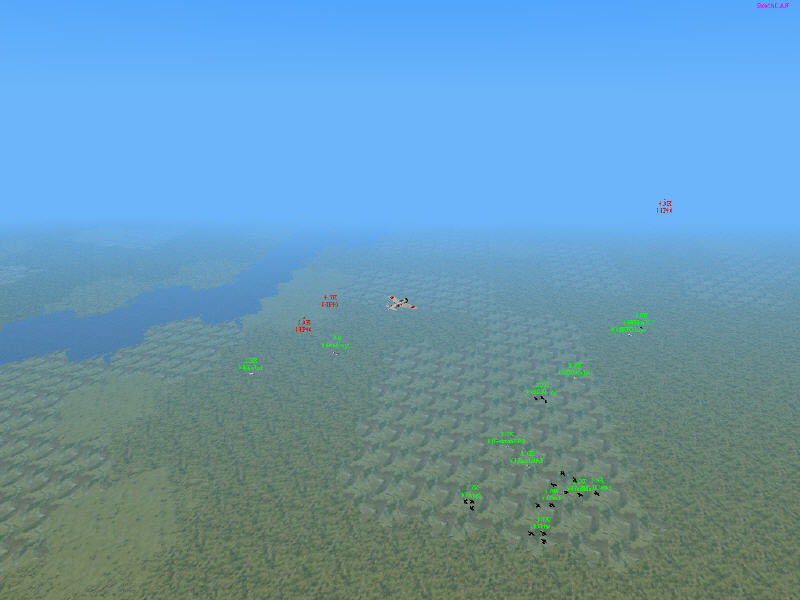
Once Strike group hit the boundary south of Bangkok, we headed west, hoping to squeeze past Tovay before scouts found us. About this time, I heard from ROC, N3 Squadron Leader, in the Sweep Group that they had found a flight or more of P-40's and were engaging. That was excellent news -- for us to be able to thin out the deadly P-40's early was better than I had hoped. "Go, ROC, go!" was shouted over the radio.
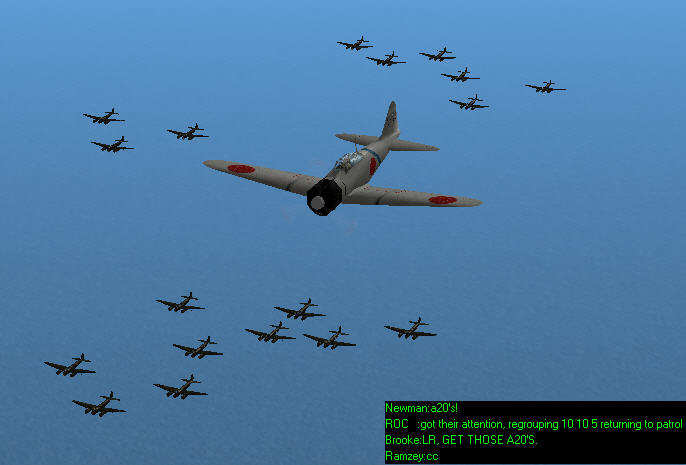
Brooke with bomber escorts as ROC reports contact with enemy P-40's.
N3 and A1 Squadrons are engaging them in sector 10,10, subsector 5.
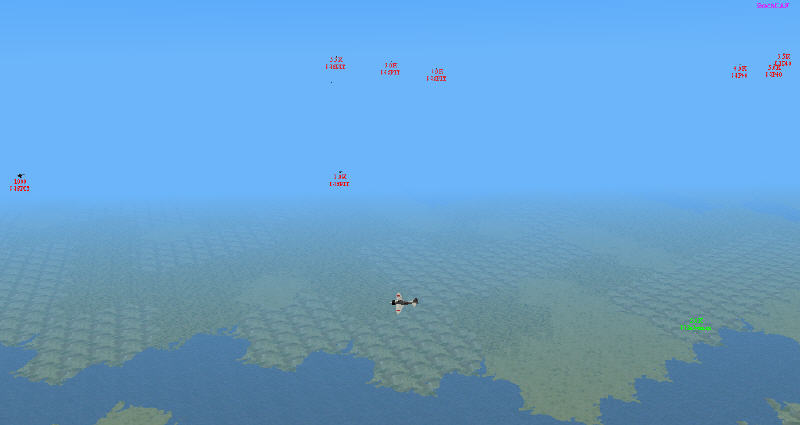
As the Strike Group got near Tovay, we could see the familiar field warnings going off there, first at the northern-most base, then at the middle base, then at the southernmost shipping. Damn. The allied scout was pressing south. I called for the Strike Group escorts to come in close on the bombers, and we continued west to see if we could make it by before the scout got far enough south to spot us. We started to scoot by Tovay -- I was scanning north of us for any bogie the whole time. Nothing. I started to feel better.
Then a report came in from Newman's N1 Squadron: Beaufighters NE of the bombers. Damn. The enemy now saw that we were sending a force west from Tovay. I called for Ramzey's LR Escorts to send Dinahs to go get the Beaufighters, and N1 pressed on trying to catch. N1 pushed the Beaufighter (or Beaufighters -- I'm not sure if there was one or more) away from the bombers. I was right near the bomber formation, and I didn't get any visual ID on Beaufighters, so I don't think they got a visual on our bombers. Newman couldn't catch them, and Ramzey's Dinahs (although our fastest planes) couldn't either, but the LR Escorts pushed those Beaufighters far from the bombers, out of bogie range, and out of any ability to attack.
Now, the enemy knew where we were. I ordered all escorts to take their planned escort positions. Now that the enemy spotted us, we could fan out as normal.
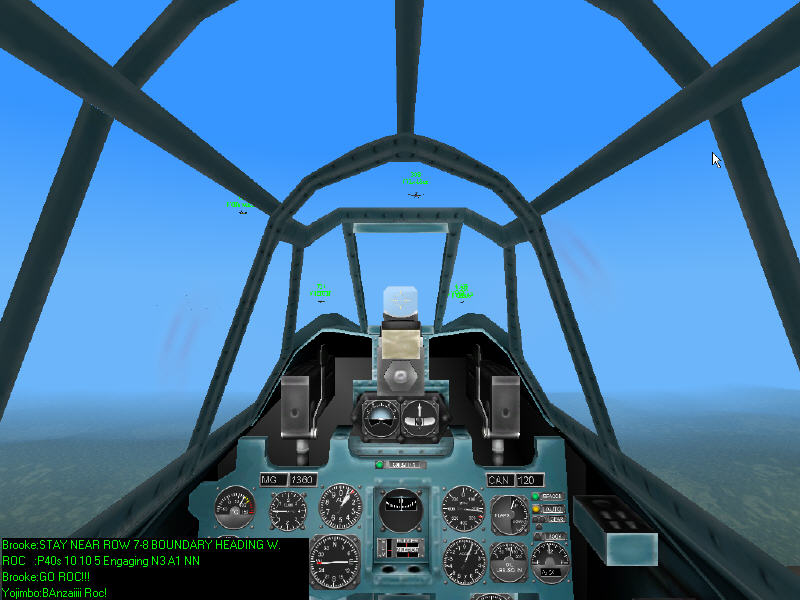
Brooke in close escort of bombers SW of Tovay as Newman reports enemy scouts
(A-20's) nearby.
Brooke orders Ramzey's LR Escorts to go get them. Ramzey is on it.
Now it was time for me to consider what to do. We could continue west as was the original plan. We could cut north and hit Rangoon from the south. We could cut NE and try the land route again. We didn't have enough fuel to turn back east all the way to Bangkok, then north, and so on. I had already thought about all of these options should we be spotted near Tovay, but didn't pick one option beforehand as I wanted to be able to factor in information gained in battle up to that point. Heading NE would put us potentially into enemy aircraft early, as the Sweep Group was finding and fighting enemies in that direction. Heading north would mean that, if the enemy was vectoring fighters to our location (especially those fighters that originally had headed from Rangoon to Bangkok), the enemy would have an easier time getting at us. They would have less far to fly. If we continued west, those Beaufighters behind us, and the P-40's and whatever else was to the NE of us, would have a long tail chase at high speed, and our bombers were faster this time. (Speed is why I wanted the bombers to load only internal bombs this time, no external load.) I decided that we'd continue west as was our plan.
We did so and were unmolested on the way. ROC was reporting that Sweep Group was continuing to push toward Rangoon and was spotting enemy squadrons pushing SE, rushing past Sweep Group. The enemy was thinking we did have another bomber group taking the route we took in mission 3. This was excellent news. It was giving me hope that the enemy was at least splitting his forces. We got to column 7 and headed north, still unmolested and with no enemy bogies in sight.
Our pilots were doing a great job of altitude discipline, staying under the radar cap. This was helping us immensely.
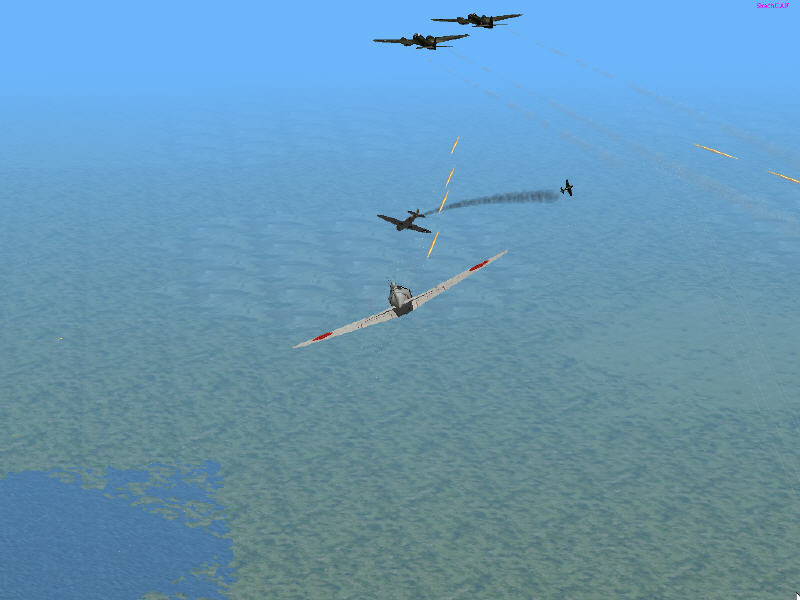
We got visibility on land, still unmolested. I was starting to hope that we'd gotten lucky and that the enemy had lost us. Then, about 40 miles SW of Rangoon, I saw a lot of bogies NE of the bombers. Our detached escort in that direction shortly reported enemy P-40's. Ah, well. It was too good to be true. Two P-40's were able to get through the detached escort on that side and come in to ID and then attack the bombers. Our bomber gunners and our close escort were able to keep them busy without loss to the bombers. Of course, now they really knew where all the bombers were, now that they got visual ID.
From this point forward, we had quite a fight to target. Every minute or two from then on, more enemies came in on the bombers, and a lot of the Zeros that started nearby the bombers (within about 8000 yards) got stripped away quickly or outpaced by the bombers. Here's a rundown to get a feel for it. Let "W" be when those first two P-40's were ID'ed by detached escort. Here is every minute from then through drop.
W+2: 18 bombers, 18 Zeros and 1 Dinah nearby, 2 P-40's attack.
Brooke chases the first P-40 through the bomber formation and hail of gunfire
from bombers.
W+3: 18 bombers, 16 Zeros and 1 Dinah nearby, the 2 P-40's are still around, but not able to attack all that well thanks to gunners and close escort.
W+4: 18 bombers, 8 Zeros and 1 Dinah nearby, the 2 P-40's are still around not really in a position to attack, but the detached escort has been stripped, perhaps in a fight with P-40's that didn't get through, or just outdistanced by bombers travelling under full power.
W+5: 18 bombers, 8 Zeros and 1 Dinah nearby, the 2 P-40's are still around, but not in position to attack. Detached escort is calling out more P-40's on the way in. I am calling for all detached escort to get to bombers if they can.
W+6: 18 bombers, 8 Zeros and 1 Dinah nearby, the 2 P-40's have repositioned and managed another pass or two. Close escort is working hard, but sticking with the bombers and not getting drawn off by the P-40's. Consequently, the P-40's are able to dive out, move off, climb, and come back this way. This is probably better than Zeros getting diluted (since we only have 8 for all bombers currently).
W+7: 18 bombers (although some have now taken enough damage to begin smoking), 8 Zeros and 1 Dinah nearby. One P-40 has been driven off or destroyed. 2 new P-40's are coming in from higher altitude.
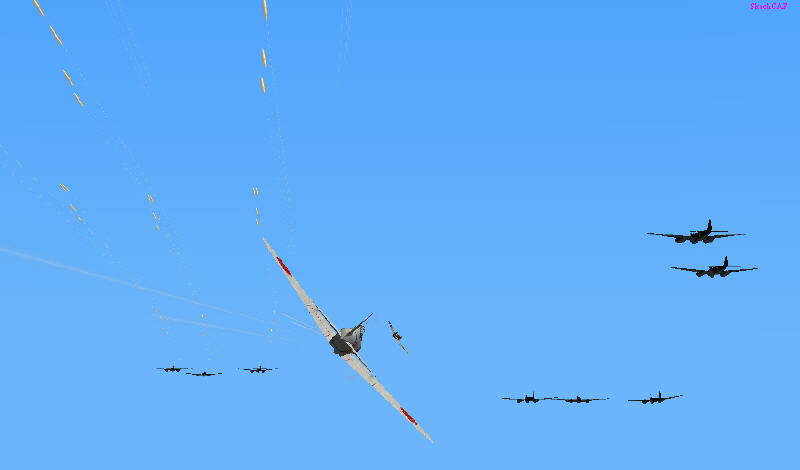
W+8: 18 bombers (more smoking, amazing formation -- so close together!), 8 Zeros and 1 Dinah nearby. 3 P-40's have done more attacks. Two are still in good position, but one is low. 7 Spitfires now nearby coming in from up high. Bombers are calling for help verbally.
W+9: 17 bombers (lost one, more smoking, still great formation), 8 Zeros and 1 Dinah nearby. 3 P-40's in the fray. The Spits are just entering combat. More P-40's on the way. I am radioing that bombers need help urgently, calling in all available aircraft, and getting out typed reports of bomber position.
View to left of Brooke's Zero. Bombers below, three P-40's mixing it up, eight
close escorts.
View to right of Brooke's Zero, same instant as above. Many fresh Spitfires
and P-40's diving in from altitude.
Brooke thinks, "We're screwed."
W+10: 16 bombers (Snak is down to 1 left, others have smoking aircraft, still great formation), 8 Zeros and 1 Dinah nearby. 4 P-40's working the bombers. 7 Spitfires working the bombers. Close escort working hard. Gunners working hard. 4 more P-40's on the way up high. I continue to call for all available escorts to get to bombers and giving position. I am thinking we are screwed and will lose all our bombers short of target. There are so many enemies around.
Brooke chases the Spitfire that set Snak's bomber on fire. Another Spitfire
is just visible off Snak's tail, diving for the deck.
W+11: 13 bombers (Snak is dead, Leigh is down 1, LilDawg is down 1, more smoking, formation has been disrupted and spread out a little finally by all the attacks), 12 Zeros and 1 Dinah nearby. HQ flight has come in and joined the fight, mixing it up with Spits. 8 P-40's are in the fight now. 2 are driven low. 7 Spits are in the fight, and have done damage, but many are being driven off or driven low. Some are still in position for attacks. I continue to radio for help.
W+12: 10 bombers (Snak dead, LilDawg down 2, Flossy's plane is on fire, Leigh is down 1), 12 Zeros and 1 Dinah nearby. 8 P-40's are nearby, but only 3 are in any position to attack anymore. 5 Spits are nearby, but only 1-2 are in a position to attack anymore. There is an F4F in the fray, but not in a position to attack.
W+13: 10 bombers (Snak dead, Flossy has 1 left, LilDawg down to 1 damaged bomber, Leigh lost one, Bino and Seeker have all 3). 12 Zeros and 1 Dinah nearby, working hard. 4 more Zeros are on the way, 7000 yards out. 6 P-40's are in the area, with 2 in position for attacking. 3 Spits are left nearby, none really in attacking position. 1 F4F is around, but low. Zeros are getting a bit pulled behind the bombers, but are working hard on the enemies.
Brooke chases P-40 during its attack run on Leigh's damaged bombers.
Leigh's gunners shot him up, and he has just started to trail smoke. Leigh almost
lands some hits on Brooke, too!
Yojimbo's A6M5 is in front breaking right.
W+14: 10 bombers. 18 Zeros and 1 Dinah near bombers. 4 P-40's, 3 Spits, and 2 F4F's in the area, but none any longer in position to attack bombers. The escorts are now mostly behind the bombers, with a few escorts slightly behind the bombers. But they have cleared the area out, so the bombers look safe for now. I am happy the area around bombers looks clear, but worried that we have so few fighters close with them. I continue to call on radio for fighters to get with bombers. We are now about half a sector west of target, and bombers are lining up and getting ready for the drop.
W+15: 10 bombers. 16 Zeros and 1 Dinah near bombers. 6 P-40's, 3 Spits, and 1 F4F in area. Most are not in attack position, but one P-40 is. I am asking fighters to get forward to and in front of the bombers. Bombers are starting their calibration procedure, opening doors, getting ready for drop.
W+16: 9 bombers. 26 Zeros and 1 Dinah near bombers. 2 P-40's nearby, but not in attack position. The one P-40 that was in attack position last time did its final pass and killed Flossy. We have run into the group that was racing east from Phitsanulok to cap Rangoon towns (the replacements for Sweep Group). The area looks clear. Still, we need fighters farther forward on and ahead of the bombers. I'm calling for that. The bombers have target in sight.
W+17: 9 bombers. Lots of escorts. 1 F4F is coming in high, in a position to attack bombers. Some escorts have gotten forward and on the bombers and are working to intercept the F4F. Bombers are in bombsights nearly ready to drop. I'm thinking, "Crap! If we lose any bombers while they are in sights, this it going to suck!" I'm over the bombers, except for LilDawg who is down to one bomber and who is ahead of the others and ahead of me. Two of our fighters are trying for the F4F, and the F4F seems like it might be going for LilDawg.
W+18: 9 bombers. Lots of escorts. The F4F did seem to get a run on someone. As I go in to help, I notice LilDawg's last plane is smoking. Flak bursts pop up all around. As I overfly the town on my way to the F4F, I look down to see numerous flashes and hear the "BOOM, BOOM, BOOM" of lots of bombs going off. The F4F is driven off for good. I call for bombers to head SE out of the area. LilDawg's engines finally quit as we exit the area, and he drifts farther and farther back. I stay with the other bombers, who have managed to form back up pretty well.
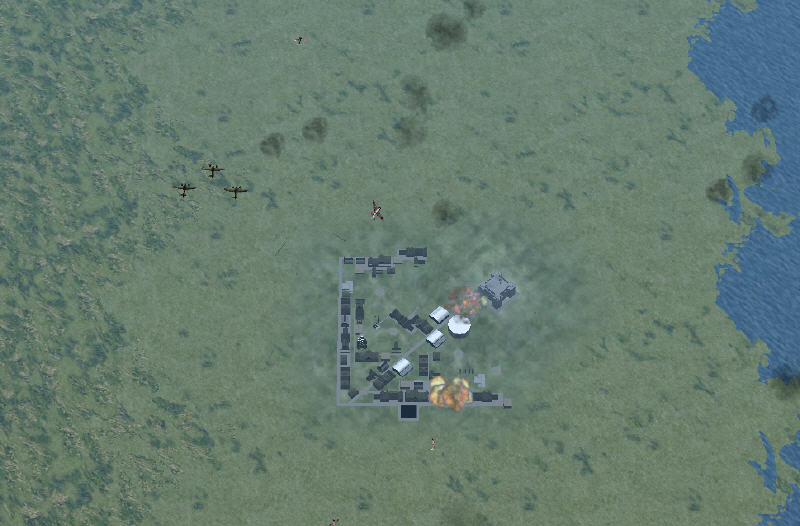
Brooke banks right to see bomb hits from Bino's drop. Bombs away and on target!
Flak bursts all around.
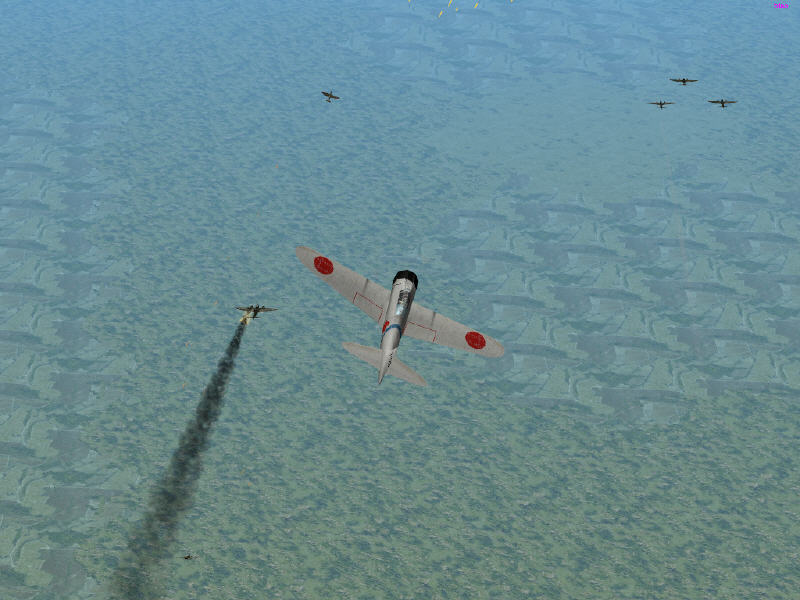
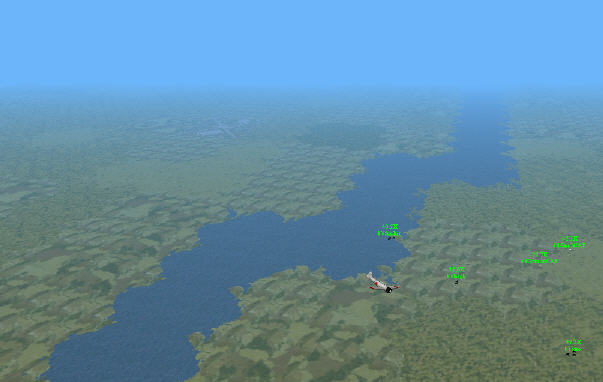
We fly SE for a while, and I ask for the bombers to head S -- we are getting too close to the Moulmein radar radius. The bombers do so. I am also calling for fighters to hurry up and get forward of the bombers. But now the bombers are without bombs and pretty fast compared to our Zeros. I'm with them, and I range ahead a bit. About 1.5 sectors SE of the target, I see bogies ahead. I go to full power and go ahead to check. Beaufighters! Three of them! Damn! I'm thinking we'll lose a bunch of bombers after all that -- Beaufighters are fast and have lots of firepower. I call it out and try to intercept. The other Zeros were able to move forward enough to get with the bombers, and they get on the Beaufighters as they attack the bombers. But there is one thing I forgot. Beaufighters don't have the amazing roll response of the P-40's, and so we are able to get on those Beaufighters. They can't roll and jink and evade us nearly as well on their way in. Also, they are bigger targets. The Beaufighters each got about one pass on the bombers before they were all killed or driven off. Gunners on the bombers might have gotten one, and the escorts handled the rest. I was pissed off at myself at one point for blowing a couple good shot opportunities on an A-20, but someone with better gunnery polished him off shortly after I stopped cursing anyway. :)

Brooke trying to get some hits into one of the damned Beaufighters (A-20's)
that found us on our way home.
The Beaufighter is the leftmost plane in the picture..
Now more Zeros caught up to us, and we had a very good escort group on and around those bombers as we headed back to Bangkok to land. A sector out, some of the rear guard spotted P-40's about 40 miles behind us and chasing and attacked them. As we got to Bangkok, I released all fighters to go tangled with the enemy P-40's that were chasing. The enemy had some other fighters show up there after a while, too, more P-40's and perhaps some other aircraft.
Our Zeros mixed it up with the allied forces. It is a big fight, but most importantly for us, the bombers that survived the mission now landed safely at Bangkok. The fight northwest of Bangkok wound down. Mission 4 was over. In the end:
Bombers lining up on Bangkok field for landing. Brooke heading to back of formation
to make sure it's safe.
by Brooke P. Anderson
e-mail: brooke@electraforge.com
Click here to go back to my scenario page, for
pictorials on other frames of this scenario, for pictorials of other scenarios,
and for links to other content on my site.