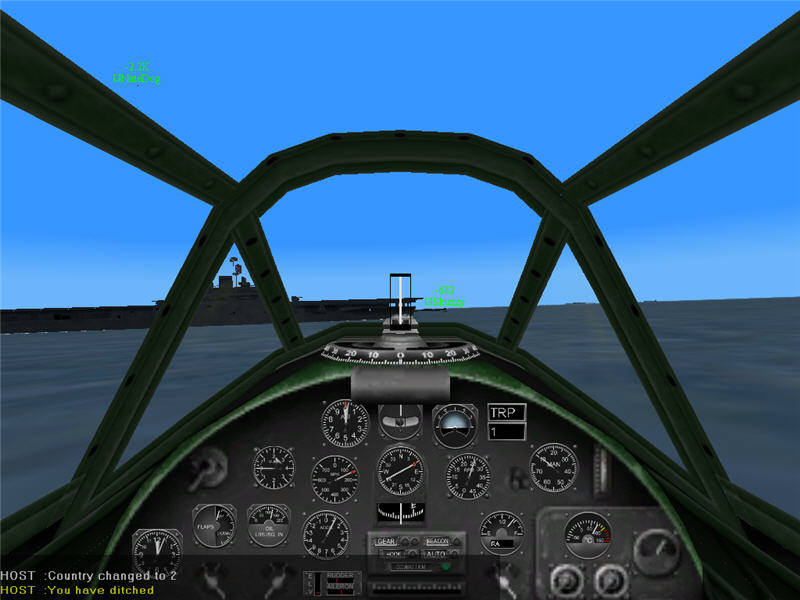
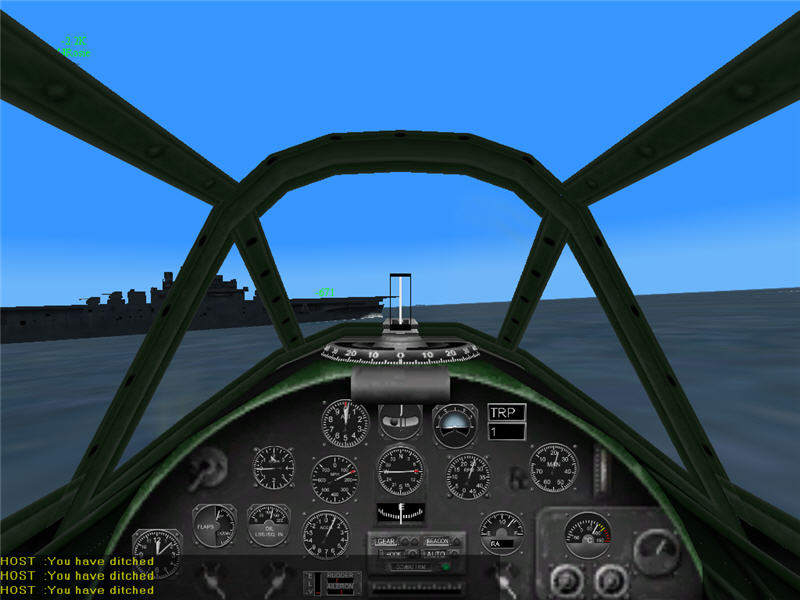
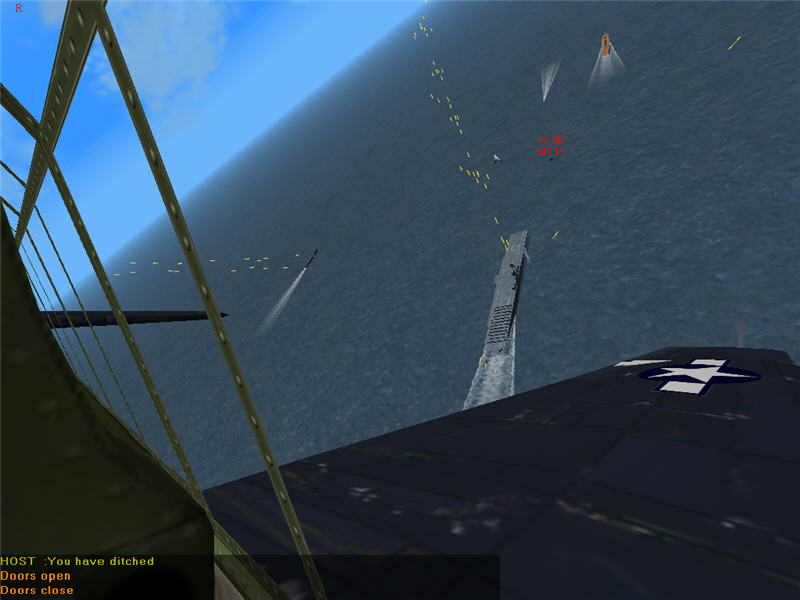
Side approach. 10ft, 150 mph, Gunsight on nose of ship. When end of ship has touches end of screen, drop. This image is when I pressed my bomb button.
How you torpedo bomb depends on the situation. There are two regimes: (1) being able to get as close as you want to the ship you are attacking, and (2) not being able to get close to the ship because you can't make it through anti-aircraft fire. For practice terrain, see the end section of this document.
This is the best case and can happen in scenarios where the autoguns of carrier task groups are turned down in lethality. Here, there are parameters for dropping torpedoes such that it will be very difficult for the ship to avoid your torpedo, even if someone is putting it through evasive action. The technique was developed and tested with the B5N2 Kate torpedo bomber. It should work with any torpedo bomber, but I haven't tested it. If you drop outside these parameters (higher or faster), your torpedo at this close range will go under the target. Getting close makes it much easier to hit, even though the drop parameters are more strict. By the time you are ready to drop:
If you are approaching from the side of the ship (90 degrees), drop when the end of the ship touches the edge of your screen in your forward view, like the following.
Side approach. 10ft, 150 mph, Gunsight on nose of ship. When end of ship has
touches end of screen, drop. This image is when I pressed my bomb button.
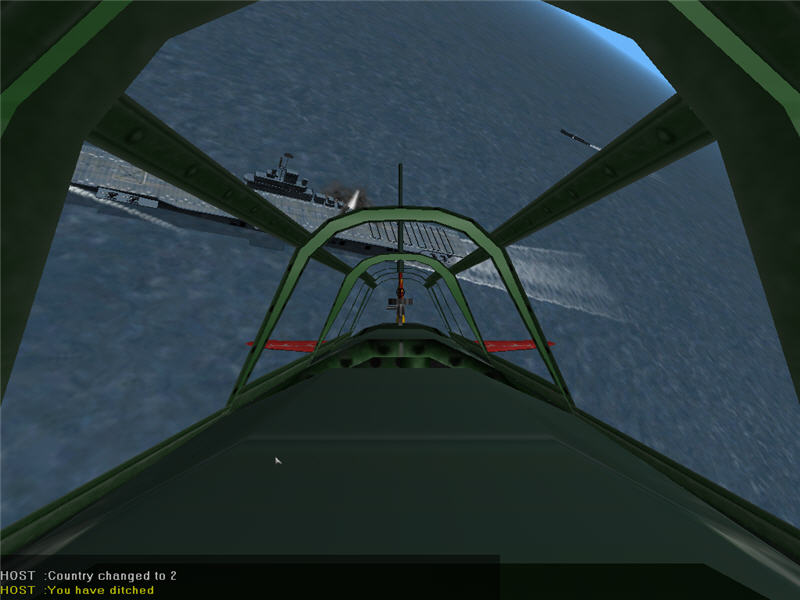
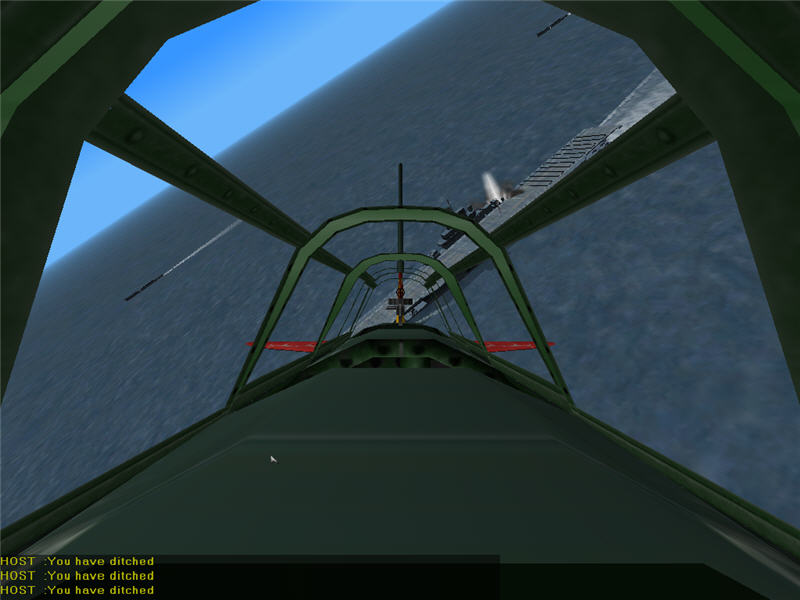
Result of side approach.
If you are approaching from the front quarter of the ship (say, 45 degrees), drop when the end of the ship touches halfway between your gunsight and the edge of your screen in your forward view, like the following. (In the B5N2, that is the outer window support.)
Forward-quarter approach. 10ft, 150 mph, Gunsight on nose of ship. When end
of ship has touches halfway to edge of screen, drop.
This image is when I pressed my bomb button.
The result of forward-quarter approach.
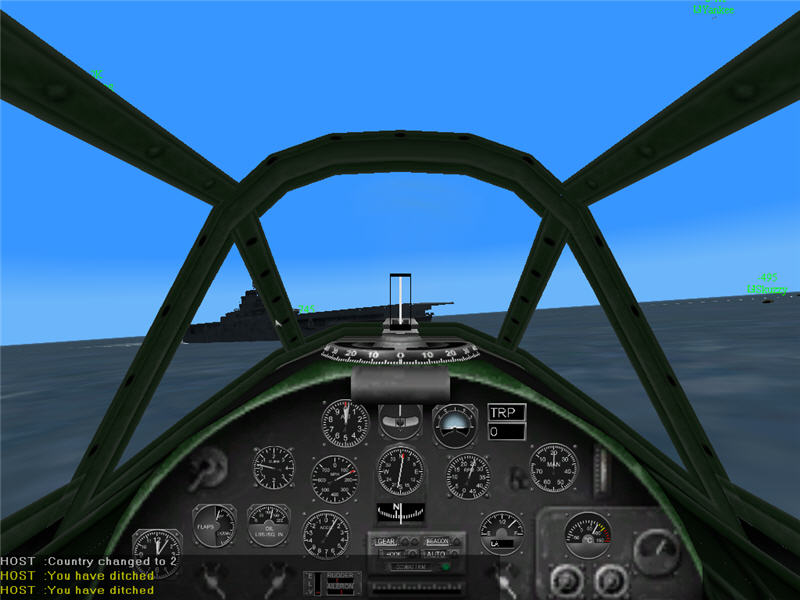
If you are approaching from the rear quarter of the ship (say, 135 degrees), drop when the end of the ship is off the edge of your screen, like in the following.
Rear-quarter approach. 10ft, 150 mph, Gunsight on nose of ship. When end of
ship is off the edge of screen, drop. This image is when I pressed my bomb button.
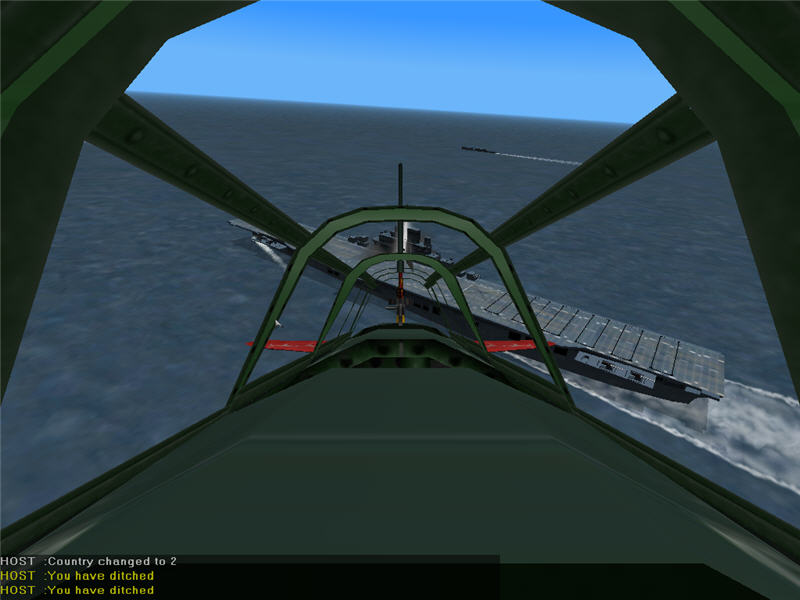
The result of rear-quarter approach.
If you aren't approaching at any of these angles, you obviously have to adjust some. If you are approaching from shallower forward angles, the rear of the ship will correspondingly be farther inward from the edge of your screen (as the end of the ship is farther from you when the nose is at 250 yards). If you are approaching from a shallower rear angle, the end of the ship will be off the end of your screen and the middle of the ship closer to the edge of the screen (as the end of the ship is closer to you when the nose is 250 yards away). If you are approaching from dead in front (0 degrees) or dead to the rear (180 degrees), the rear of the ship is right on your gunsight. If the ship is maneuvering, the above techniques are still good. You are getting in there so close that typically a turning carrier still can't get out of the way.
Note, before people give me a lot of guff about how 200-300 yards is an unrealistically short drop distance, let me say that I looked all over the Internet for information on WWII aerial torpedoes and arming range. The best I could find were references to arming range of 200-300 yards. Amazingly, this information seems almost impossible to get in today's crappy search-engine interfaces (where it is difficult to employ decent boolean searches). Here are some references:
To see how all of this worked in an actual scenario, see the pictorial of Coral Sea, Frame 3.
This is a much more difficult case but might be necessary if AA is so bad you can't get close without being obliterated. The good news is that it is much more survivable, and you don't have to be so low and slow. The bad news is that, if the enemy ship is being run by a human who can take evasive maneuvers, your hit percentage will be very low, as he will have enough time to get out of the way of your torpedo. However, in a scenario, there might be enough torpedoes in the water that he can't evade all of them. You won't be able to get close if the carrier task group has full-lethality autogunners or lots of human gunners with good aim.
Here, your drop parameters for the TBM3 Avenger are pretty loose: under 300 mph and under 500 feet altitude is good enough. For the B5N2 Kate and Ki-67 Hiryu, it is much more restrictive: under 175 mph and under 400 feet. Those are good rules of thumb.
You are typically going to launch your torpedo when you enter anti-aircraft range (when the yellow tracers are heading your way), although the closer you can get, the better your hit percentage will be. Drop your torpedo, do a hard 180 degree turn, and get out of there.
The two approaches that seem to work best for me against non-maneuvering ships are: (1) head on to the target and (2) from perpendicular to the target's path.
I like best head on to the target. I get way out in front of the fleet, so that I can barely see it. Then I reduce throttle a lot (no point in approaching the ship quickly, as it just gives you less time to line up), turn to go head on to my target, and get down to my drop altitude (and open bay doors if my bomber has them). I go to max zoom so that I can see my target and line up on it. Once I feel I am lined up as well as I can be, I drop my torpedo and get out of there. Here are some screen shots illustrating this approach. The hardest part is lining up very precisely while using full zoom and not getting too far inside ack range.
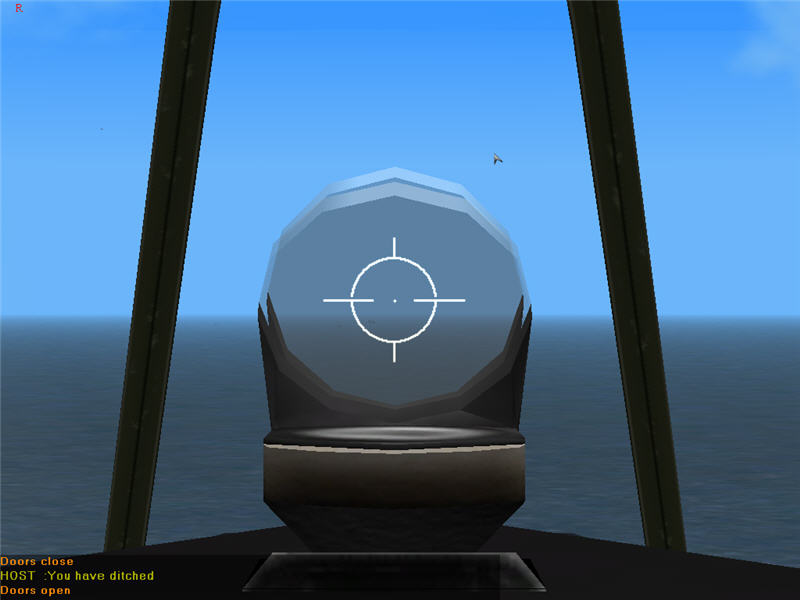
At extreme range, I can barely see the ships -- but barely is good enough to
start lining up.
The grayish blob below and to the left of the center of my gunsight is the carrier.
I'm at about 500 ft. and 150 mph.
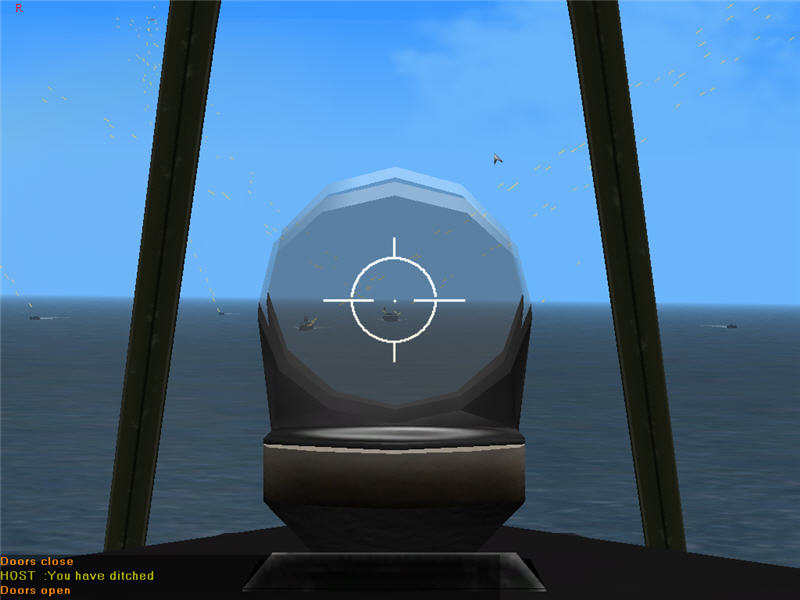
As I get closer, I can line up (still using maximum zoom). Here, I'm pretty
much dead head on to the carrier as seen by the aspect of the ship and also
that the amount of wake to either side of the ship seems equal. I'm perhaps
just a tad to right of center, but this is pretty close. I drop my torpedo.
It takes a while for the torpedo to come close to the ship because I dropped
so far out. Here's a view of it inbound.
Against an actual enemy ship, you of course wouldn't fly your plane in over
the target but would instead stay out of ack range.

The final result: a hit amidships.
For general approach angles other than directly head on, for when you might be able to get at least a little closer to a maneuvering target (but not close enough to do the "close as you want" technique described above), aim depends on carrier's heading. I call this the "phi over two" technique (which is based on the fact that a torpedo is about as fast as a carrier or cruiser -- close enough to within your ability to estimate angles). Let theta be the ship's relative heading. Zero means it is headed straight at me. In the image below, it is heading 30 degrees. I want the baseline of my aim to be theta/2. So, if the ship is heading 30 degrees and going straight, I want to put the ship's centerline at 15 degrees to me. If it were 45 degrees, I'd use 23 degrees, and so on. Then, if the ship is turning toward me, I want less lead (by say 5 degrees); if it turning away from me, I want more lead. That's where the judgement comes in.

The "phi over two" rule of thumb.
An example of the "phi over two" approach. The carrier is heading
about 45 degrees relative to my line of flight and turning away from me.
So I'm putting the carrier at about 23 degrees from my heading.
To see how all of this worked in an actual scenario, see the pictorial of Coral Sea, Frame 2. Note the the cruiser, where the ship was about 30-45 degrees off my heading, and I put the cruiser at about 15 degrees to me at launch and got a near miss; and note the destroyer, where the ship was about 90 degrees off my heading, and I put the destroyer at 45 degrees to me at launch and got a hit.
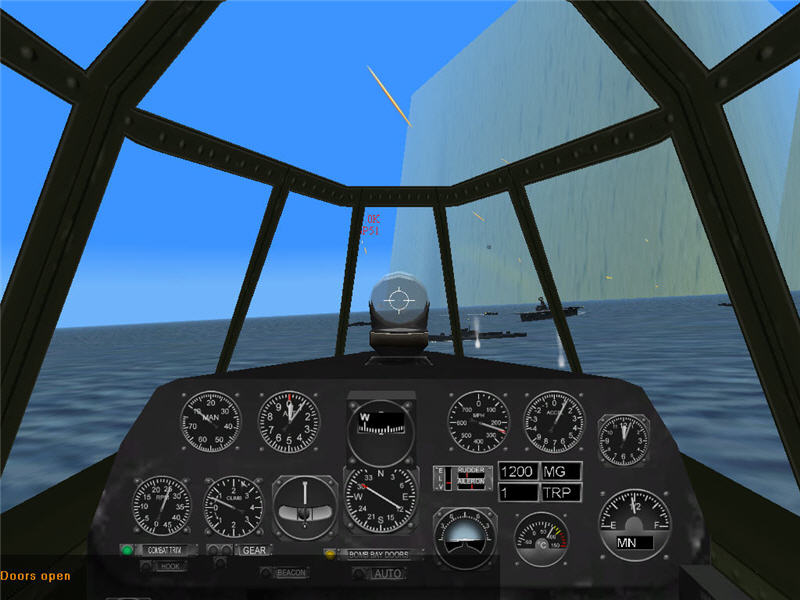
For helping you judge angles at which you should put they enemy ship (theta), here are some guides.
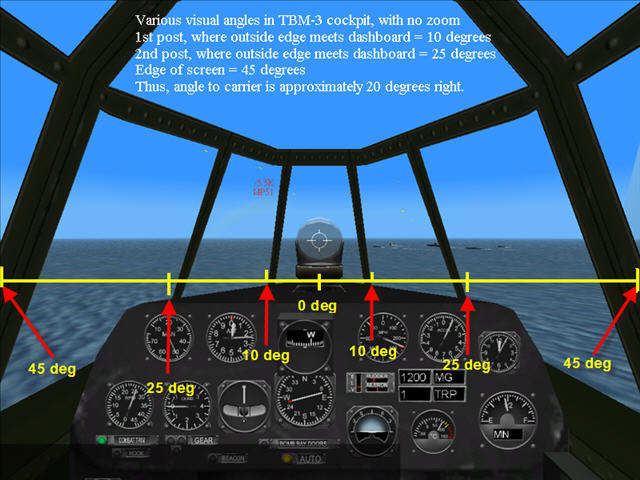
Angles from the cockpit of a TBM3 Avenger.
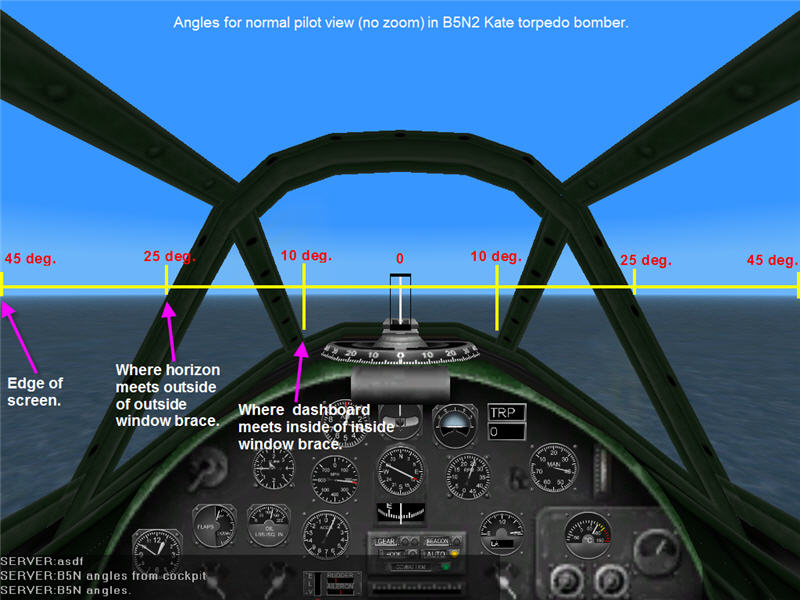
Angles from the cockpit of a B5N2 Kate.
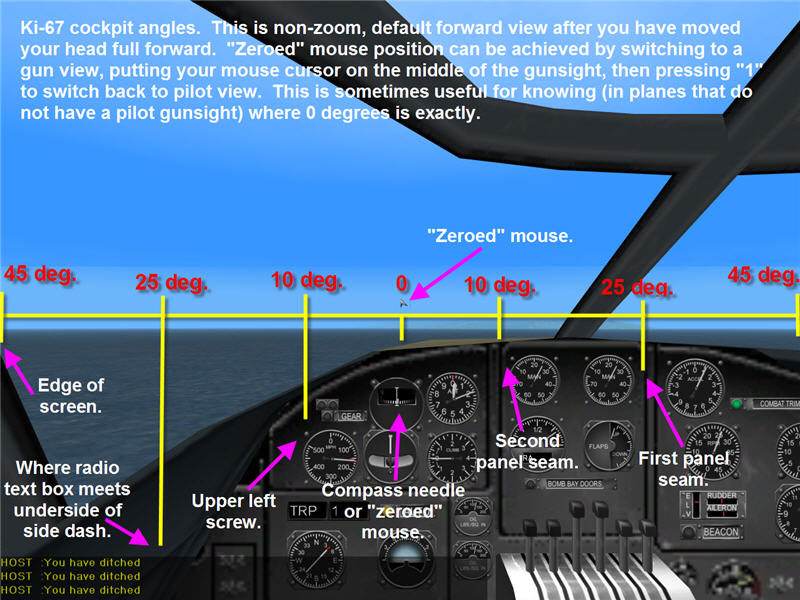
Angles from the cockpit of a Ki-67 Hiryu. Here the view is one starting at the
default forward view and moving the head full forward.
(You can save this as your new forward view by hitting the "F10" key.
You can get back to the default forward view by hitting the "Home"
key.)
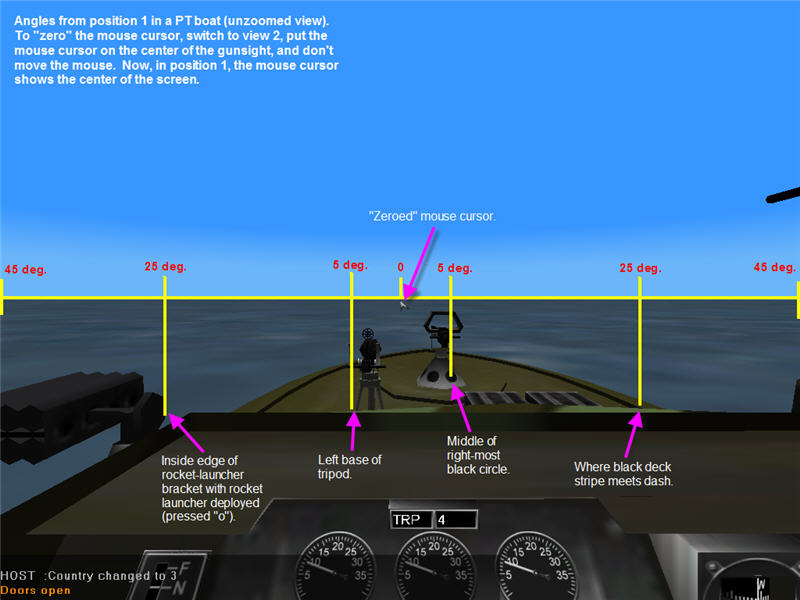
Angles from the bridge of a PT boat.
In practicing for the Coral Sea scenario, Sikboy made his wonderful practice terrain Torp3. A later version of Aces High came along, and his terrain no longer worked, so I made one. It is terrain with an airfield at 15,000 feet. Off the end of the SW direction of the runway is an enemy fleet that is under evasive maneuvers. So, you can take off in a torpedo bomber or a divebomber and get good practice against a carrier fleet taking evasive maneuvers.
Here is the practice terrain: brooke1.zip
To use the terrain, unzip it, and put the file brooke1.res into your "C:\Program Files\HTC\Aces High II\ahiiterr" folder. Then, start up Aces High, click on "Choose Terrain", pick "brooke1", then choose "Offline Practice".
If you want to practice the close-in approach, you will need to turn down the autogunner lethality (or you won't survive to get close). To do that, in Aces High, hit Escto get the clipboard and go into Options->Arena Setup->Environment->Arena Settings and change GroundAutoLethality[armored], GroundAutoLethality[hard], and GroundAutoLethality[soft] from 1 to something low (like 0.03 if you want to risk some damage eventually or to 0 if you don't want to worry about it at all). Also here, you can set the hardness of carriers to be high (if you want them to survive multiple torpedo hits). Carrier hardness can be adjusted by the "ObjectHardnessMults[SHP]" setting -- set it to 1.0 for the carrier to take the normal 6000 lbs to destroy, 10.0 for it to take 60,000 lbs to destroy, and so on. You can save those settings, then your offline play will use them each time. Don't forget to set them back to 1 if you want normal settings again.
Cruiser and destroyer hardness is set in "Options->Arena Setup->Objects->Object Settings" by setting "Ship" hardness.
There is also a port near the enemy fleet, so you can launch PT boats for practice, too.
There seems to be a bug with the D3A1 Val such that, when you are at the 15,000 ft. altitude runway, giving full throttle doesn't cause the engine to come up to full RPM. Here's how to handle it. Pull up the clipboard and go into "Options->Arena Setup->Environment->Wind"; set a wind speed of 5 mph; and click the "Set Layer" button. The engine will now come up to speed, and you can take off. I don't get this odd bug with any other aircraft I tried from the field -- only the D3A1.
The Ju 88 can also carry torpedoes. It is a bit different compared to flying the TBM or B5N because (1) the usual view out the front is not good when you are slow, (2) it carries two torpedoes, and (3) you can have formations. Below, I talk about what impact these differences have and also show results against a maneuvering CV.
The Ju 88 is carrying a lot of weight, and as you approach 150 mph or lower (i.e., when you are low and slow), the angle of attack needed to keep the plane in the air is such that the dashboard and the mount for the gunsight start getting in the way of your view forward. The solution is to use the "Page Up" key to move your head up then hit the "F10" key to save that as your regular forward view. Don't move your head so far up that the gunsight mount obscures your altimeter, though -- you'll need to be able to see that needle at the 10-20 ft. mark. If you want to get back to the default regular forward view later, just hit the "Home" key to get it back and then "F10" to save it. Of course, I recommend setting this forward view well in advance of the target, perhaps even at takeoff.
Once you are on the deck at 150 mph, set the throttle to about 25" manifold pressure to maintain 150 mph.
Two torpedoes are very nice. Just toggle them both off at the same time, and both will hit with the close-in technique.
For the close-in technique, the torpedoes from the formation planes will usually not hit. If you want them to have a chance of hitting, you have to drop farther out than 200-300 yards, and you will have to lead the ship's bow more. I think it's better just to go for two high-probability hits than to go for more hits but with lower probability.
Below are pictures of a run on an irratically maneuvering CV. On the approach, I did not know which direction the CV would turn, if it would stay in a turn, etc. I just flew in at about 20 ft and about 150 mph, working to put my sight on its bow, and released once the end of the CV went off the edge of my screen. As I came in, the CV started turning hard left, and I had to correct left. I pulled up to about 30-50 ft altitude to have enough room to bank left and to correct my heading, then went back down to 10-20 ft. In the first picture below, which is my drop, you can see that I was a little sloppy in getting my sight right on the CV's bow and didn't quite get my wings back to level at drop. A little sloppy, but realistic for combat conditions -- and it still worked, as you can see from the picture of the results.
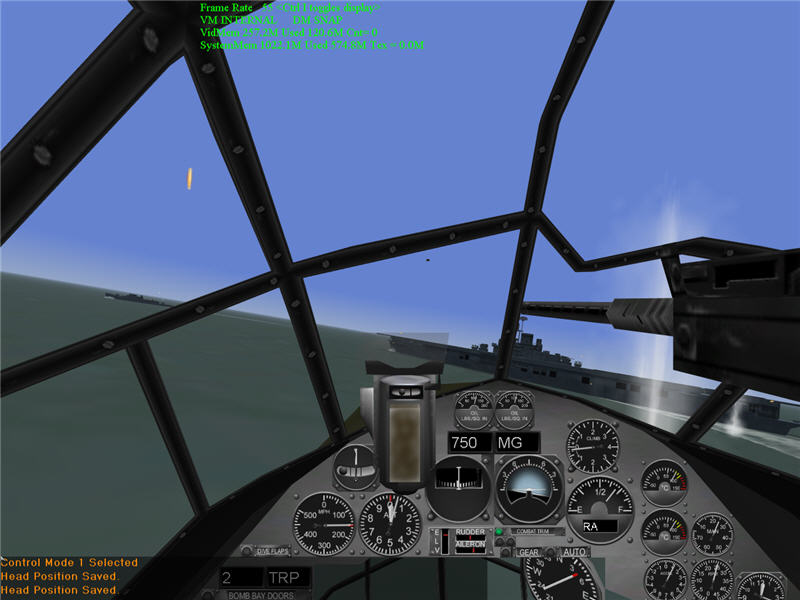
Ju 88 an instant before release. Altitude 20 ft, airspeed 150 mph. Note that
I have previously moved my head up in order to see over the gunsight better.
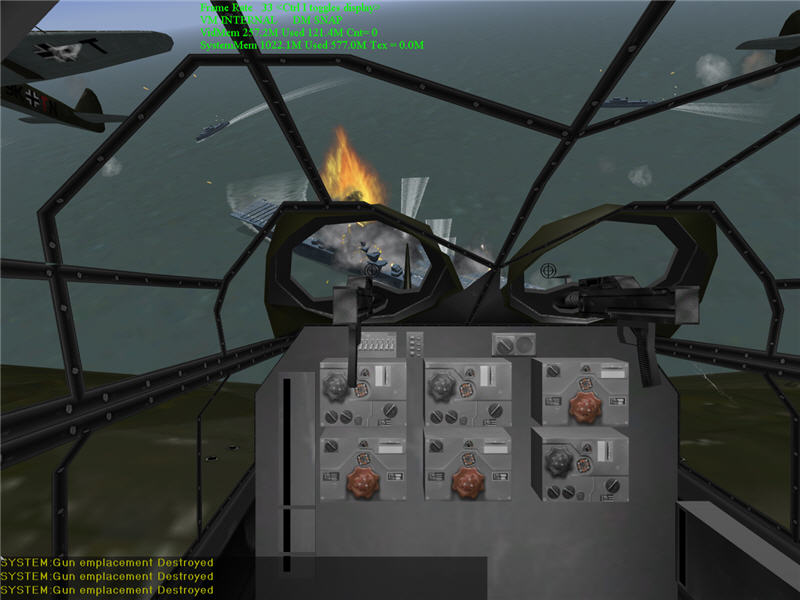
A view out the back showing the result. At least two torpedoes hit, and some
from the drones go under the CV.
by Brooke P. Anderson
e-mail: brooke@electraforge.com
Click here to go back to my main gaming page.