Stalin's Fourth, Frame 4 Pictorial
Stalin's Fourth was a scenario that ran in April,
2006 in the multiplayer on-line air-combat simulation Aces
High.
Objective: capture a56
VVS10 consists of me (Brooke, as GL), HB555 (FL), SkechCAF, Rompa, Hawco, Monday,
and Boozer. Our first mission is to launch from v54 in ground vehicles and capture
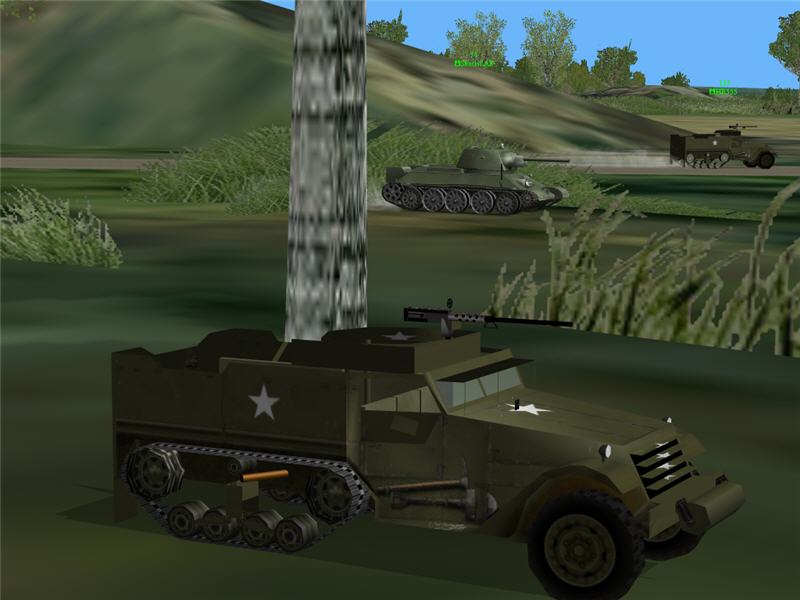
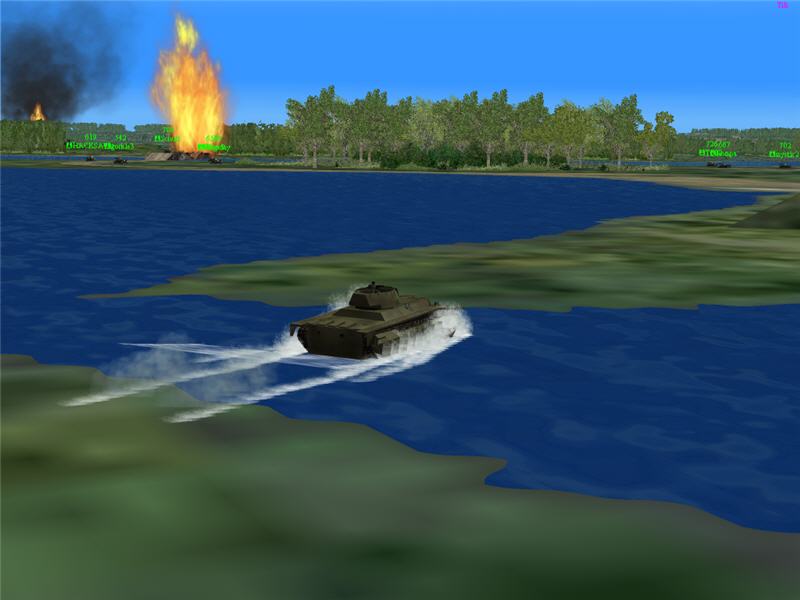
a56. This is a picture on our way to a56 town of me (Brooke) hiding in trees
in my M3 troop transport while Skech (in his T-34) and HB555 (in another M3)
zoom past. (launch is t=14:03:29)
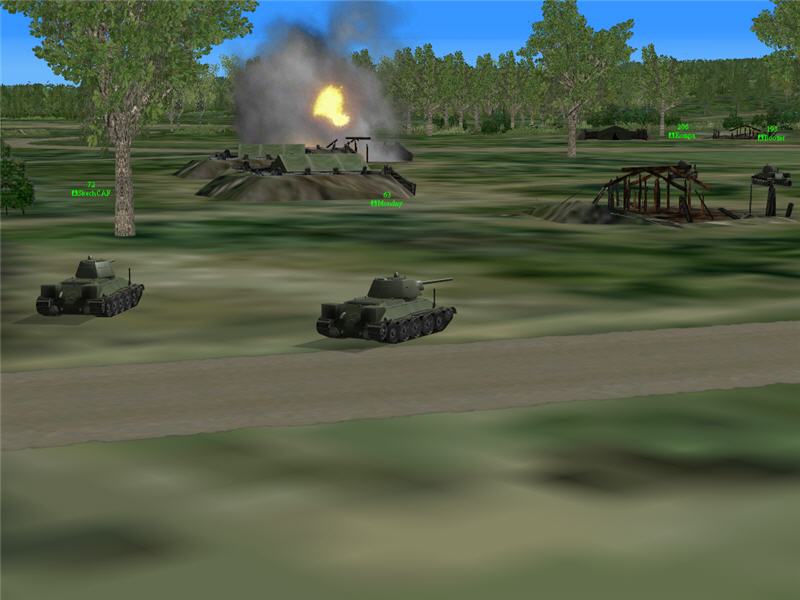
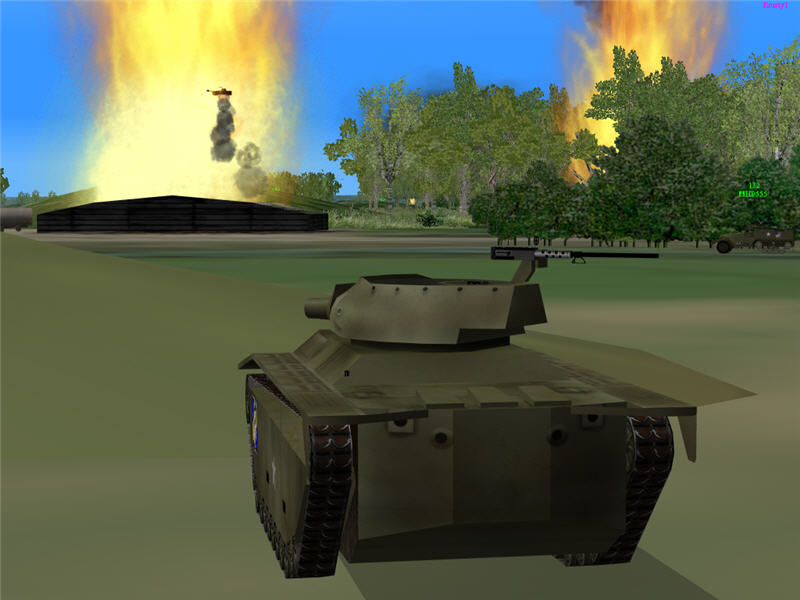
We roll up to the town 1 mile north of a56. Rompa goes in first and takes out
the defense guns. Others are hot on is heels. This is a picture of (from left
to right) Skech, Monday, Rompa, and Boozer destroying the fortified tent structures.
Once they are all down, I give the call for HB to go in and deploy troops. HB
captures the town. VVS10's ground objective is now completed, and I radio command
to ask if they now want us in Boston bombers, which was the original plan. (t
approx. 14:15)
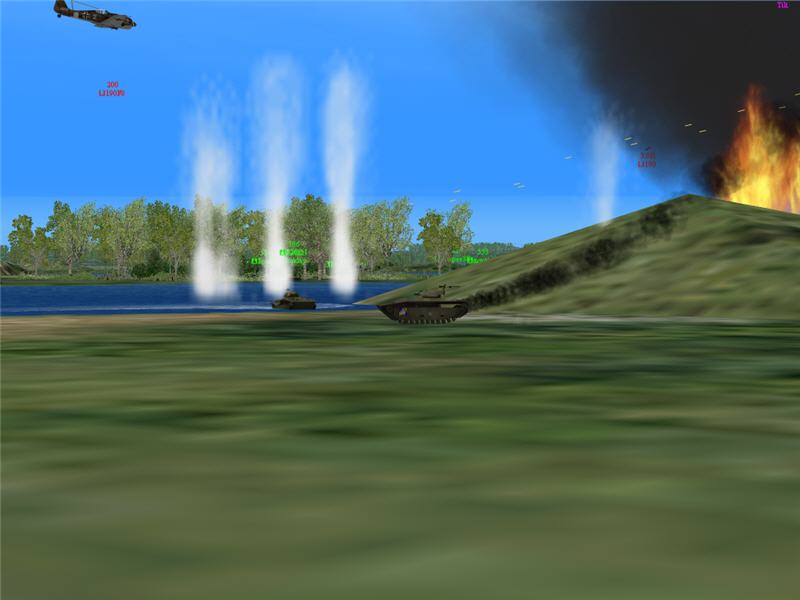
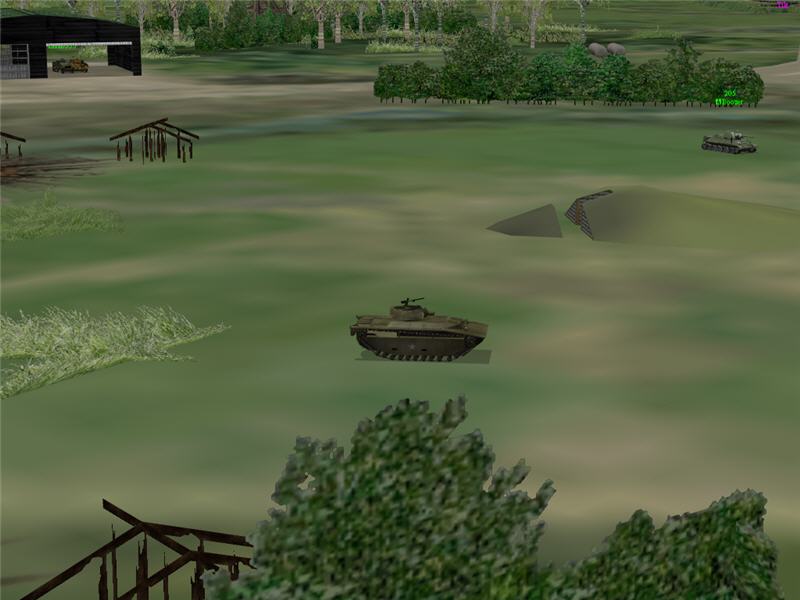
Objective: Assist at 57 and 58
57 and 58 are being vigorously defended by the Finns. Command orders VVS10 to
continue on to 57 and 58 to assist with their capture. As we get closer, we
can see that Finnish Air Force (FAF) FW 190's are attacking our Russian ground
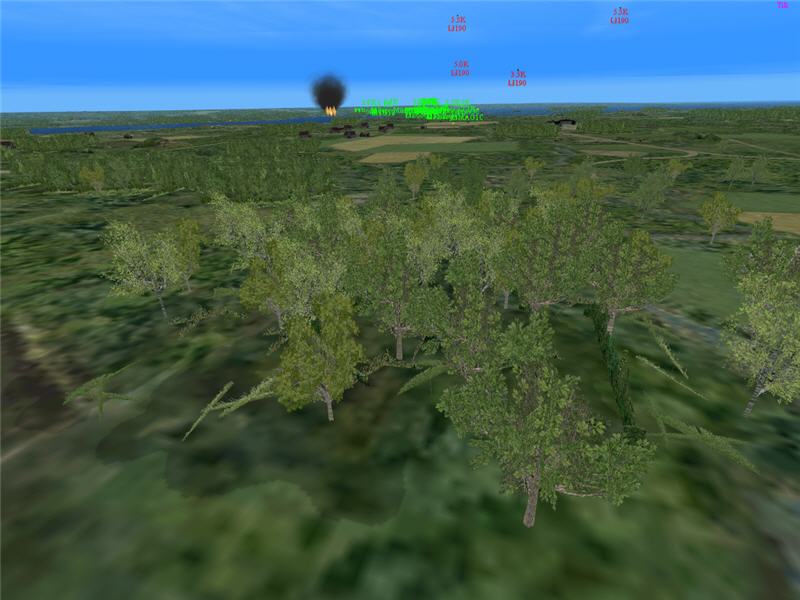
vehicles. (Attacking 190's are the red icons.) As I draw close in my M3 (which
can easily be destroyed by aircraft fire), I pull up into some trees and hide,
waiting for some VVS fighters to come clear it out so that I can get to 57 without
getting attacked. I'm in the clump of trees at the center of the picture. The
fire in the distance is one of the bridges from 57 to 58. VVS briefly creates
a clearing of the skies over 57, and I rush in with my M3.
At 57, I inquire about the situation. The bridges to 58 are down, and the Finns
are putting up an aggressive defense at 58, stalling the Russian advance. The
ground commander in the area asks for more LVTA4's so that we can cross the
water and assault 58. An LVTA4 is an amphibious craft, lightly armored (but
at least with some armor), with a 50-cal machine gun and a 75 mm gun that shoots
high-explosive rounds. It cannot kill a Panzer, and one hit from a Panzer will
kill an LVTA4, but it can perhaps blow off a Panzer's tracks, making it immobile.
It's the best we have to get to 58 with bridges down. I launch in an LVTA4.
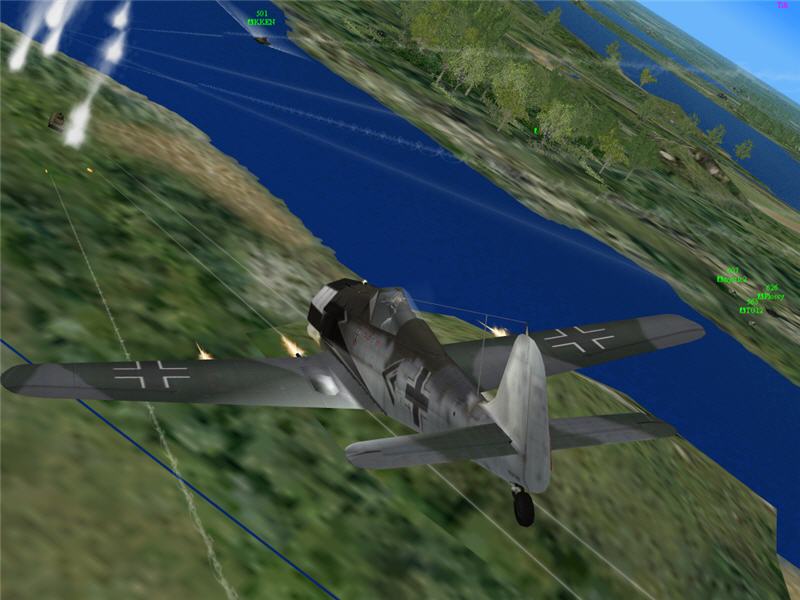
As I try to race away from 57, I am attacked by one of the several Bf 109's
that have come into the area. Here the 109 has just done a strafing run on me.
Our own AA guns (see tracers) are shooting at him and coming close to me, too!
I fire back with my 50 cal during his pass, but I don't think I hit him. I am
hit, but not disabled. I continue on. (t=14:42:07)
I splash across the first crossing to the island between 57 and 58. The second
bridge is on fire, and several of our T-34's wait on the river bank. They are
looking for enemy Panzers to hit from there while they wait for the bridge to
come back up. Some of the T-34's present are (from left to right) Hacksaw, Gorkle3,
Shutt, three unidentified, Rompa, and mystic2.
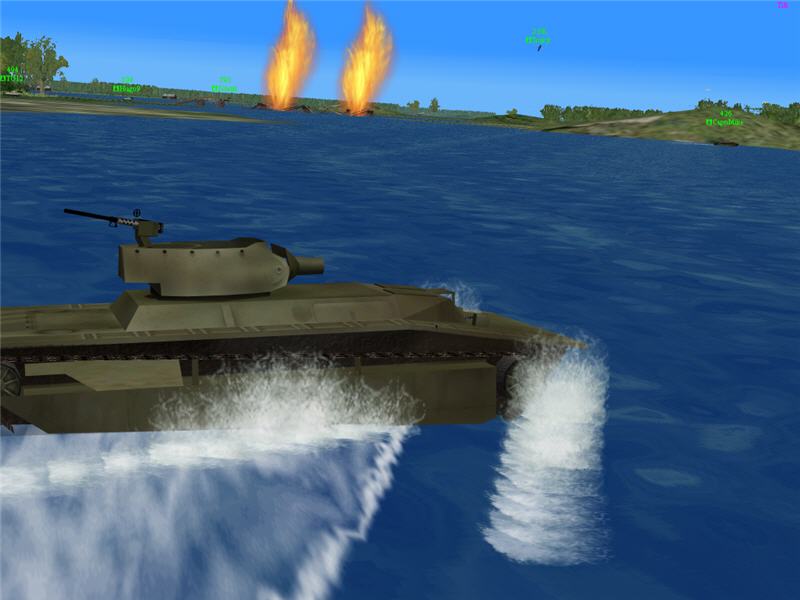
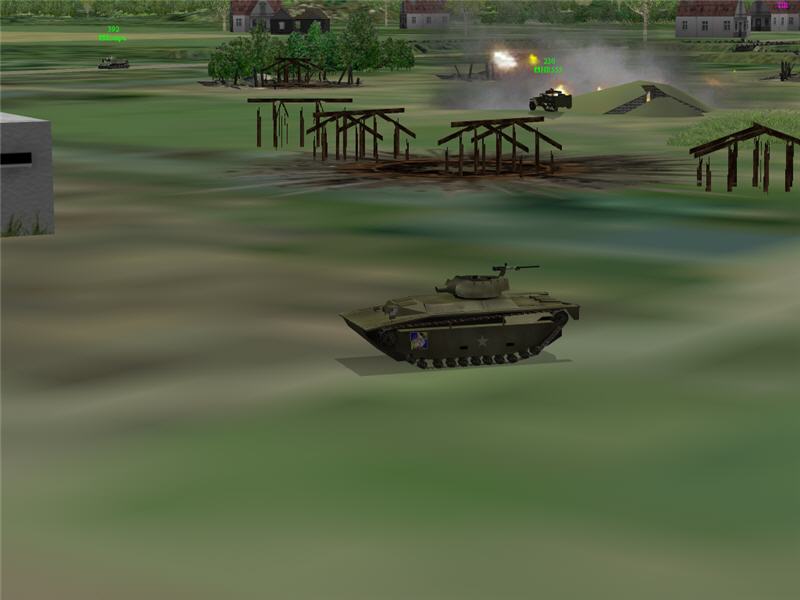
I splash into the river at the second crossing toward 58. This is the dangerous
crossing. On the water, out in the open, I'm a sitting duck (well, maybe a swimming
duck) for any Panzers across the river and for aircraft. If I make it, I will
land near CapnMike in his LVTA4 (upper right of picture). The burning second
bridge is visible above.
As I make land (upper left), I am immediately attacked by a FW 190. Cannon shells
explode around me and raise splashes of water and earth. I take some hits, but
I don't have time to check damage. I'm gunning the engine and trying to go forward
to a tree line. I don't know what happend to CapnMike. KKEN is trying a crossing
behind me.
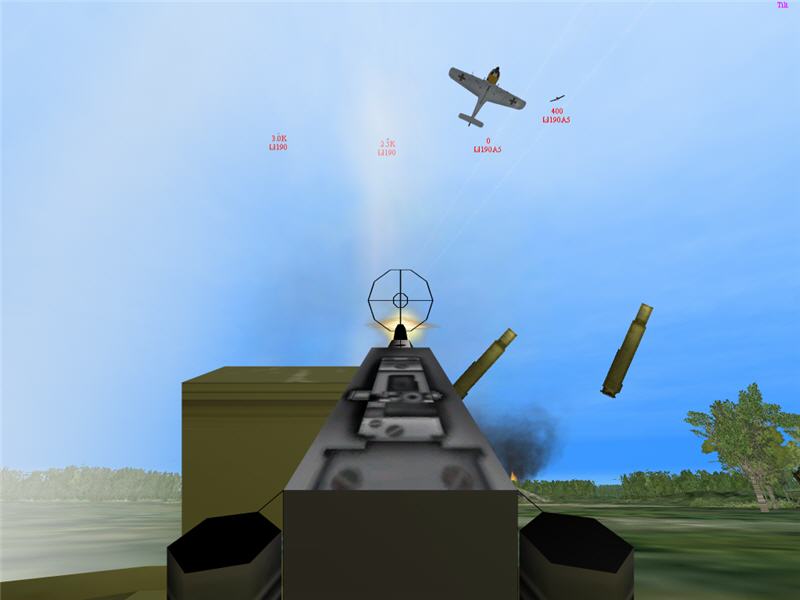
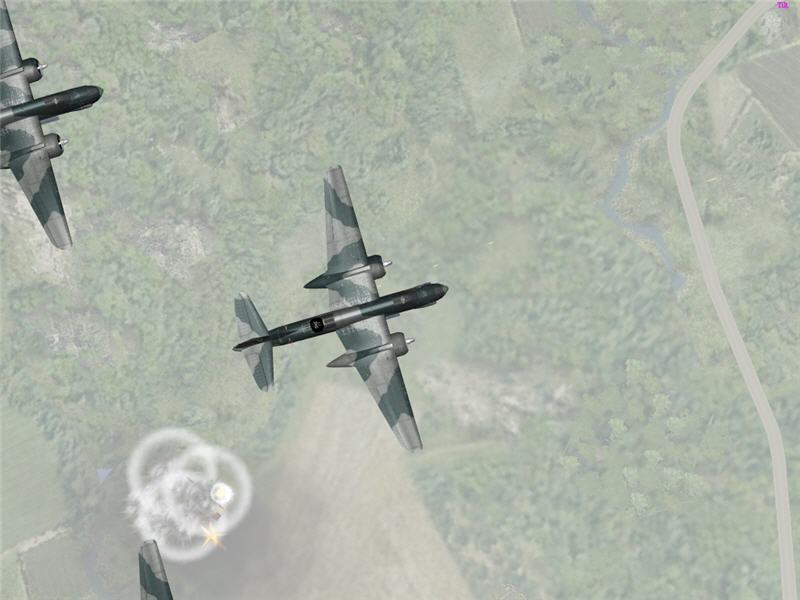
Seconds later, I'm attacked by another FW 190. This is a view from my gunner
position as he zooms past overhead. I fires at him but am not sure if I hit.
The washed-out, white appearance to the left in the picture is because the 190's
cannon rounds are exploding around me, raising puffs of earth. Again, I am hit.
There is another 190 starting a run on me and several more 190's in the air.
The fire and smoke ahead is from burning buildings at 58.

The other FW 190 makes a run at me (upper right). The ground explodes around
me from the cannon rounds, and I am hit some more. My engine is beginning to
smoke, and I am racing as fast as I can for the treeline ahead. I am amazed
that I have lived through all these FW attacks. In the distance, visible is
a line of anti-aircraft fire from 57, shooting at some FAF planes out that way.
Also, to the right in the picture, the second bridge is back up, and Russian
tanks are starting to cross the bridge. I actually make it to the tree line.
I check damage and find that my turret (main gun) and machine gun are disabled.
I'm useless for attacking.
Since I'm useless for attacking, I decide to see if I can run back to 57. I
can accomplish two things that way: saving a vehicle and distracting FAF fighters.
They might attack me instead of one of the vehicles that can still attack. This
is a picture of me heading back to the river. The second bridge is back down
again (fire and explosion in the upper right). I don't know if any tanks made
it across -- this picture was taken only shortly after the previous one. KKEN
is about to make to to shore, but he is under attack from the FW 190 upper left
(splashes in water are hits directed at him). I actually make it back to 57
and get a fresh LVTA4.
I launch from 57 in my fresh LVTA4. I go to the river bank and wait a bit for
the FW 190 cover to dissipate. I also get command's permission to get two members
of VVS10 (Monday and Skech) up in Bostons, starting a mission to hit 58. Once
I finish that, the 190's have moved off a bit, and I head for my river crossing.
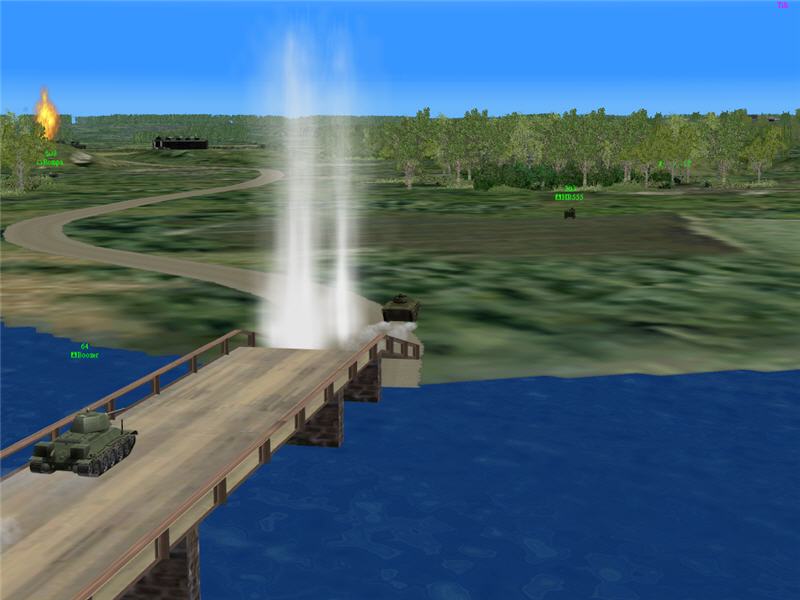
As I am almost in the water, the bridge comes back up. I abort my river crossing
and head for the bridge. This is a picture of me making it across the bridge
(center of picture). A FW 190 has just tried to shoot me but hit the exit ramp
of the bridge instead. Rompa (left) and HB (in front of me) have made it across
in front of me. Boozer is just behind me. I think the only one left from previous
crossings is Mag1c in an LVTA2 in the trees ahead of HB.
Rompa and Boozer (in T-34's), and I (in my LVTA4) move forward at speed. HB
hangs back in his M3. I hear calls of an enemy Panzer somewhere, but press forward
to the trees. I go into a treeline east of base, maneuver to get at least a
little cover, and start shelling the fortified tents. Ack at 58 is still up.
I can see them shooting, but I can't see the guns. I don't want to move into
their fire in my LVT. I can see plenty of tents and keep shelling them (explosion
upper right is a tent).
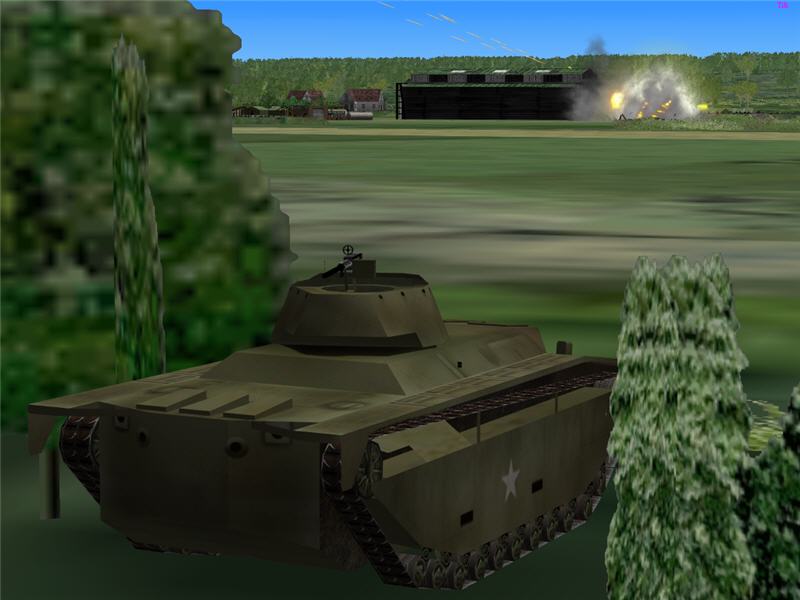
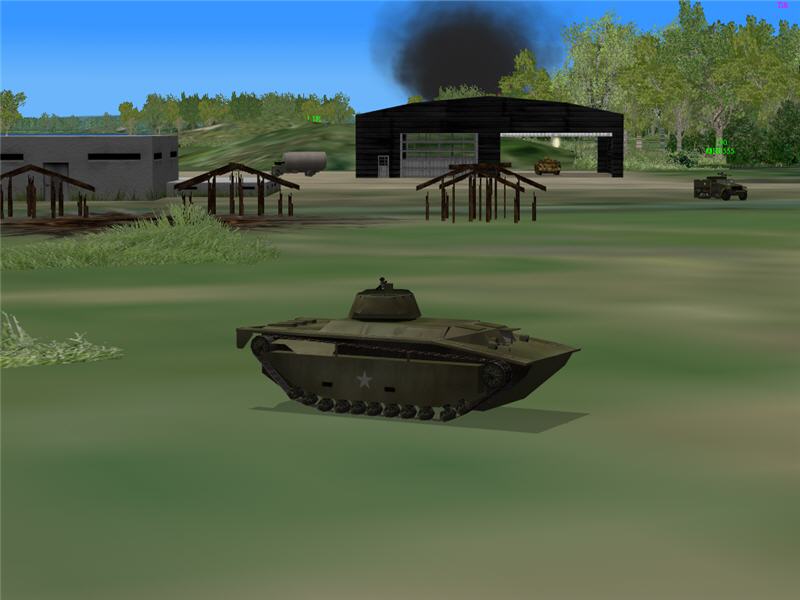
I shell tents for a while and see Rompa move in (upper right). I move in, too,
and continue shelling tents (explosion upper right). Boozer announces that he
got the Panzer. The vehicle hangars are down (fires upper left) -- Rompa got
a kill on one of them. Our aircraft or first waves of vehicles across did a
good job softening up the base.
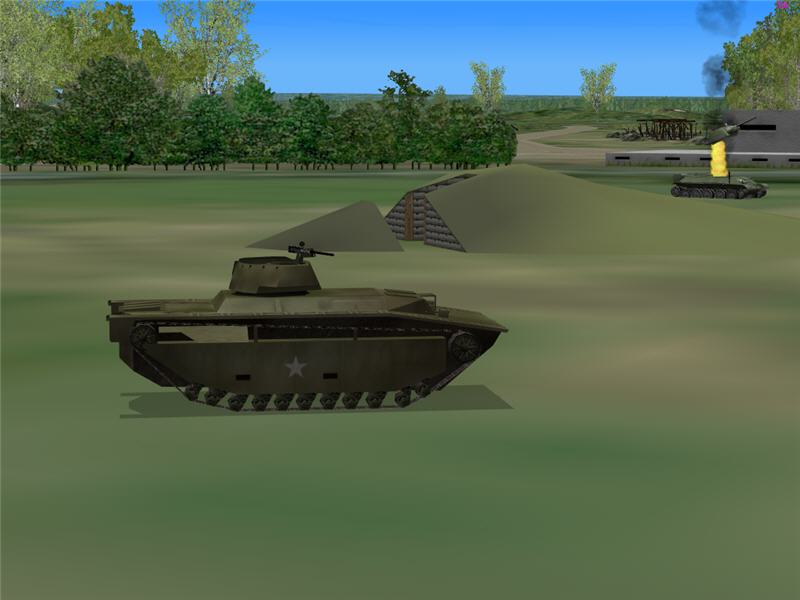
I move up more. Boozer (upper right) , Rompa (off picture to the right), and
I (center) are now near the map room, taking out all the fortified tents. As
Boozer, Rompa, and I take down the tents and fortifications, several things
happen in quick succession. First, one of the vehicle hangars comes up. Second,
HB races up and parks his M3 in the vehicle hangar. Third, an enemy Panzer appears
in the vehicle hangar right next to HB (upper left).
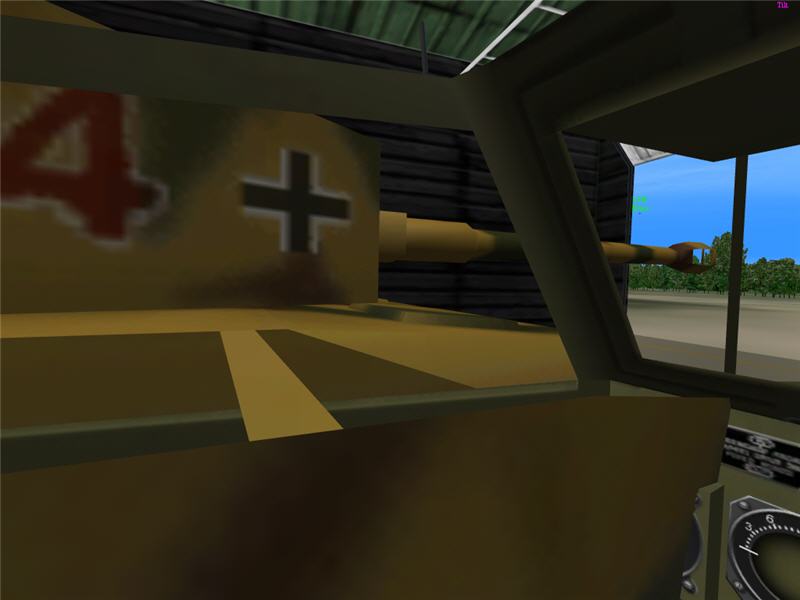
HB's view out the driver's side window of his M3. That's a Panzer right next
to him.
Someone shouts about the VH and the Panzer. It must have been Rompa, as Boozer
and I had our backs to the VH. I immediately swivel turret left. Seeing HB fleeing
from the Panzer but right in front of it, I don't bother to take time moving
or aiming all that well. I take the most immediate shot I can just over the
top of the tent frame at the Panzer. My shot misses him and hits the hill behind
him. I'm thinking HB is dead, then I'm dead -- one Panzer hit each.
Fortunately, even though HB drove across in front of the Panzer, the Panzer
seems to have first seen Boozer. The Panzer shoots Boozer from close range and
rear quarter. Boozer's turret explodes off (upper right), but in the meantime
HB is able to make it around the line of bushes, totally blocking him from the
Panzer. Now I have time to think how screwed we are. An enemy Panzer is up,
a VH is up (so there can be many, many Panzers at any moment), and we've got
one T-34 in the immediate area. I gun my engine, put the map-room hill between
me and the Panzer for partial cover, get my front hull pointed at the Panzer,
and swivel my main gun toward him. I'll likely die, but I might be able to disable
his tracks.
Just then, just as I am about to shoot at the Panzer, there are explosions all
over the place. The Panzer explodes. The whole VH explodes. Ye gods! It turns
out that Skech and Monday (in their Bostons) both hit the VH right at this moment!
Skech's drop blew up the Panzer (and actually a second Panzer that had just
spawned, which was obscured by the first Panzer) and softened up the VH, and
Monday's drop landing two seconds later finished off the VH. What a miracle
of good luck! This picture is the moment of the VH exploding. Note the turret
of a Panzer lifting rocket-like into the air on a column of smoke. HB is to
the right of the picture, behind the bushes. (t=15:22:02)
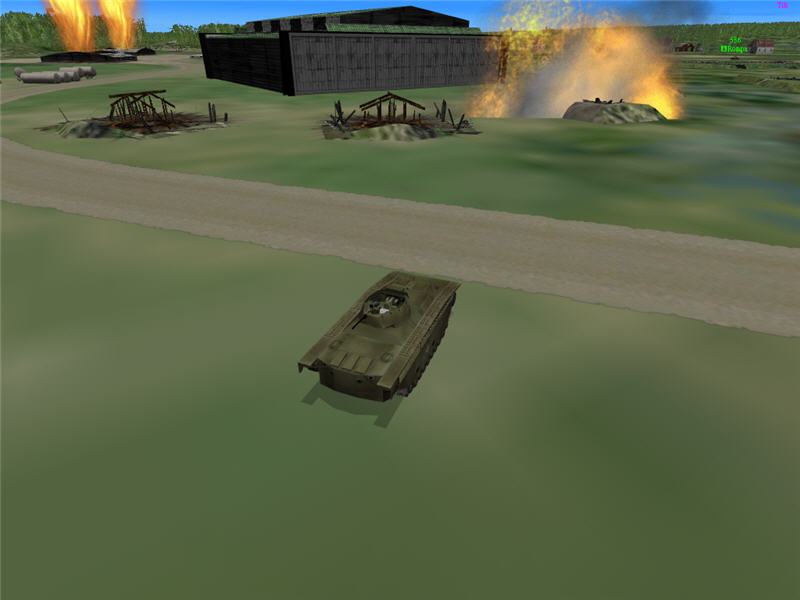
We quickly take down the rest of the tents, and HB releases the troops. This
is a picture of the moment of capture at 58, with HB in upper right, outlined
by demolition of the map room. Man, what an exciting capture! Talking to HB
later, it turns out that he saw the VH appear and went in on purpose as the
best place to be, feeling that enemy tanks don't look right next to them in
the VH for targets. He would have stayed there, except he heard Skech and Monday
coming in to flatten the hangar, so he got out quickly. I don't think I'd have
the guts for such a hiding place! (t=15:23:24)
Bostons
With 58 captured, VVS10 was ordered to get in Bostons. Our objective was to
keep bombing bases such as 59, 60, 61, 66, 68, 76, 68, 85 -- any base that can
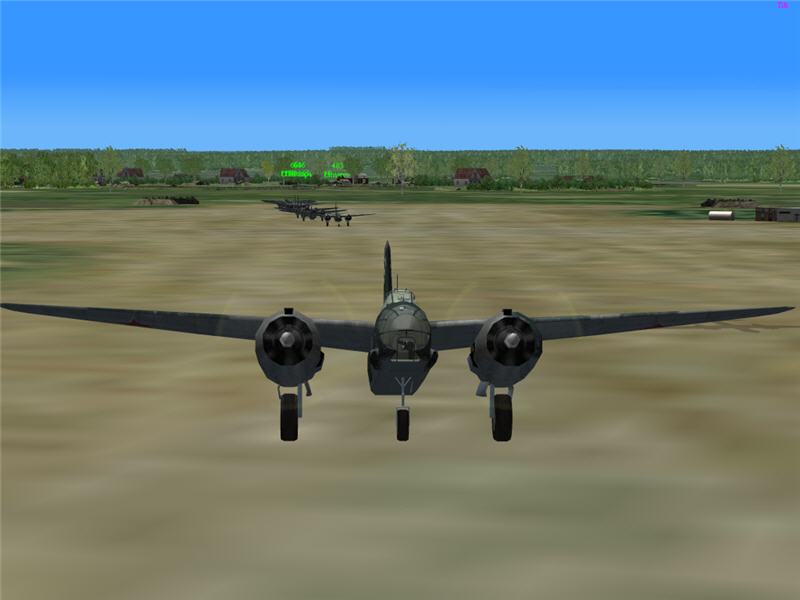
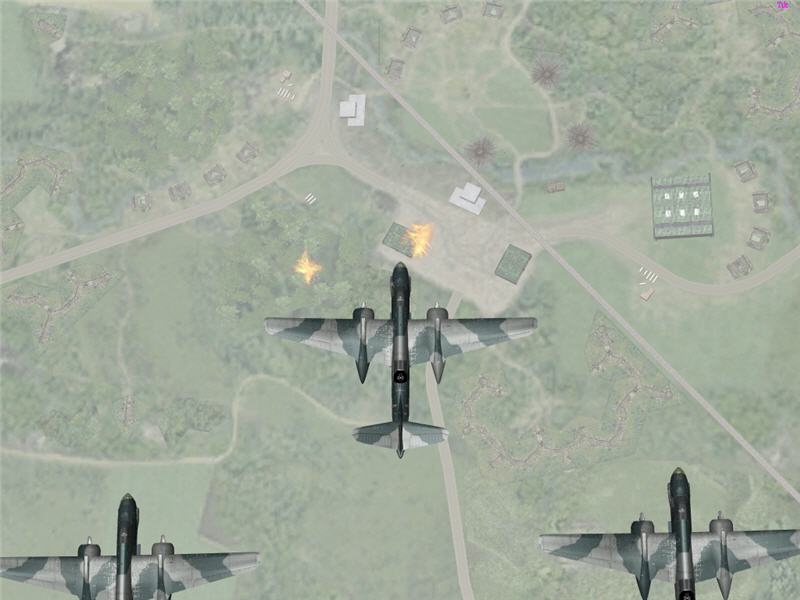
spawn tanks close to one of our key captures. This is a picture of me, Hawco,
HB, and Rompa taking off in our Boston III's. Skech and Monday are already up
(returning from their awesome mission to 58). Boozer is already up in a P-40E
as our lone escort -- we won't have any other escort. Our first targets are
for HB and I to attack 59 and for Rompa and Hawco to hit 61. (t=15:28:04)
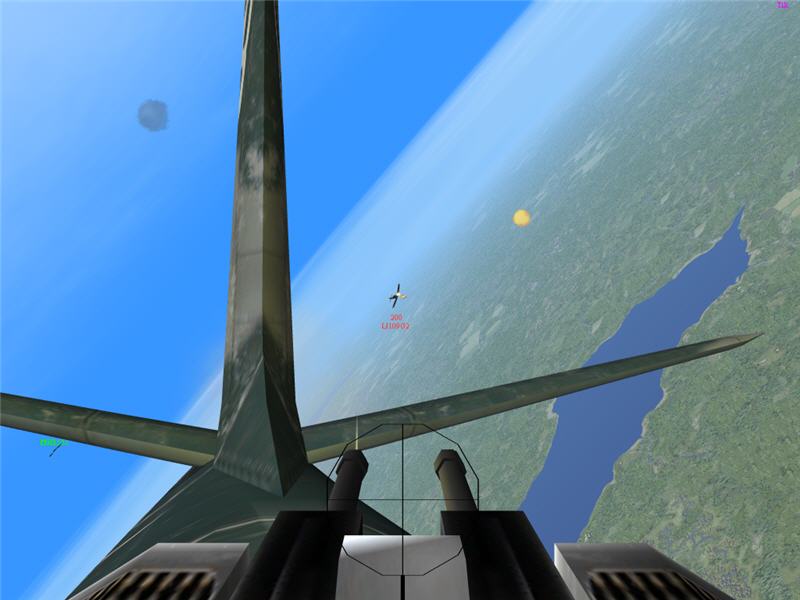
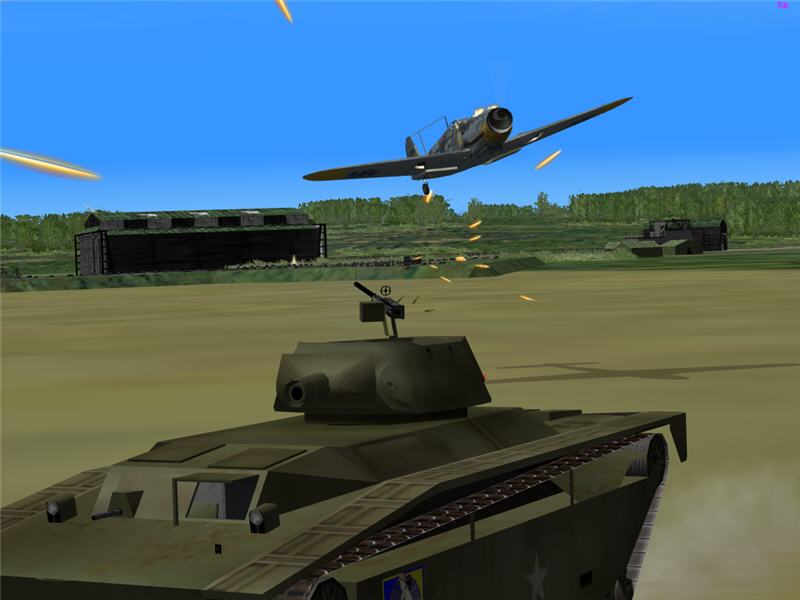
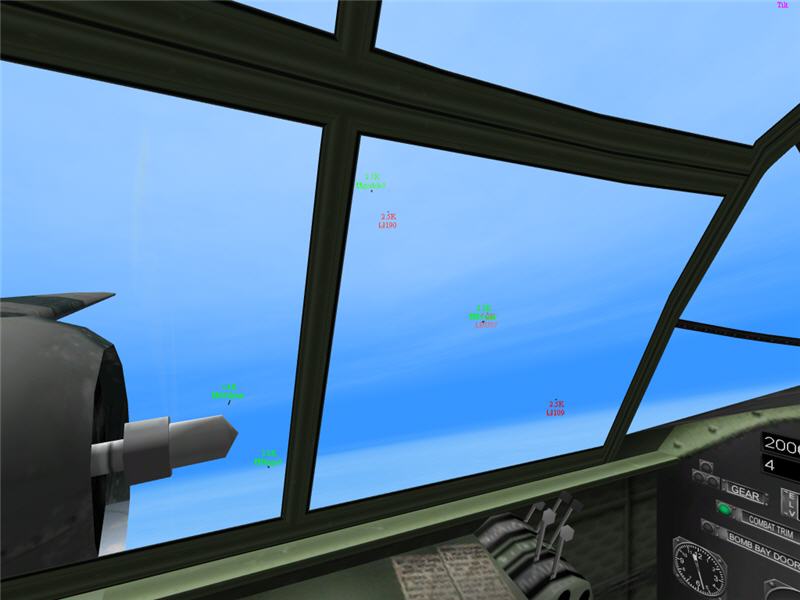
On our way in, I am attacked by a Bf 109. This is a picture from the gunner
position while the Boston turns and while I shoot at the 109. I have just landed
some hits on the nose of his plane (the bright flash). I put more hits into
him and knock some parts off his plane. He in turn shoots down one of my drones,
and I lose another drone in maneuvering. I think I'm dead, but I manage to get
a little distance, and Boozer comes diving in to the rescue. He shoots the 109
down before the 109 has a chance to chase me down again and kill me. Thanks,
Boozer! That also kept the other VVS pilots safe, as 59 and 61 are in the same
area. HB is visible in the left of this picture.
59 turns out to be down already, so HB and I redirect to 60. HB takes out the
one VH at 60, closing that base, and Rompa and Hawco got one of the VH's at
61, so I redirect to 61. I have only one bomber (not a formation of three),
so I put my salvo at 4 and my delay at 0.10 (for a tighter pattern, although
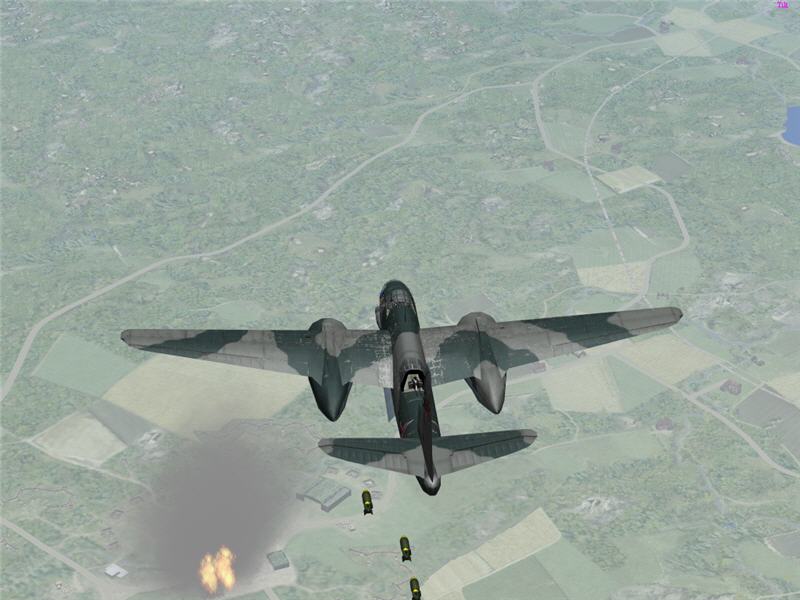
it is then more difficult to hit). This is a picture of my drop at 61. After
my drop, I veer away sharply to get out of there. I know there are enemy fighters
around.
This is a picture of my bombs exploding at 61. The drop is well aimed (the VH
is at the center of the cluster of explosions), but, alas, my one load of bombs
is not enough to destroy the VH.
The next targets were given and retracted a few times. The Finns had taken 72,
and we were trying to retake it. If we are in the process of taking it, we don't
want to bomb it. If we are having a lot of trouble retaking it, we want to bomb
it (which will make retaking easier). So, as we were inbound and as the battle
raged back and forth, there were times where command wanted everything hit,
only VH's hit, only tents hit, or nothing at 72 hit. I knew I'd need to keep
checking right up until drop on this one, as it was a hotly contested base with
rapidly evolving conditions. I kept a watch on the radio and talked on the range
mic when I was close enough. A few seconds from drop, I was given an abort order,
and did so. This is a picture of where I was at 72 around the time of the abort
order.
On the way out of the 72 area, I came across a region with some FW 190's and
Bf 109's, but they were getting engaged by some VVS fighters (including Boozer).
I veered out of their way, and I wasn't attacked. Boozer, thanks again!

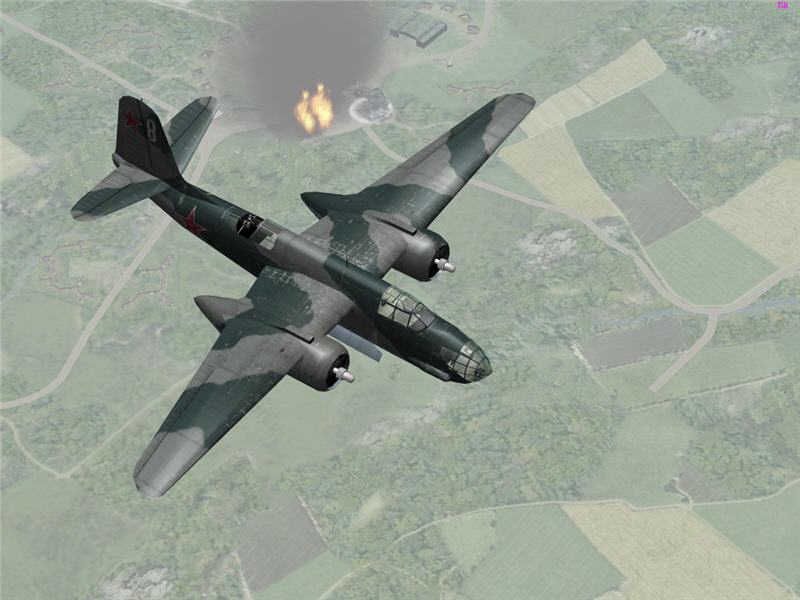
A little out from 72, I redirected to go hit the VH at a59. HB had attacked
it and weakened the VH there, but not destroyed all of it. This is a picture
of my drop.
A picture of my hits and destruction of the VH. At this point, it was nearly
the end of the frame, and all pilots were recalled to ground vehicles to protect
our vital bases. The Finns were mounting a strong push for 72 and 55. (t=16:38:37)
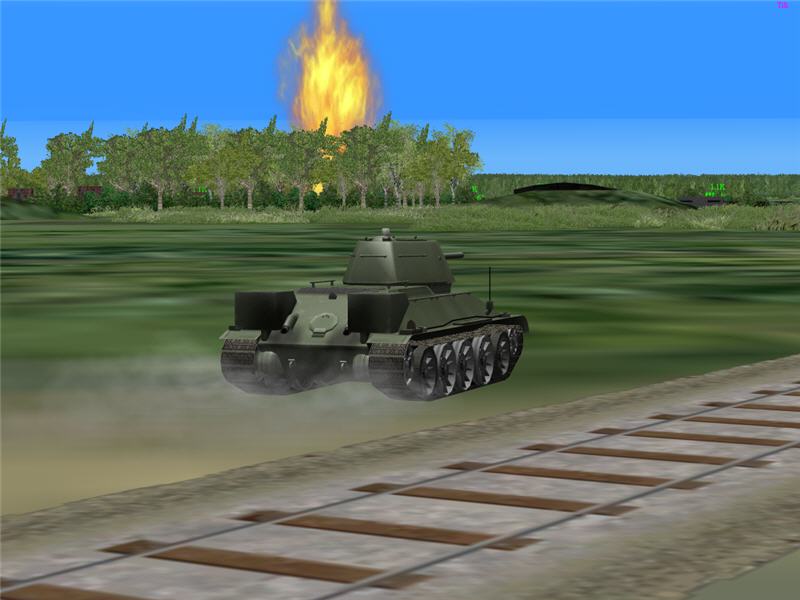
Command wanted spare people at 72, so I headed there. Unkown to us at this time,
the Finns were very close to capturing 55, which would have been closer for
me to get to than 72. This is a picture of me in a T-34, racing to 72 (the source
of the fire) at the end of frame.
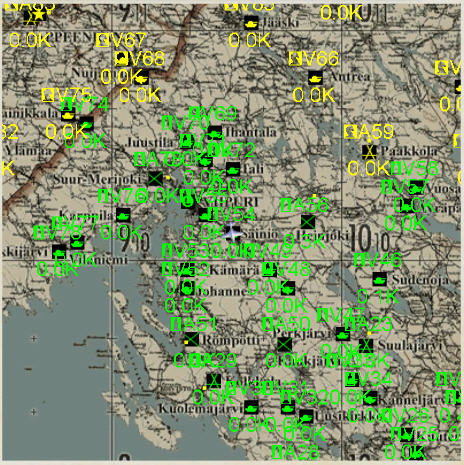
The clipboard map at frame end. We hung onto 55, apparently just barely. There
are victory conditions for controlling 55 and some collection of 77, 72, 69,
and 58.
Conclusion
I ended the frame with no deaths (thanks to Boozer), one VH destroyed, one
assist (Bf 109), and 11 fortifications destroyed.
VVS10 did an excellent job in this frame. We captured 56; we played a key role
in the capture of 58, both on the ground and in the air; and after that we destroyed
some VH's at 61 and 72 and completely shut down some other enemy bases (59 and
60).
It was great flying and fighting with you guys! A salute to my excellent comrades!
by Brooke P. Anderson
e-mail: brooke@electraforge.com
Click here to go back to my scenario page, for
pictorials on other frames of this scenario, for pictorials of other scenarios,
and for links to other content on my site.