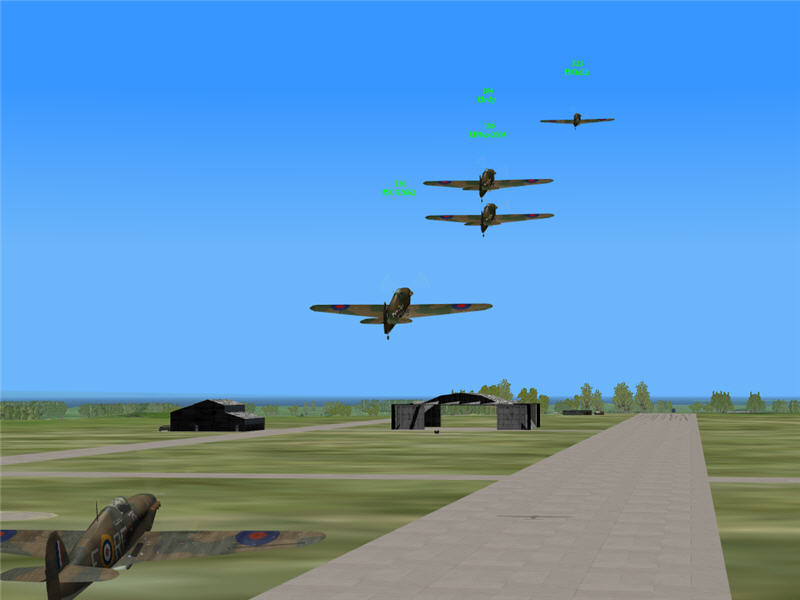
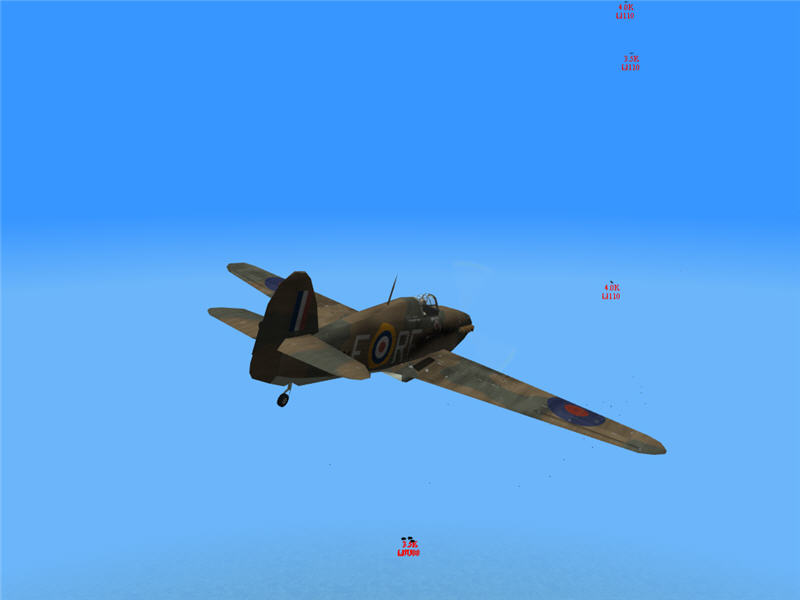
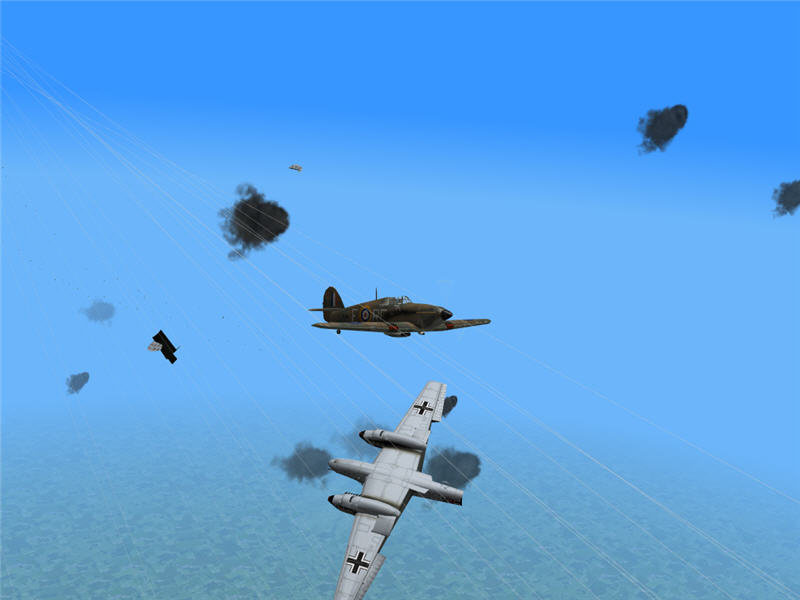
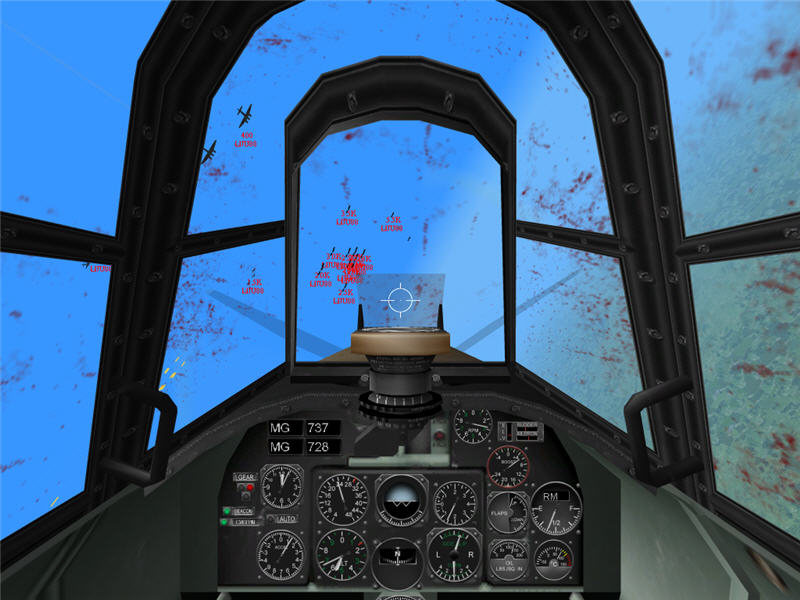
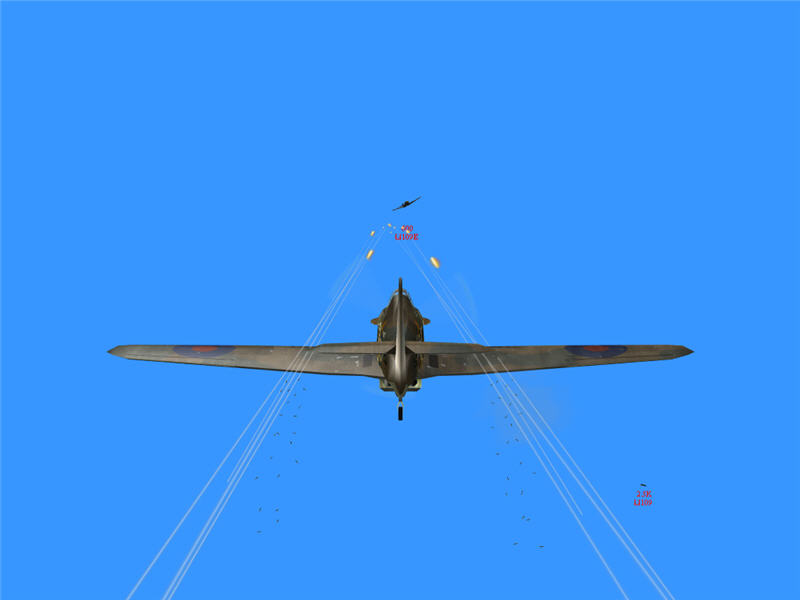
Pilots of 56th Squadron taking off from Biggin Hill (A8) in their Hurricane Mk I's. From lower left to upper right: me (Brooke), OOZ662 (the GL), Mace2004, ndy, and Chili. Other pilots in 56th are not shown (off picture). t=0:00:00
Battle of Britain 2006 was a scenario that ran in September, 2006 in the multiplayer on-line air-combat simulation Aces High.
Pilots of 56th Squadron taking off from Biggin Hill (A8) in their Hurricane
Mk I's. From lower left to upper right: me (Brooke), OOZ662 (the GL), Mace2004,
ndy, and Chili. Other pilots in 56th are not shown (off picture). t=0:00:00
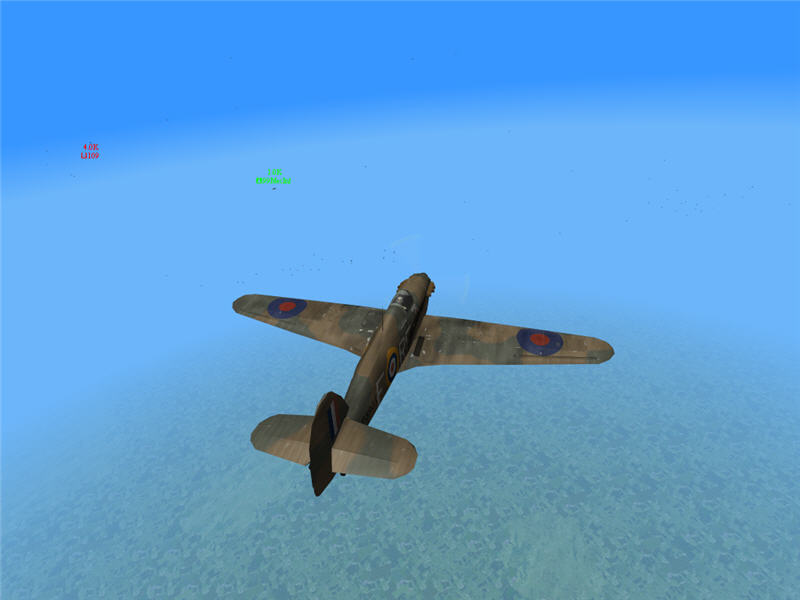
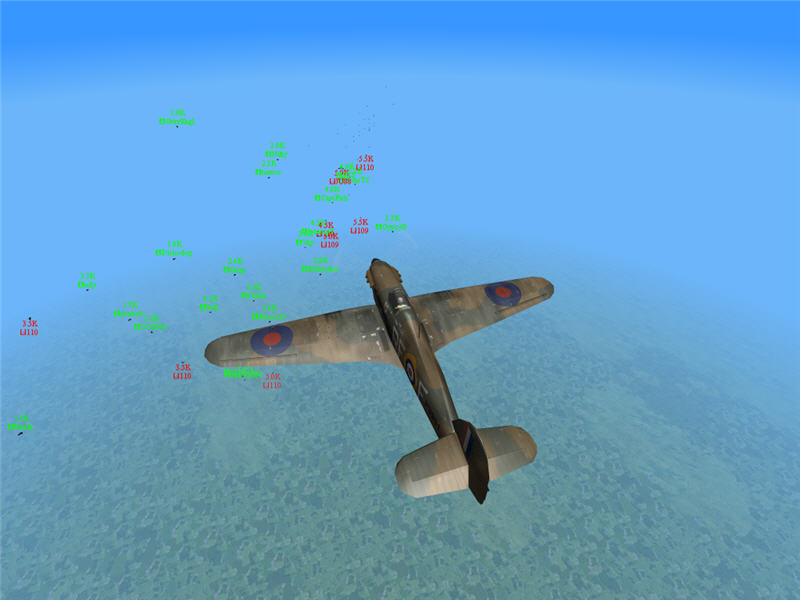
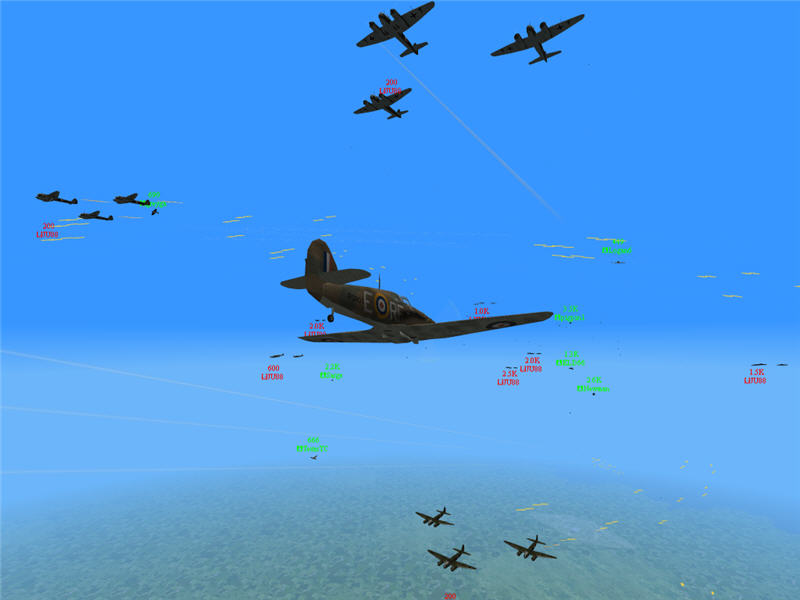
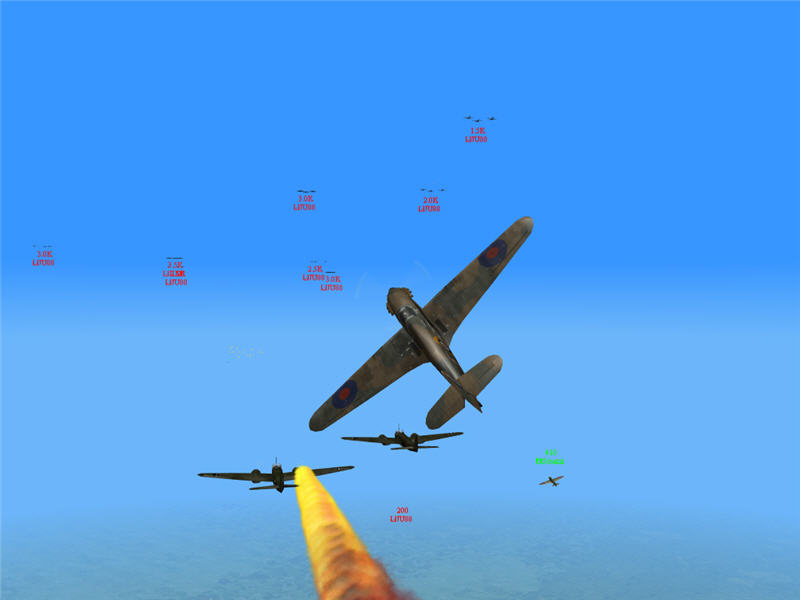
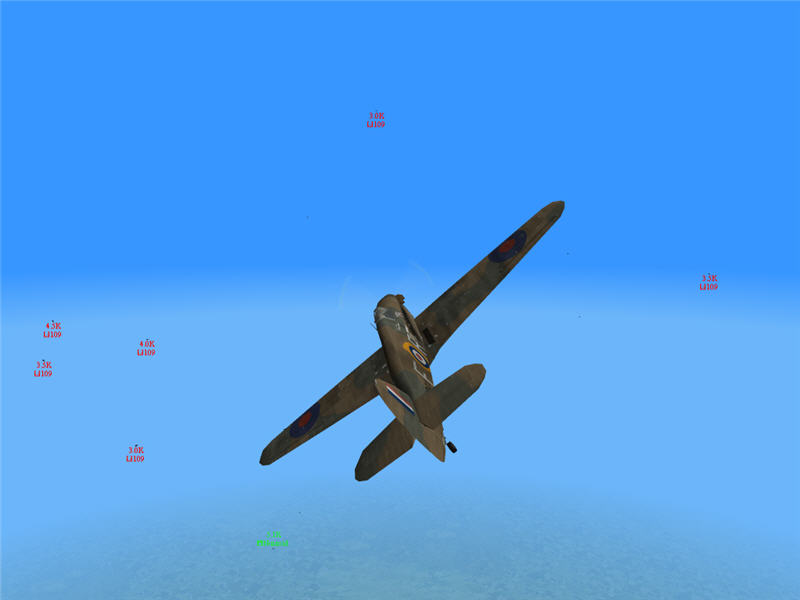
We were vectored toward a large Luftwaffe strike incoming for London. I was
forward and left of a large collection of squadrons. Here, I have contact with
the Luftwaffe raid, with one Bf 109 to the left and, barely visible, two large
groups of bombers. One bomber group is visible as faint dots or speckles forward
left of my Hurricane's nose, and the other is forward right. I'm at about 25k
altitude here.
A view behind me as we establish contact.
A view to my left as I head for the front group of bombers. Luftwaffe escorts
are working to engage our forces. They are mostly Bf 110's with some Bf 109's
mixed in. I try to avoid these escorts, staying on target for the front bomber
group. 99MecInf, asw, and Fencer51 are engaging some of the 110's.
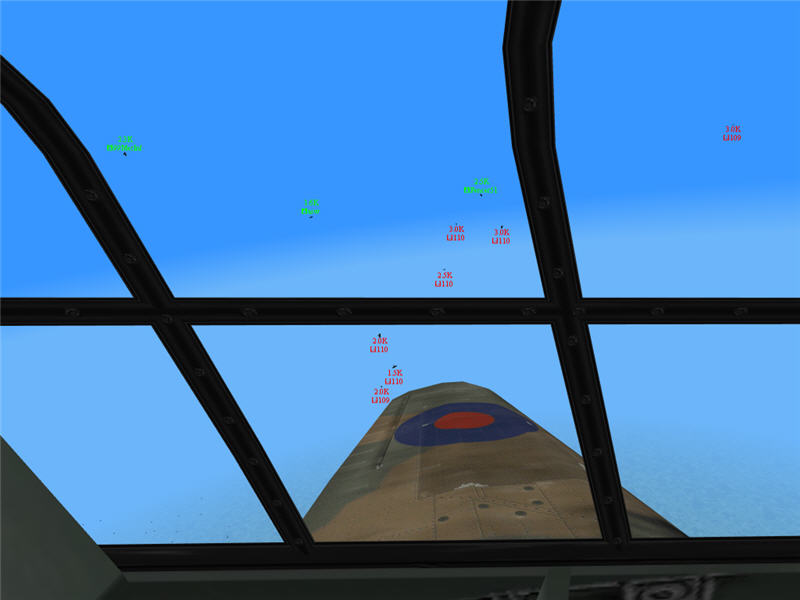
As I press ahead, I come in contact with high Luftwaffe escorts to the rear
of the front bomber group. There are six Ju 88's (two formations of three, very
close together) below and forward of me and three Bf 110's forward and ahead
of me, with two at higher altitude. The 110's cause me to evade rather than
continuing to press on to the Ju 88's. Again the faint speckles (visible in
the picture near my right wingtip) are more bombers.
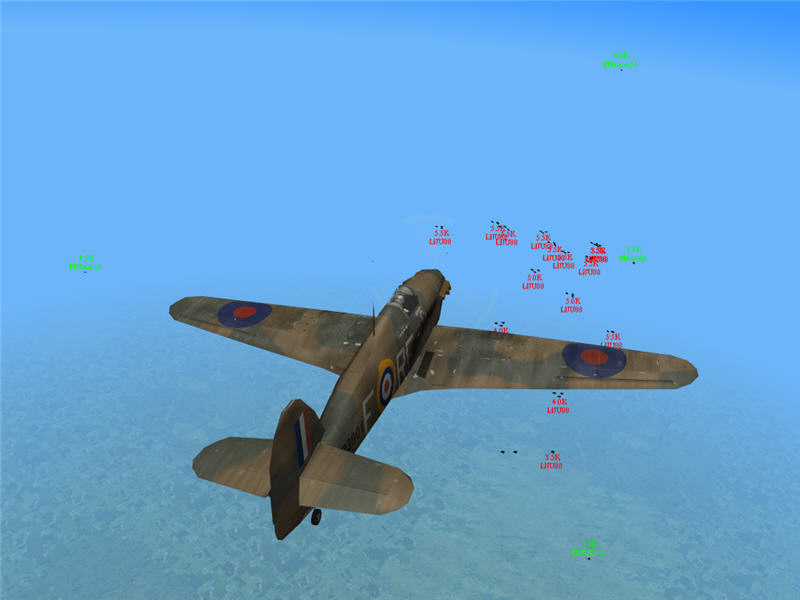
I evade the Bf 110's that make a run at me, lose some ground, then press ahead.
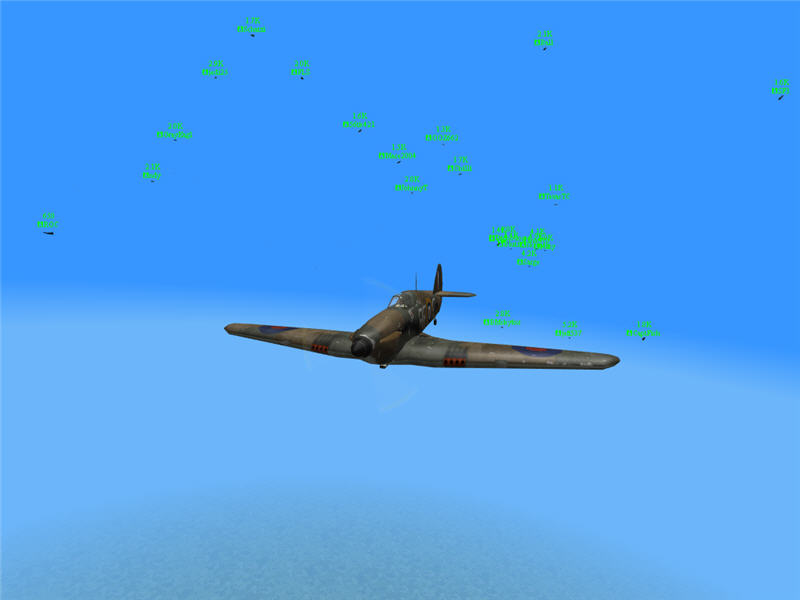
Many other RAF get ahead of me, pressing forward, and are now engaged with escorts
and trailing elements of the bomber formation. Here you can see lots of RAF
fighters, some LW escorts, and many, many faint dots ahead that are bombers
in the bomber groups.
As I move up the tail of the formation, I again tangle with a Bf 110, don't
get any shots on him, but do end up chasing him a bit. I manage to drive him
off, but I don't chase him far. I stay on heading toward the bombers and don't
loose too much altitude in the engagement.
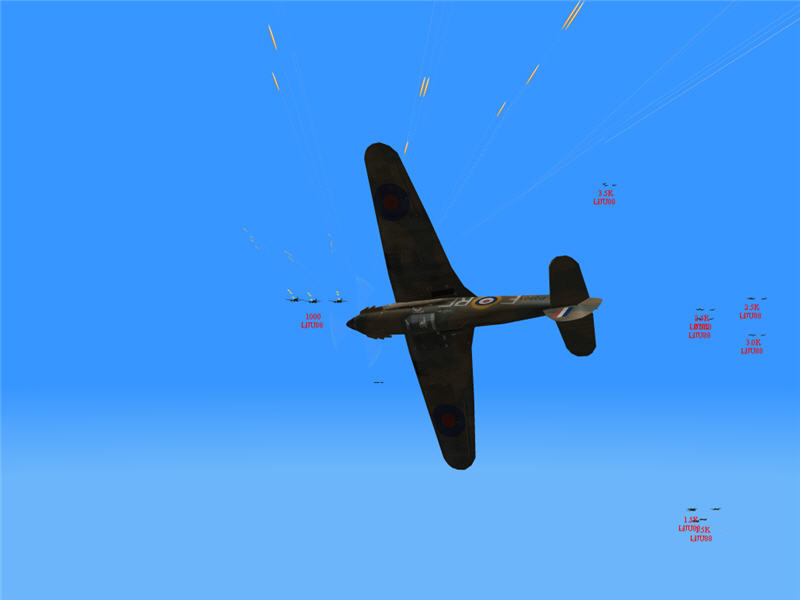
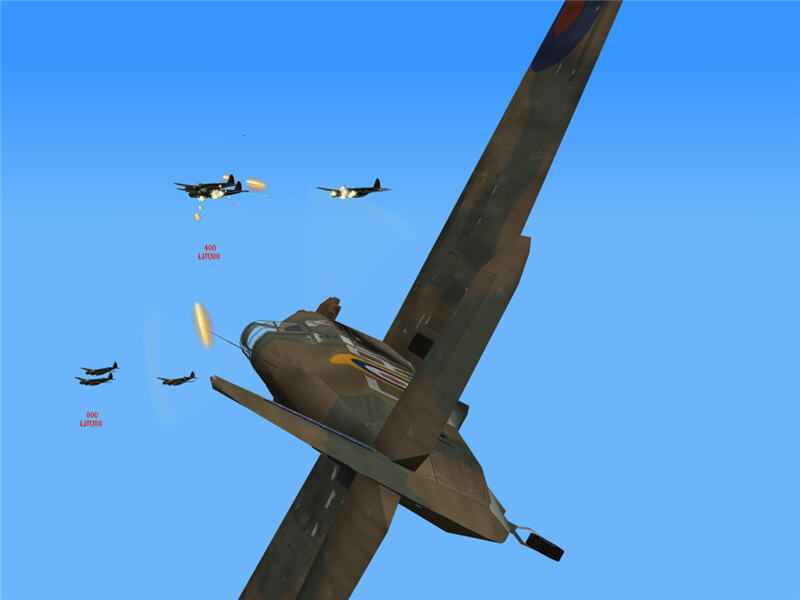
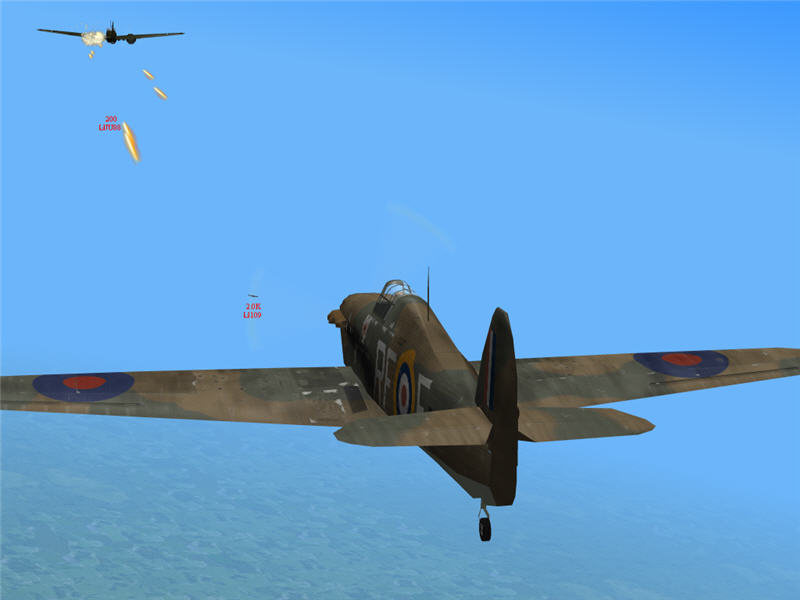
I tangle with another Bf 110, this time getting shots on him. This is a picture
of me shooting off part of his tail and scoring many other hits. Ahead of the
110 is TexasTC in his Hurricane (green icon).
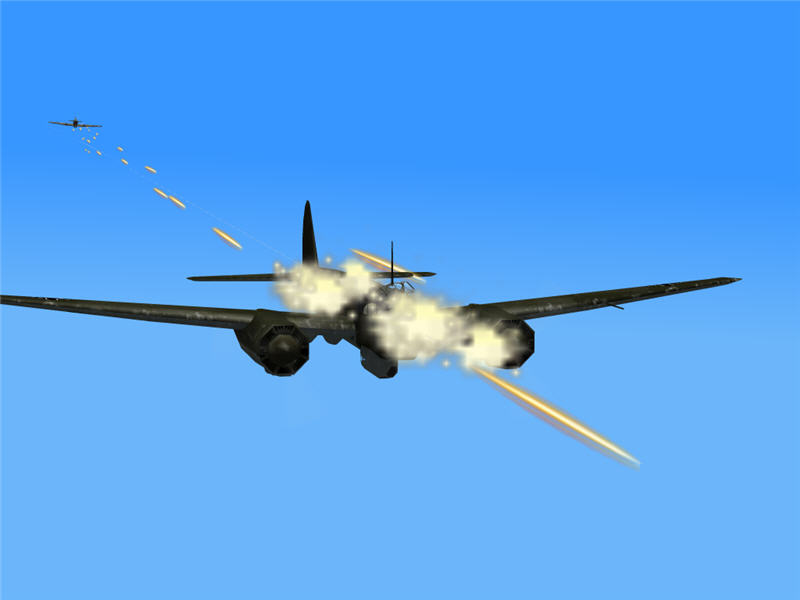
I blow off the Bf 110's tail. The 110 violently sumersaults, and I barely avoid
colliding with him, pulling lots of g's to miss him by about 10 feet. The black
splotches are AAA explosions from ground batteries shooting at the enemy aircraft
in the area. The gray lines are trails from my gunfire of moments ago, which
shows what direction my Hurricane was travelling before I pulled up hard.
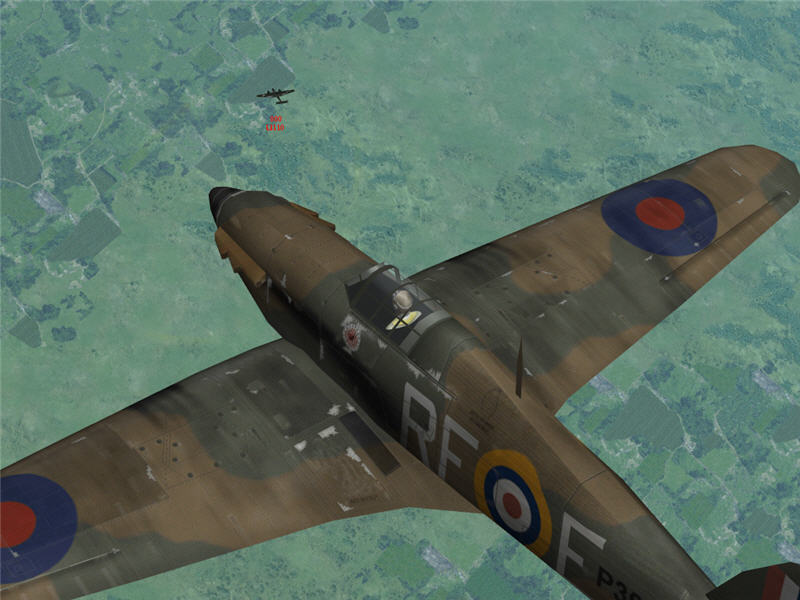
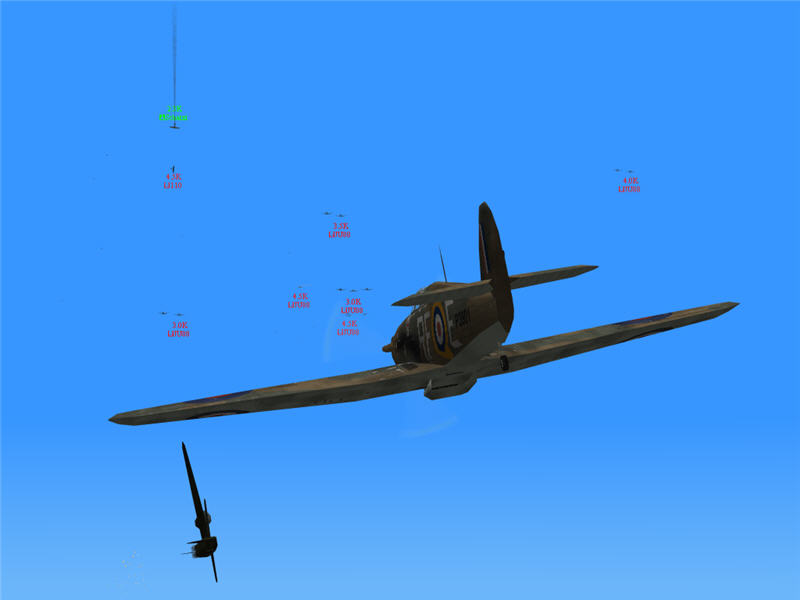
I press forward and come upon bombers. Other RAF fighters visible in this picture
are (from top to bottom) Fencer51, Boozer, Nutzoid, and OOZ662.
I find a bomber out alone and savage it. Unfortunately, it savages me back.
I work it over with a good, long amount of fire, but it doesn't go down. Meanwhile,
its gunner is putting hits into my plane. t=0:39:00
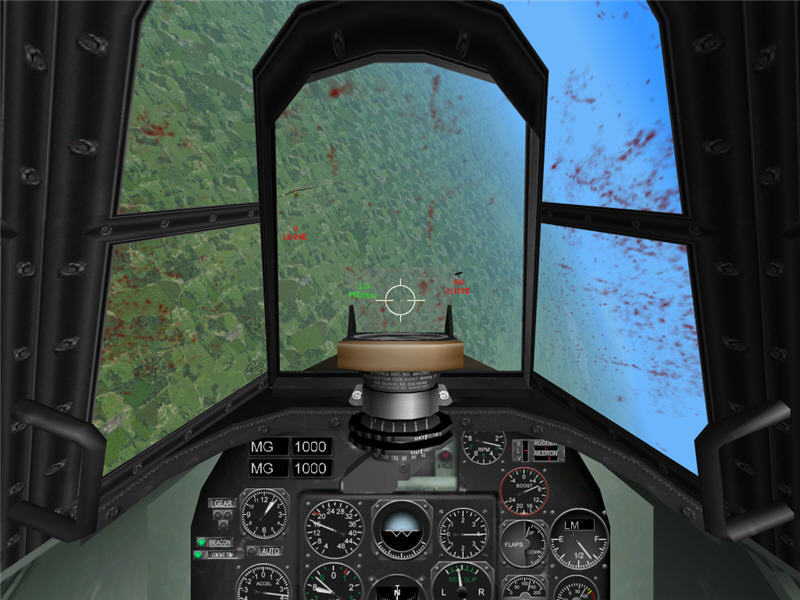
Eventually, I get a pilot wound (as evidenced by all the blood splattered over
the windscreen). I veer off before I start to black out due to loss of blood,
hoping someone else can put in what is probably is the single remaining bullet
needed to down this Ju 88. After I black out once and come to, I judge my ability
to continue fighting and decide to press on toward the bombers again. Two other
RAF fighters visible in this picture are Fencer51 (left) and RamzeyI (center).
I can't catch the lone bomber I was fighting, but I come across some others
close enough for me to attack. I try for them (such as the Ju 88's about 400
yards to my upper left), but blackouts make it difficult for me to line up.
I don't want to be sitting off the tail of a bomber formation blacked out while
it shoots at me. So, I try to get into decent position, black out, come to,
then go in for the shot, but I am not able to time it well enough to get hits
on bombers. For what seems like forever, I fly along among the bombers, trying
not to get within about 1000 yards and hoping at least to be distracting to
them.
I take some more hits to my plane from bomber gunners and finally call it quits,
veering off and diving out. t=0:44:23
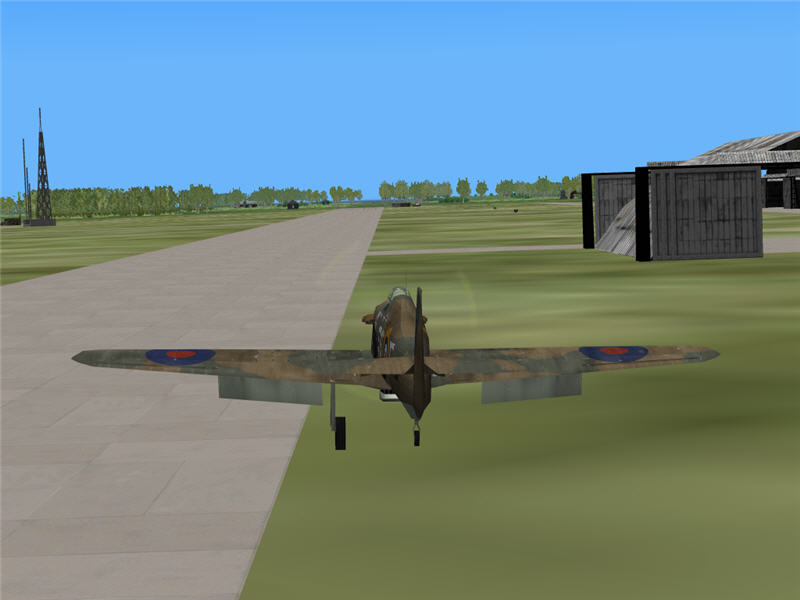
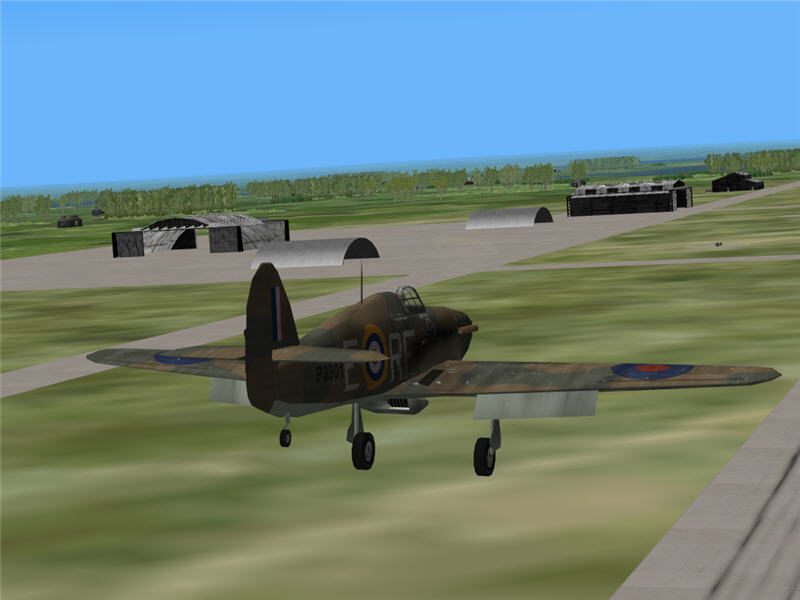
A picture of my approach to land. I didn't notice that my gear was out -- I
was too absorbed in trying to get into the landing pattern and to position my
plane between bouts of blacking out. Here, I have lined up as best I could manage
and black out right as I'm about to touch down.

The result -- but I am at least still alive. I conclude this mission with a
ditch. The LW hit London, their survivors travelled back across the Channel,
and they got ready for another raid on London.
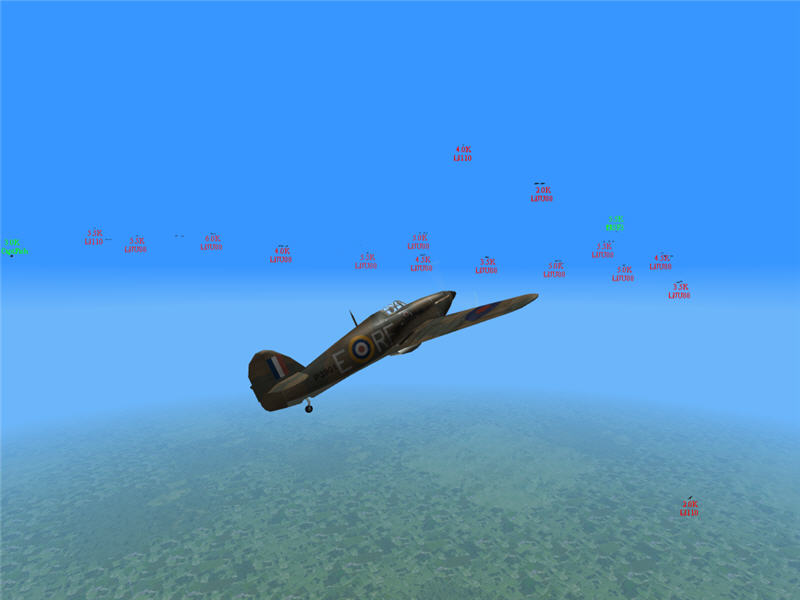
I take off with 56th Squadron again, and again we are vectored to the incoming
LW raid for London. We are hitting the forward elements of the raid as it crosses
onto British soil. This time, I have lots of altitude on the bombers, am in
front of them, and decide to try a frontal attack. Many RAF fighters are already
mixing it up with these incoming Ju 88's (from left to right, Sarge, greyga,
pigpin1, TexasTC, CBFAS1 right by another I can't make out, Logan6, ELD66, Newman,
cbizkit, and Fencer51).

My frontal attack on a formation of Ju 88's. I'm at about 20k altude and going
380 mph indicated (460 mph true). My attack is marginal. I do get lots of hits
on the bombers, but I don't hit the pilot, which is the main goal of a frontal
attack. Other RAF pilots are mixing it up, and tracers are visible from the
various Ju 88 gunners are firing. (RAF pilots from left to right are TexasTC,
pigpin1, CBFAS1, ELD66, Newman, and Logan6.)
A picture of me zooming through the formation, picking out a next formation
of Ju 88's to attack head on. (RAF pilots from left to right are greyga, TexasTC,
Sarge, pigpin1, ELD66, Newman, and Logan6.)
I am firing on my next set of Ju 88's. I didn't find any lined up directly in
front of me -- these are the best targets of opportunity I find. I do get hits
on two of the bombers. Again, though, I don't manage to kill the pilots.
A picture of me zooming through after the previous frontal attack. No other
Ju 88's are close enough to my direction of travel to be a good target. (Visible
to the left is Sarge.)
Out the back of the bomber formation, I go into an Immelman. My intent it to
come back down, then run up the tail of the bomber formation that I just came
through. Unfortunately for me, there are many LW escorts at the back of the
bomber formation, with plenty of speed. I don't get a chance to run back up
the tail of the bomber formation before I am busy with escorts. There are a
bunch of other RAF fighters entangled with LW escorts back here, too. (RAF pilots
from left to right are taxi, Sarge, pigpin1, Newman, Zippy41, CBFAS1, ndy, ELD66,
CEMENT, and hawco.)
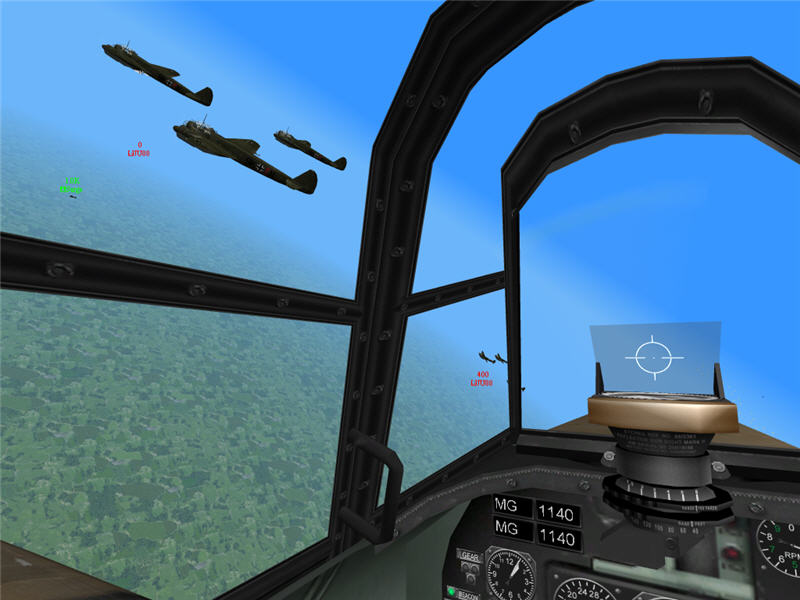
I go after a Bf 109E at long range, but miss. Bullet casings stream back from
my eight Browning 303's. After this, he rolls over and dives, and I follow.
t=1:45:06
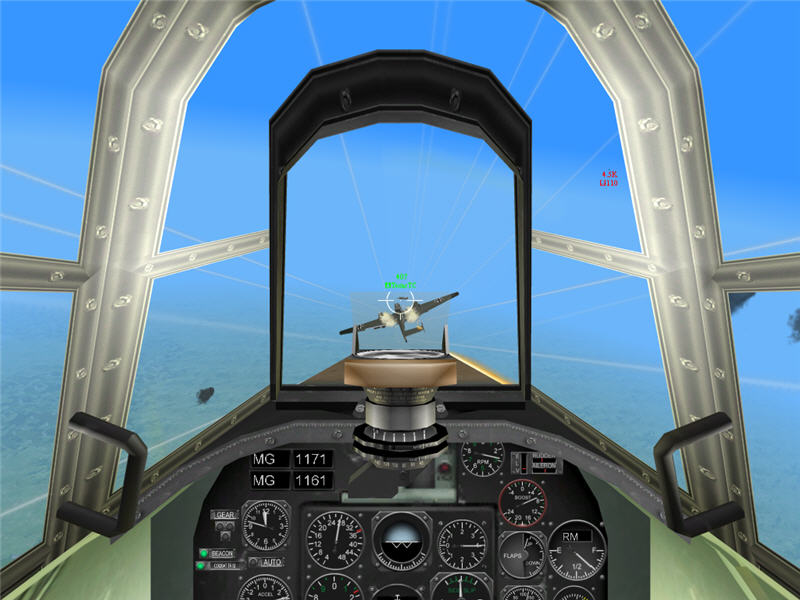
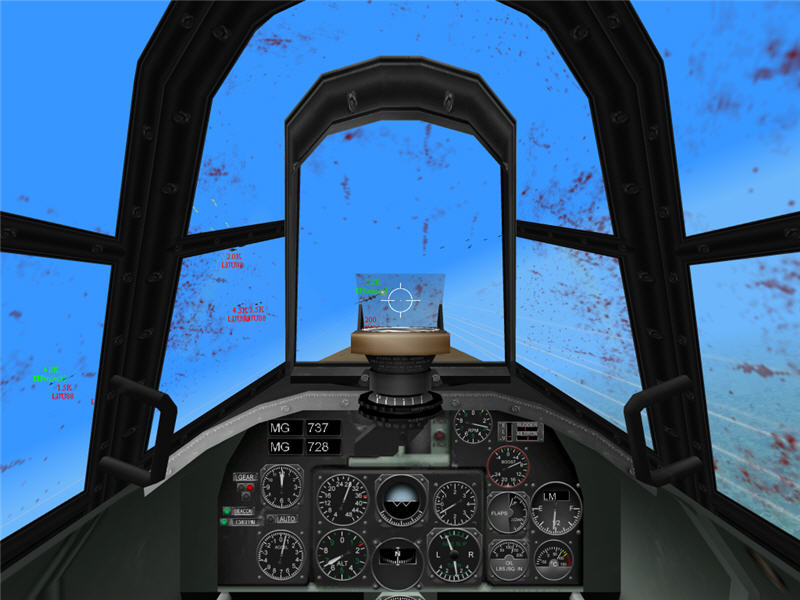
I mix it up with another 109E (the one right of my gunsight in this picture)
and am reeling him in. I'm getting him to turn hard, and my Hurricane will easily
outturn his 109E now that his has lost his speed advantage. But there is another
109E (to the upper left of my gunsight, being chased and targeted by Krypto).
Under very difficult circumstances, he gets a brief chance for a headon snapshot
at me, which he takes. In that brief burst of fire, he manages to hit me (the
pilot) and to kill me instantly -- this is a picture of that instant. Now after
the passage of time, I congratulate the LW pilot on the shot, but I must admit
that there was much swearing initially. (The log shows Krypto shooting down
that 109 seven seconds after he got me.)
I take off from near London, use all of my WEP (war emergency power) to climb
and to get into position. I have just enough time to get to altitude as the
Ju 88's start their final approach on London. I'm in front of the bombers as
they near London, so I try another frontal attack. I don't get any hits this
time in my frontal attack, but I do a quick Immelmann (no going through the
whole formation this time), and dive back down onto the bombers.
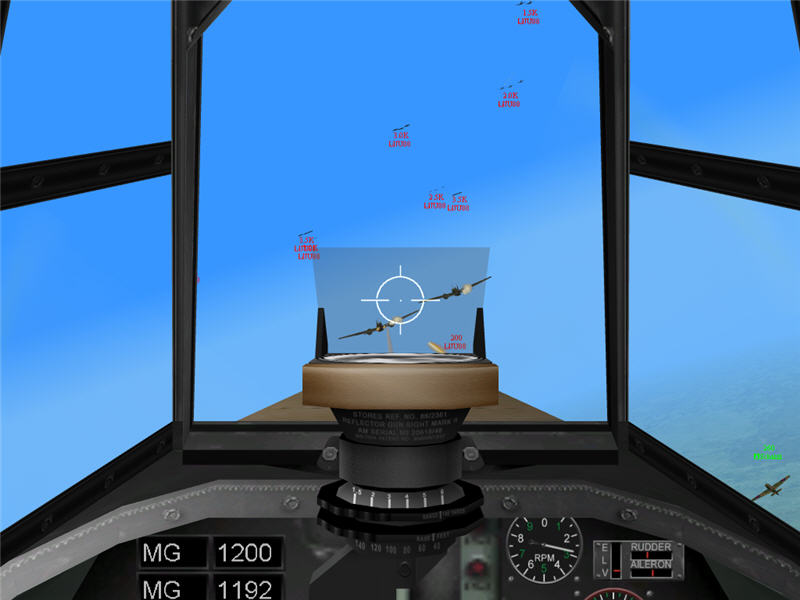
I pick out a pair and let them have it. This is a picture through my gunsight
as I pour fire upon the leftmost Ju 88. Schatzi (lower right) is attacking this
same pair. t=1:57:56
I set the bomber's right wing on fire and then veer off, as I am taking fire
from the gunner.
I line up another Ju 88, which is flying alone, and concentrate fire on its
left wing root.
I blow off its left wing. Schatzi above is going after another Ju 88, too, but
is now trailing smoke from her Hurricane. t=2:00:10
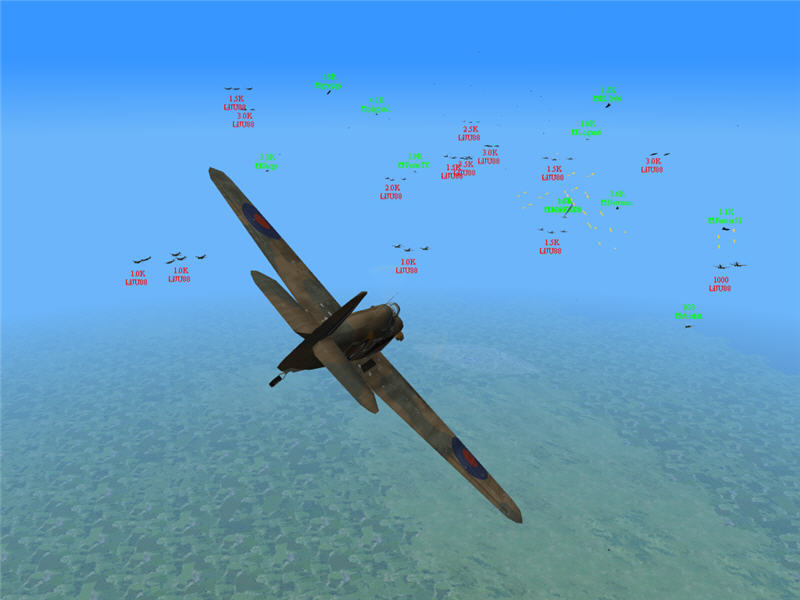
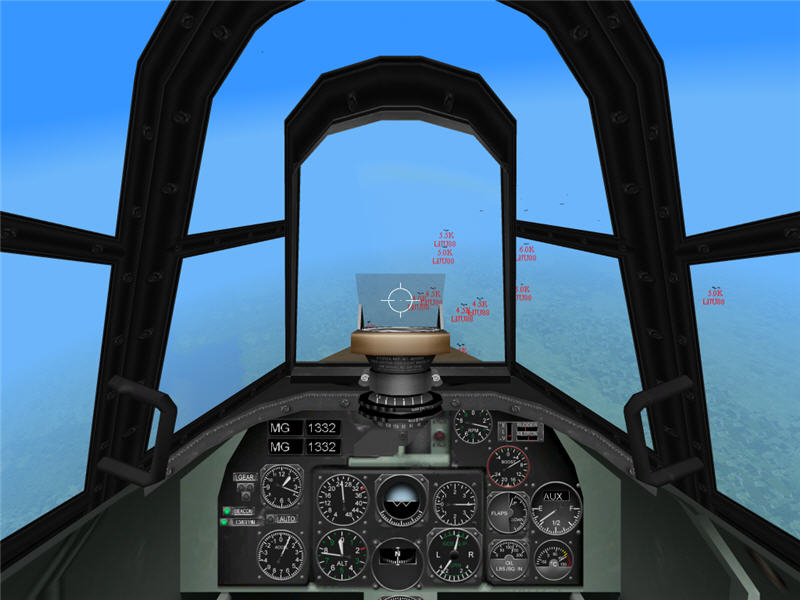
I try to catch other Ju 88's, but they have dropped their bombs on London, are
lighter and faster, and I can't catch them. The two other RAF fighters in the
picture are CaptFish (left) and SF3 (right).
As I vainly chase after the Ju 88's, I come across many high 109's. I tangle
with some of them along with some other RAF fighters (Nutzoid is visible below).
More of them show up. I break off to get distance and to try to get up to their
altitude. Once I get a little clear, I climb SE in the hope of coming across
stragglers.
I don't find any stragglers. After loitering near the coast a while, the disengagement
period is announced, and I go in for a landing at one of the coastal fields.
Flying Hurricane Mk I's, I ditched once, died once, and landed once. I got two kills (two Ju 88's) and one assist (on the Bf 110).
by Brooke P. Anderson
e-mail: brooke@electraforge.com
Click here to go back to my scenario page, for
pictorials on other frames of this scenario, for pictorials of other scenarios,
and for links to other content on my site.