Battle of Britain 2004, Frame 3 Pictorial
Battle of Britain 2004 was a scenario that ran
in August, 2004 in the multiplayer on-line air-combat simulation Aces
High.
Mission 1
The Bf 109E-4's of I/JG26 were assigned to escort the Ju 87 Stukas of I/KG2.
A mixup in takeoff times caused I/JG26 to be late in rendezvousing with I/KG2.
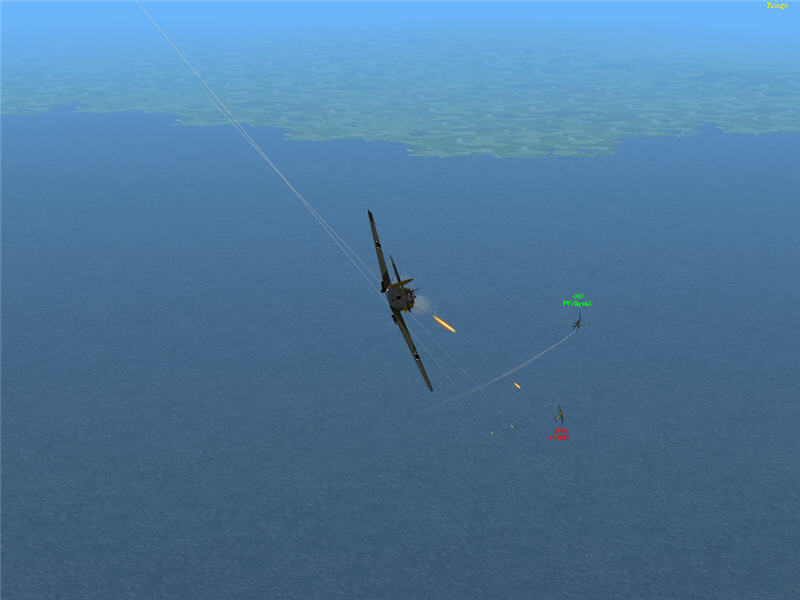
Brooke as one of the lead elements of I/JG26 comes upon Vlkyrie1 after he is
already under attack. Here, a Spitfire is closing in on Vlkyrie1's Stuka, which
is already shot up and smoking. Brooke shoots at the Spitfire from very long
range and misses.
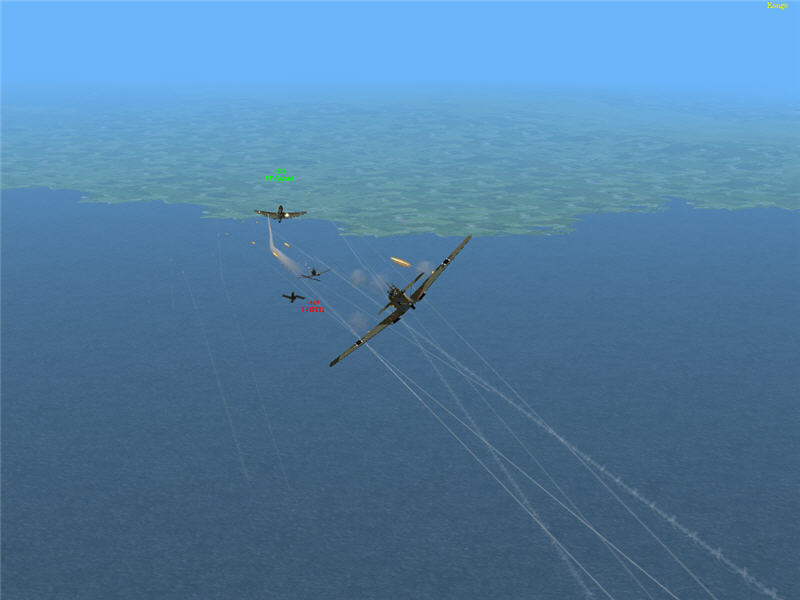
The Spitfire shoots off Vlkyrie1's tail (which is the debris near the Spitfire).
Brooke shoots at the Spitfire, misses, and (cursing his aim) lands some hits
on Vlkyrie1's doomed Stuka instead.
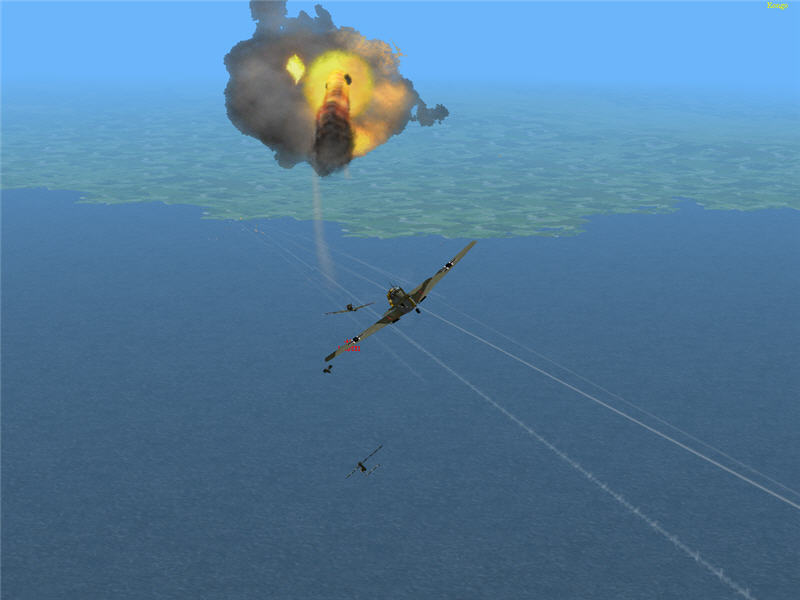
Brooke continues to shoot at the Spitfire but is missing. The Spitfire lands
some more hits on Vlkyrie1, whose plane then explodes.

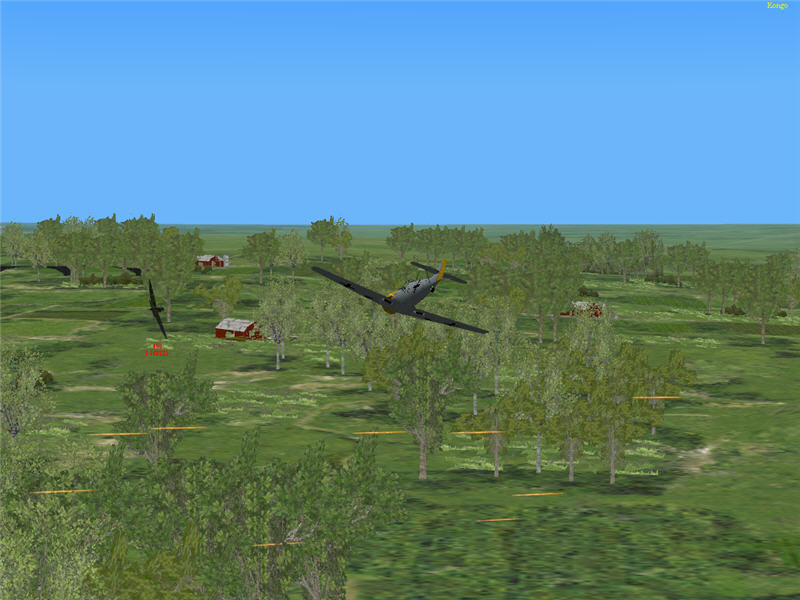
Brooke chases the Spitfire, which flees to the coast of England. On the way,
they come across Wombat in a damaged and smoking Ju 87 (lower right). Brooke
fires at long range to keep the Spitfire from Wombat. Wombat makes it by without
being attacked.
Brooke chases down the Spitfire. The Spitfire is running for the antiaircraft
protection of the nearby town. Some AA fire is already visible as the yellow
streaks across the bottom of the picture. The fight is at treetop level now.
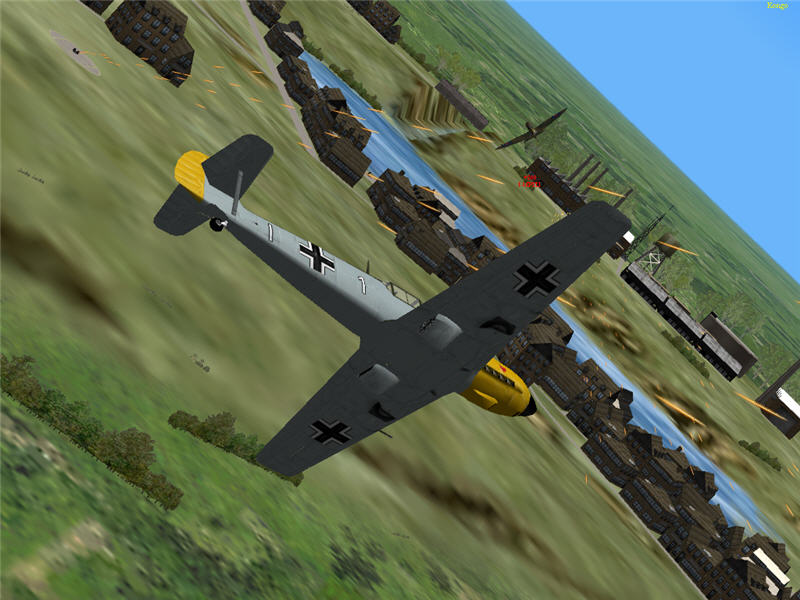
Brooke continues to pursue the Spitfire, but it is flown by a skilled pilot
with good evasives. Brooke misses a lot with his gunnery. The Spitfire makes
it to the town, and the town's AA is firing at and periodically hitting Brooke's
Bf 109E-4. An AA gun is visible shooting in the upper left of the picture.
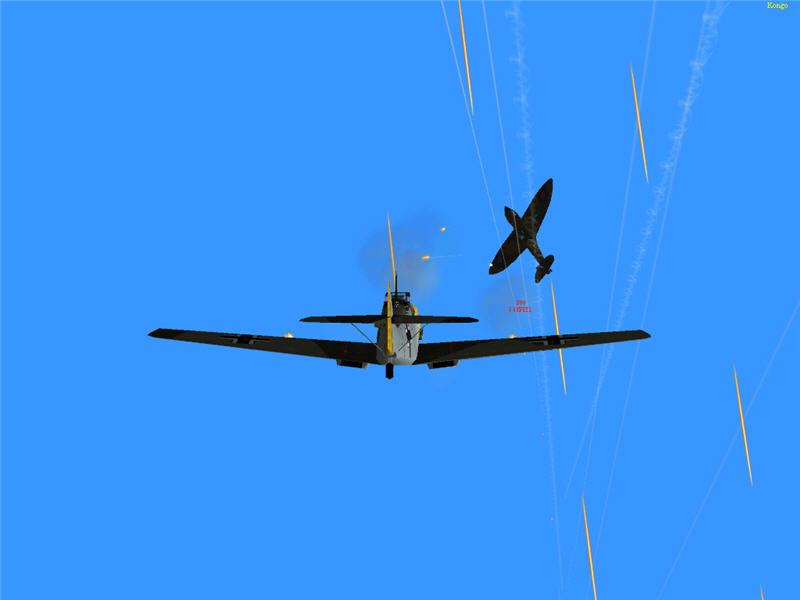
A swirling dogfight ensues around, over, and at times in the town. Brooke manages
some hits on the Spitfire, hitting the left wingtip, but it results in minor
damage at best. AA fire (visible here, too) is shooting at Brooke the whole
time.
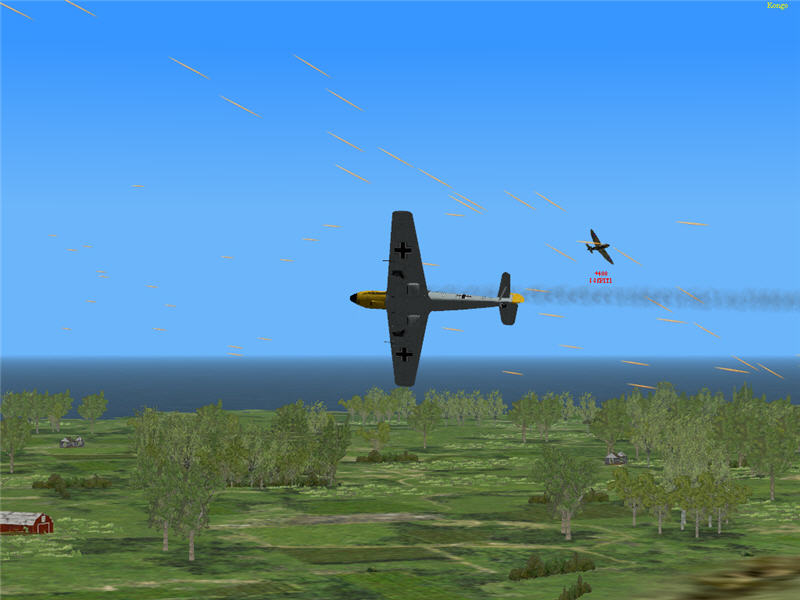
Brooke's Bf 109E-4 is taking more and more hits from the AA fire. Eventually,
it shoots off his left elevator (visibly missing in this picture) and causes
engine damage (Brooke is now trailing smoke). Brooke decides his gunnery is
too bad to score a kill before his plane is destroyed and breaks off attacking
to get the hell out of there. On his way out, he is wounded by the continuing
AA fire. It turns out that the Spitfire is piloted by 68KO, the Commanding Officer
of the RAF.
Brooke's engine quits before he can make it back to the coast of France. He
ditches in the English Channel hoping to get picked up by a German PT boat.
He bleeds to death from his wound before a PT boat can arrive.
Mission 2
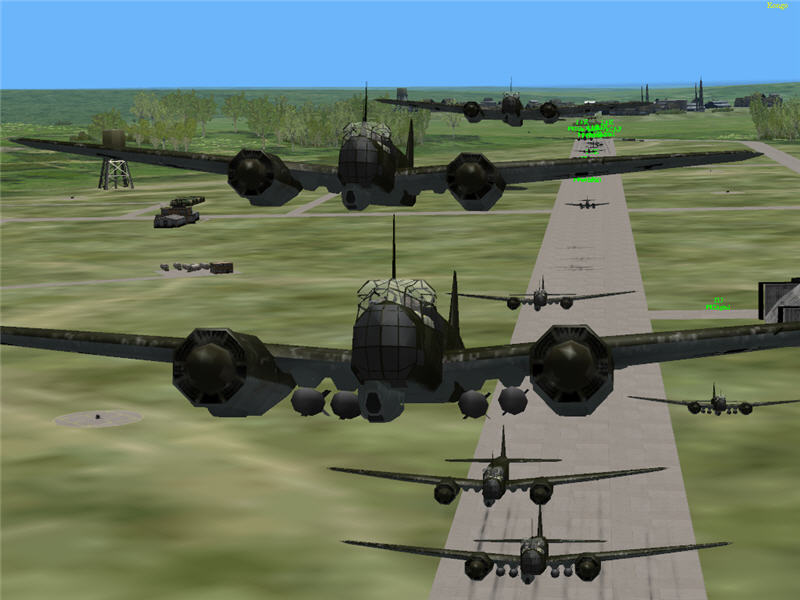
Back at the coast of France, Brooke gets a second life as a Ju 87 Stuka pilot.
While he awaits mission orders, a group of Ju 88 bombers (shown here) takes
off on a bombing mission.
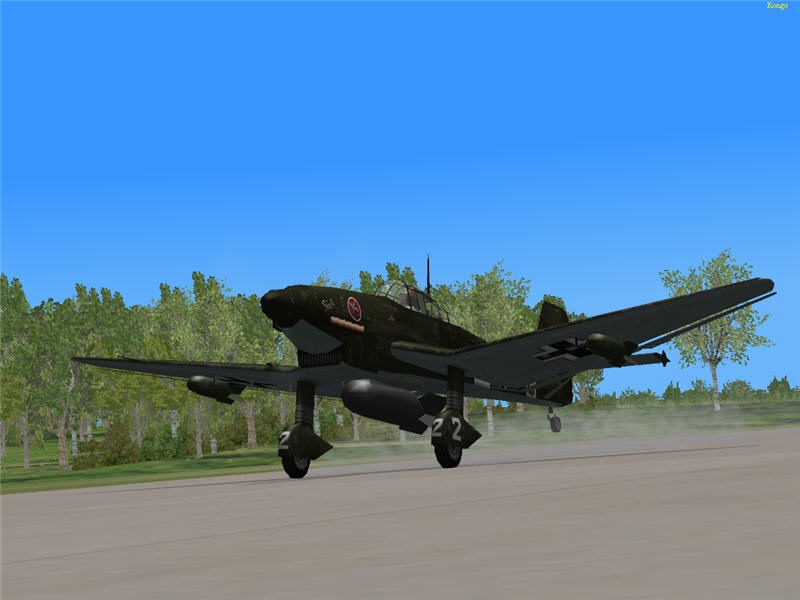
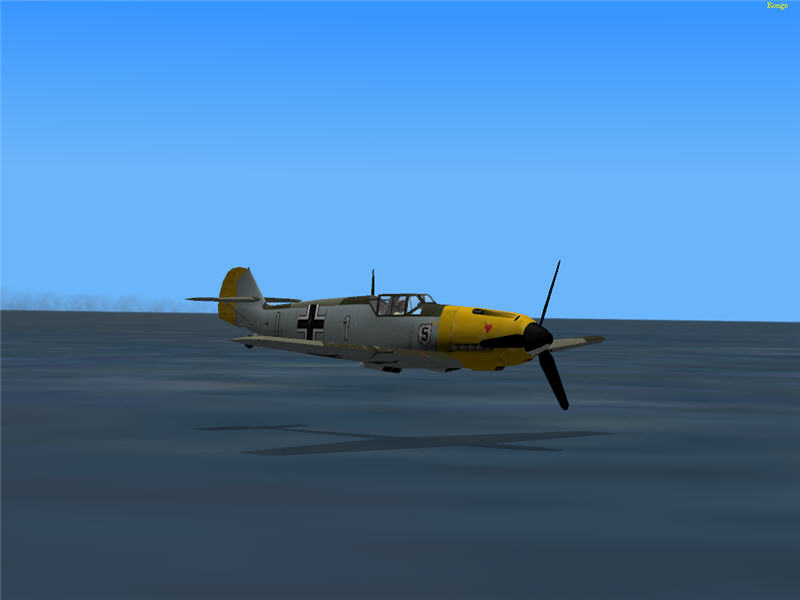
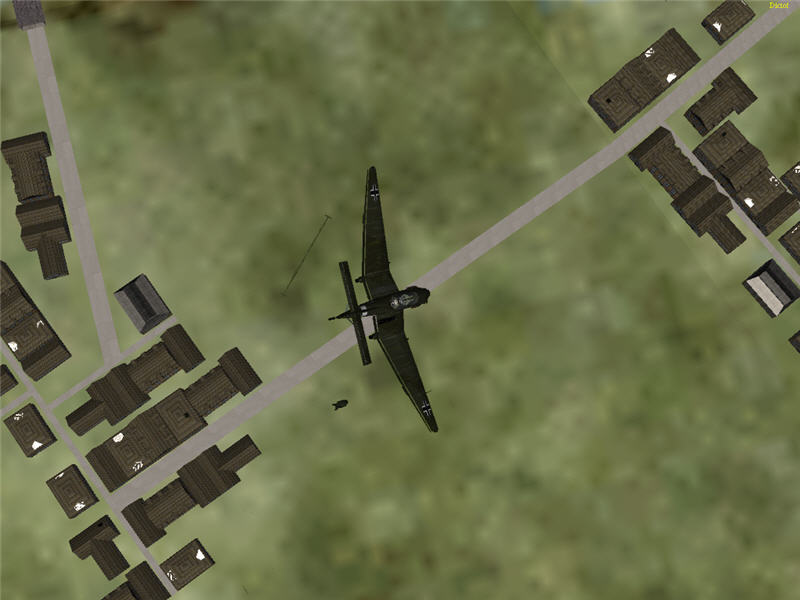
Brooke taking off in his Ju 87D-3 Stuka divebomber, carrying one 1000 kg and
two 250 kg bombs.
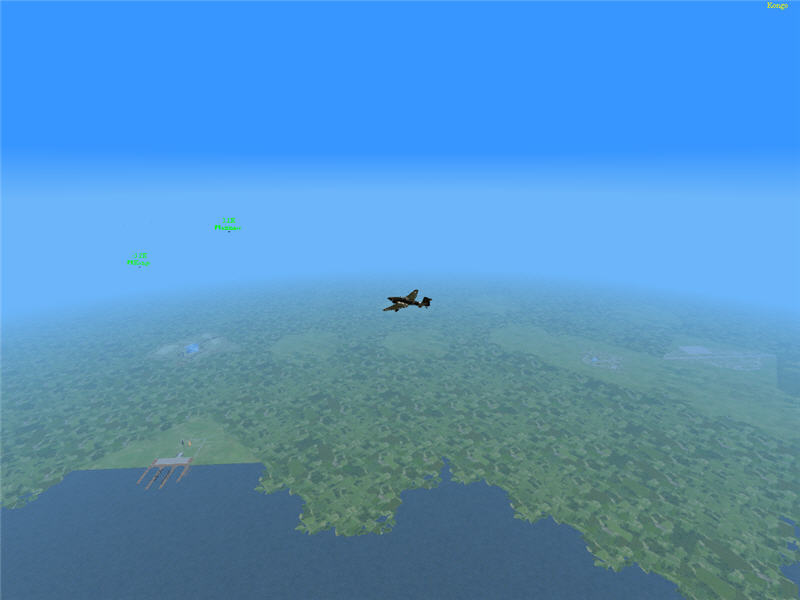
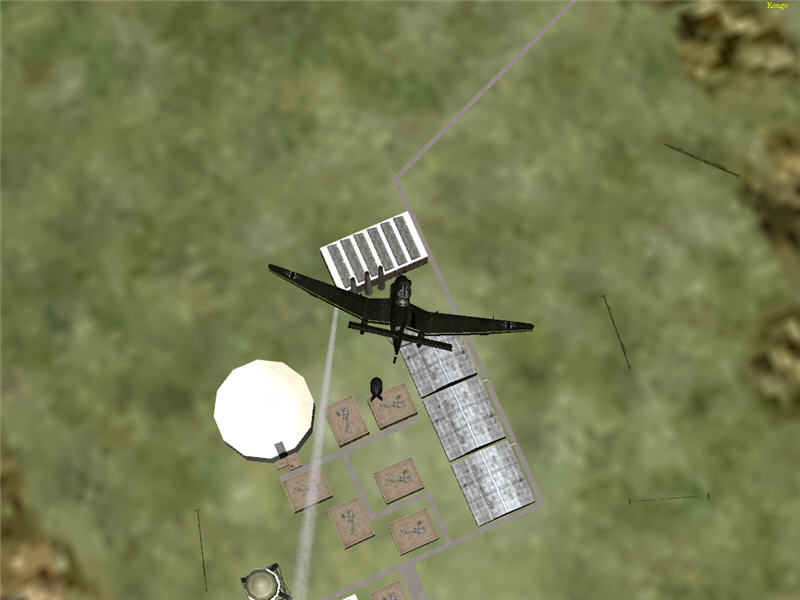
Brooke is in a flight with 2 other Stukas at about 12,000 ft. altitude. Ahead
of Brooke from left to right are Kongo and Airmess. Their target is a particular
building at the port Folkstone, codenamed "P105" (in the bottom left
of the picture). The secondary target is the city inland of the port ("P105-city"),
with the blue pond in the middle.
The three Stukas are to attack P105 one at a time so that they can judge results
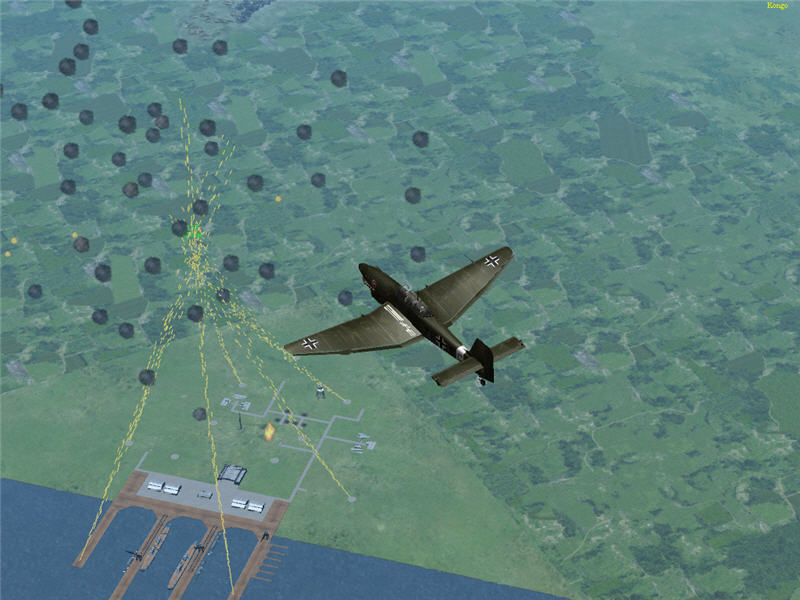
and to save (for use on P105-city) any bombs not needed at P105. Kongo (indicated
by green icon just above Brooke in the picture) is first to dive on P105. Just
starting are the antiaircraft artillery (orange explosions and resulting black
puffs around Kongo) and the AA machinegun fire (orange streams of tracers from
the corners of the port facility).
Kongo is in. The AA fire is converged on him as he dives. It is intense -- Kongo
is at the center of the convergence.
Kongo lives through it and egresses left. Some AA fire follows him. Airmess
(indicated by green icon in upper right of picture) is second and has started
his dive. The rest of the AA fire is just starting up to go after him.
After Airmess's run, the target building is destroyed. Airmess (below Brooke)
exits the area pursued by a hail storm of AA fire. His plane is severely damaged,
and he ends up having to ditch in the Channel.
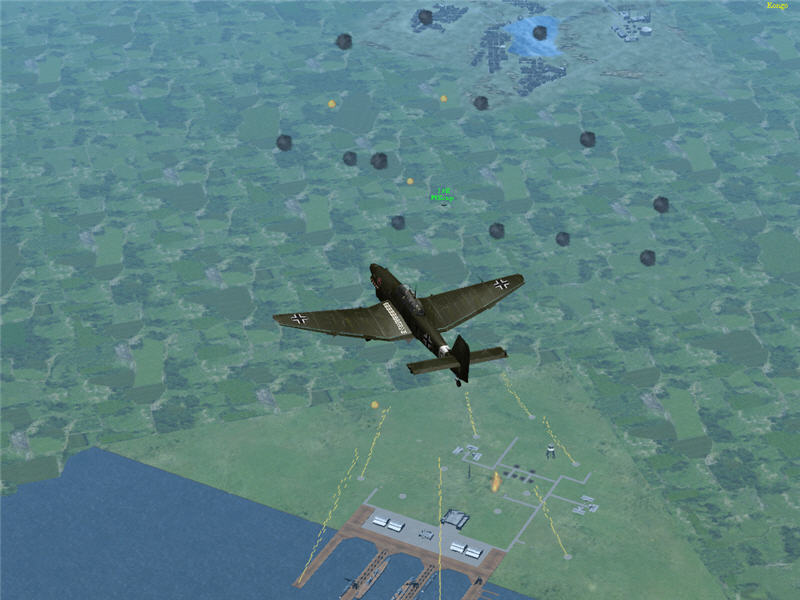
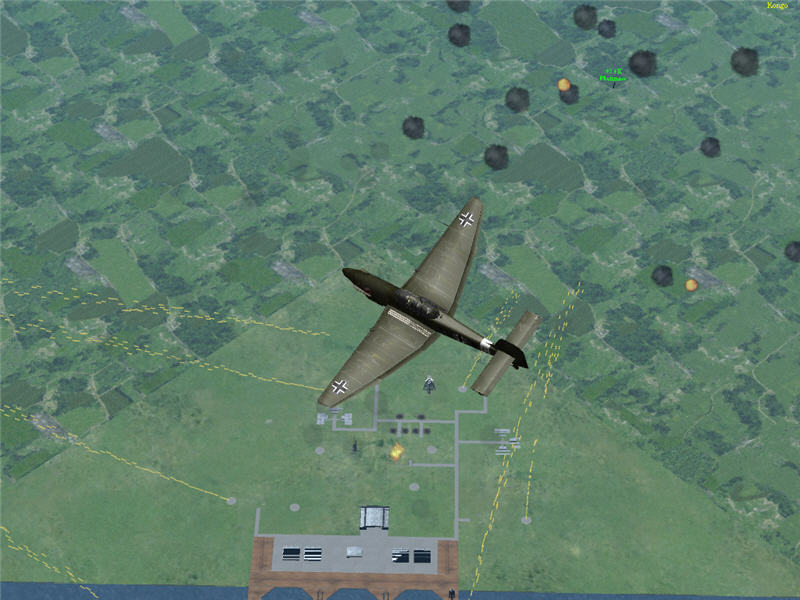
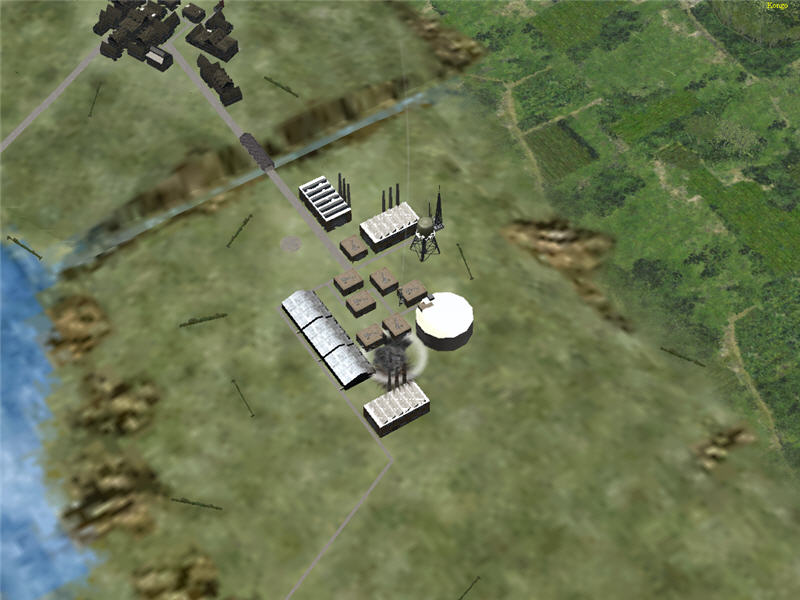
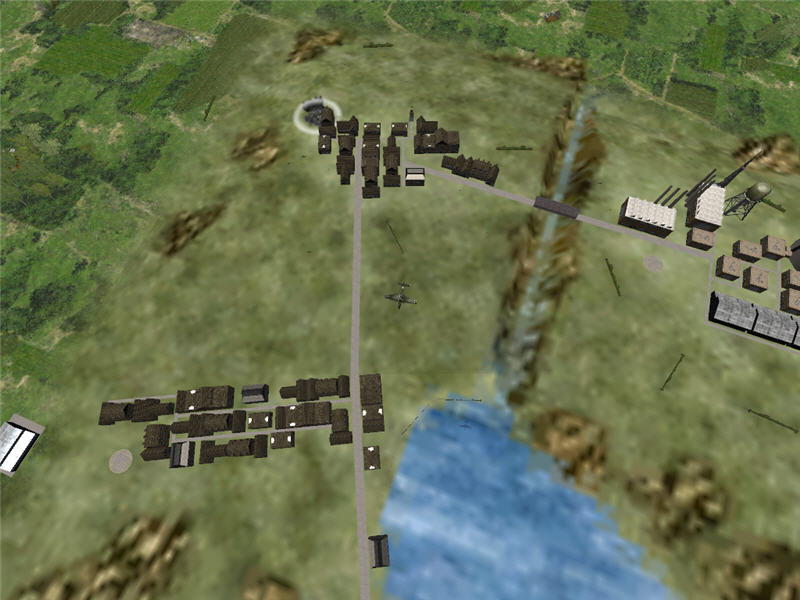
With the target at P105 destroyed, Brooke (who is 3rd in line) now redirects
to hit P105-city. Brooke adjusts his approach and exit to fly through as little
AA fire as possible. Even so, Brooke has taken AA hits approaching the city
and is leaking fuel from his left wing tank (white vapor stream from left wing).
The port P105 (which Kongo and Airmess attacked) is in the upper right of the
picture. Brooke's target (P105-city) is below right of Brooke in the picture.
The city has already been much attacked (black bomb craters visible), but has
many structures still standing.
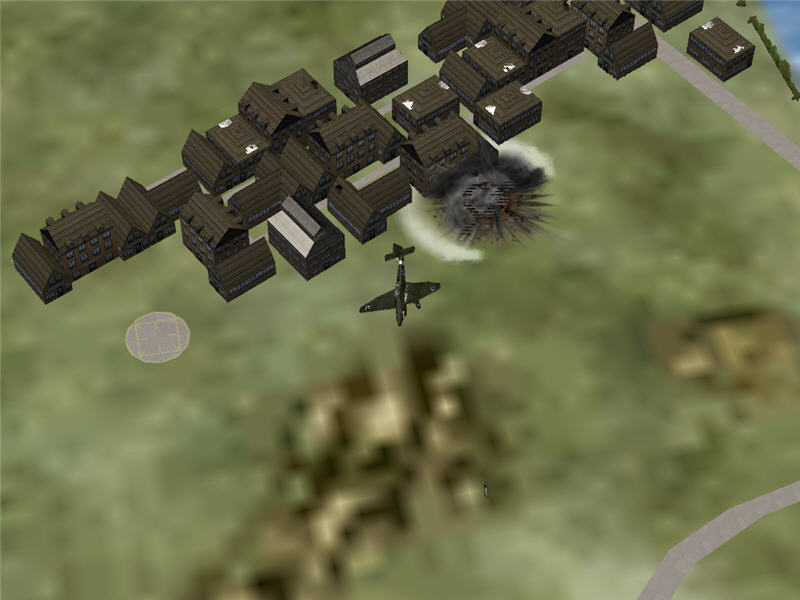
Brooke dives in and releases bombs on structures at P105-city. The 1000 kg bomb
was just released and is visible under Brooke's Stuka.
A bomb hit (indicated near the center of the picture by black cloud of explosion
and white ring of compression wave) misses hitting directly, but explodes close
enough to destroy a building. Brooke scores one building destroyed on this bomb
run.
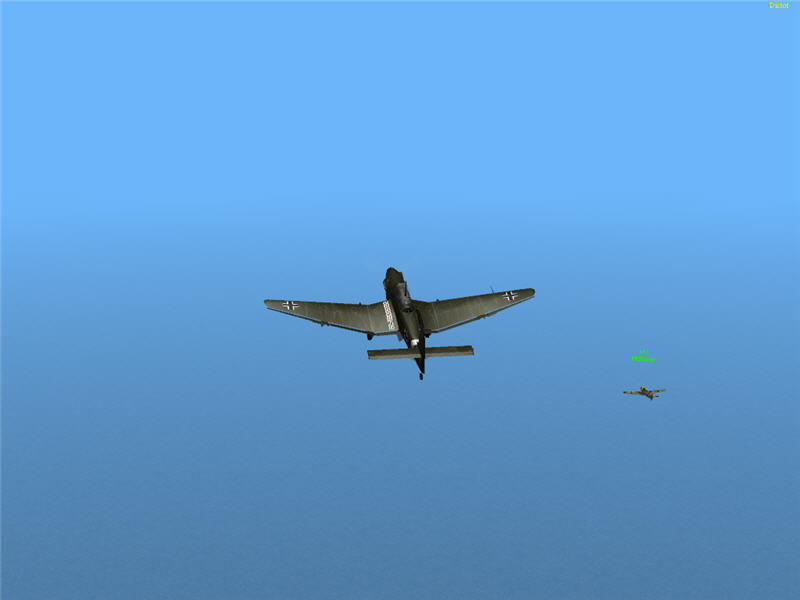
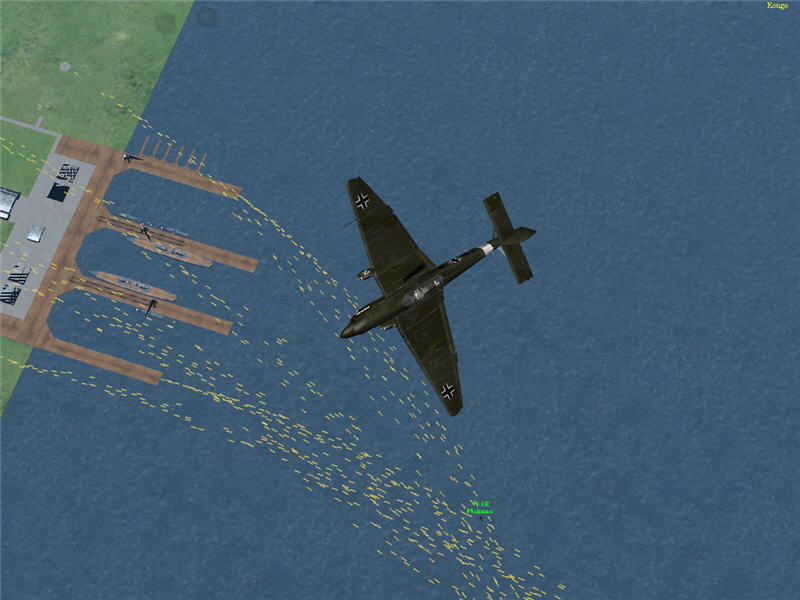
Brooke goes back for a fresh Stuka and pics up lots of escort for his second
bombing run. Here, Kongo is nearby in a Bf 109E-4.
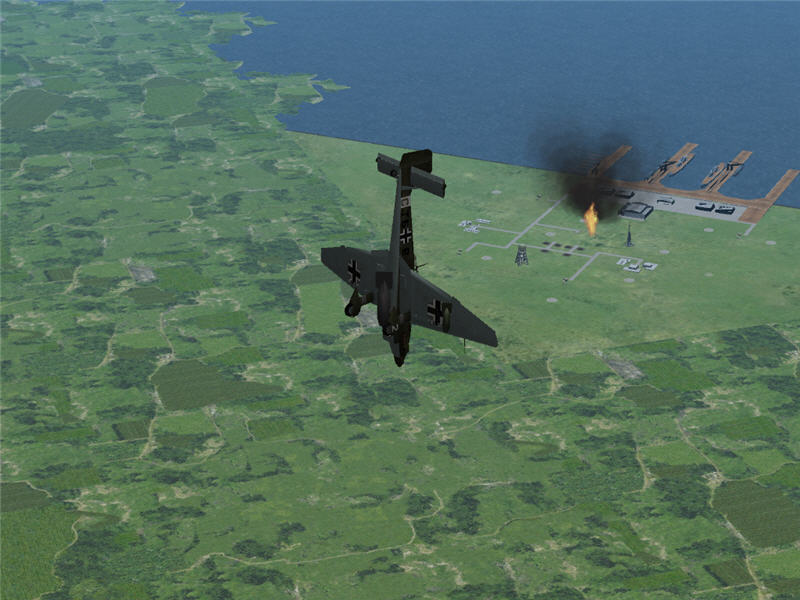
The target is again P105-city. Brooke dives in vertically. The port P105 is
visible in upper right of the picture, with flames and smoke as a result of
prior bomb runs on it.
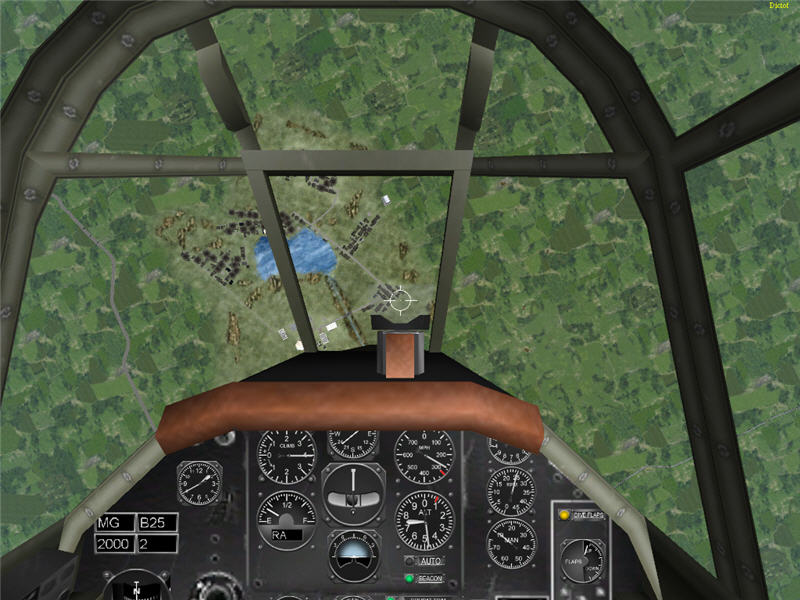
Brooke's view from his cockpit as he dives on P105-city, passing through 8000
feet in a vertical dive.
Brooke has three bombs: two 250 kg and one 1000 kg. He tries dropping them on
three different clusters of buildings. Here, he is dropping his second 250 kg
bomb for the cluster of buildings in the upper right of the picture.
A picture of one of the bomb explosions (with black cloud and white ring of
compression wave). Again, not a direct hit, but close enough to destroy a building.
Brooke scores 3 buildings destroyed on this bomb run.
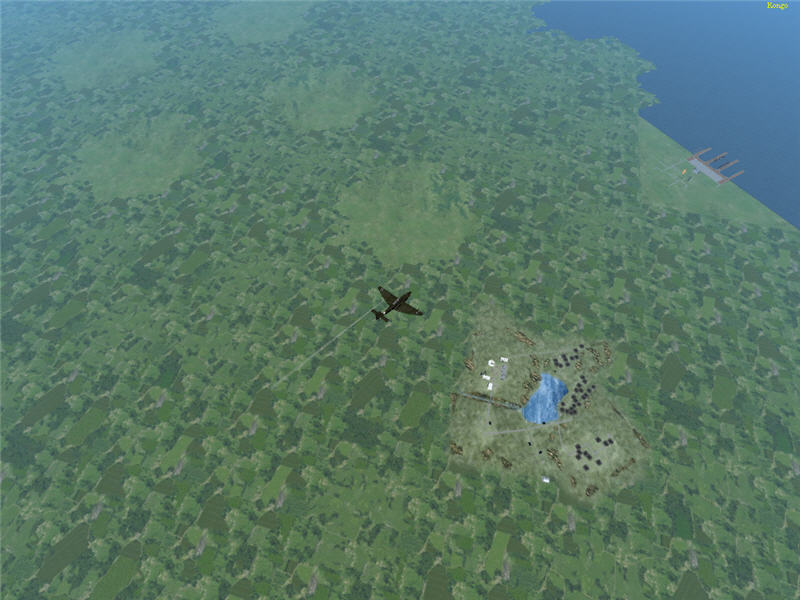
Brooke rearms and makes a third attack on P105-city. This is another drop.
A bomb explosion from Brooke's third attack on P105-city. The explosion is on
the upper left building in the picture. Brooke scores three buildings destroyed
in this bombing run.
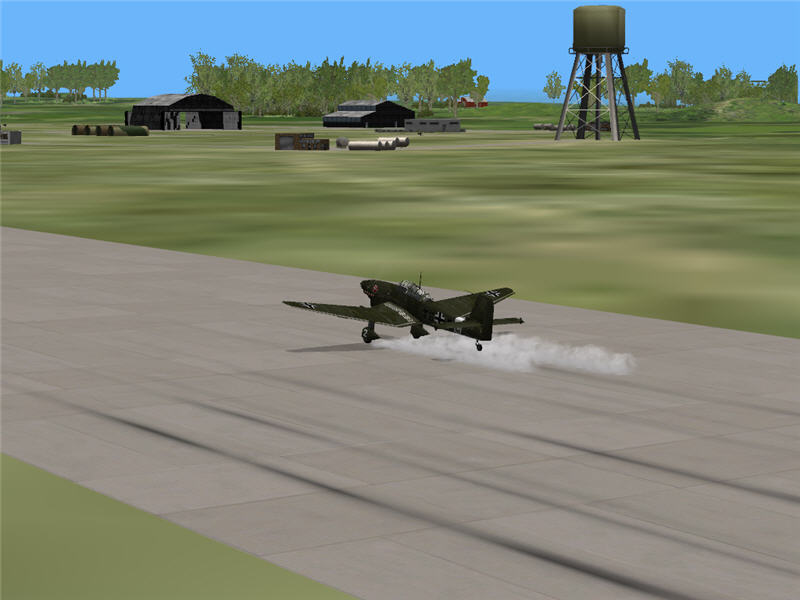
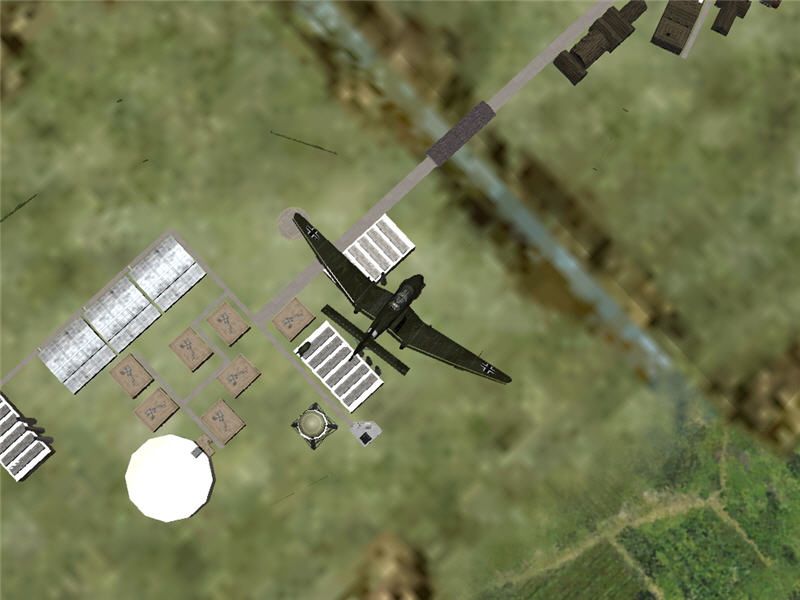
Brooke touching down back in France at the end of the day's missions, after
his third attack on P105-city.
Final Results
Brooke ends Frame 3 with 1 assist and 7 buildings destroyed. The assist was
on the Spitfire that dragged Brooke into the town's AA fire -- someone got the
Spitfire, and it turned out to be piloted by 68KO, the Commanding Officer of
the RAF!
by Brooke P. Anderson
e-mail: brooke@electraforge.com
Click here to go back to my scenario page, for
pictorials on other frames of this scenario, for pictorials of other scenarios,
and for links to other content on my site.